• Skip to primary navigation
  • Skip to main content

Illuminations

  • Buying Guides
  • Styles & Trends
    • Bathroom Lights
    • Ceiling Fans
    • Ceiling Lights
    • Lamps
    • LED Lights
    • Outdoor Lights
    • Smart Lights
    • Wall Lights
  • Wellness & Safety
  • Shop Products

Styles & Trends

Smart Lighting 101: 5 Top Tools to Upgrade Your Smart Home

Smart Lighting 101: 5 Top Tools to Upgrade Your Smart Home

by admin · Feb 28, 2023

Everyone talks about “smart homes,” but what does that really mean? While smart assistants are often the foundation of any smart home, they aren’t truly smart on their own. Smart lighting is another essential element of your smart home. It includes a wide range of electrical products that use software to interface with your smart hub to give you enhanced control, function, and flexibility of your lights.

We know it can be overwhelming sorting through all of the options available to you as you build your smart home. So, we put together this quick guide to some of the most popular smart lighting tools to help you get started!

Special note: Before you go out and purchase any smart light accessories, remember to check for compatibility. Each smart lighting tool is programmed to work with one or more smart home hubs or apps, like Google Home, Amazon Alexa, Apple HomePod, etc. It will be much easier to keep track of everything if you can control them all from the same place!
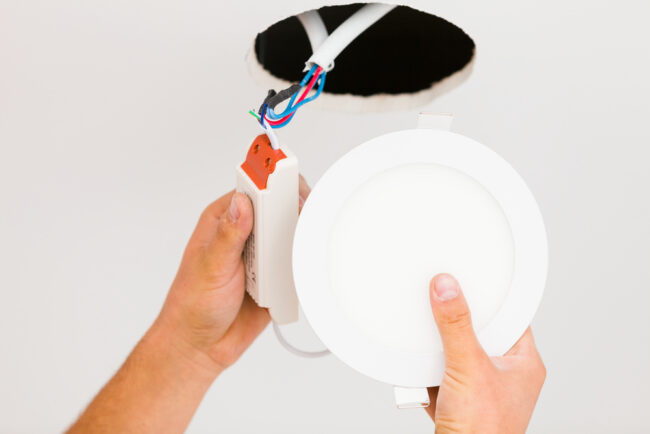
  1. Smart Bulbs

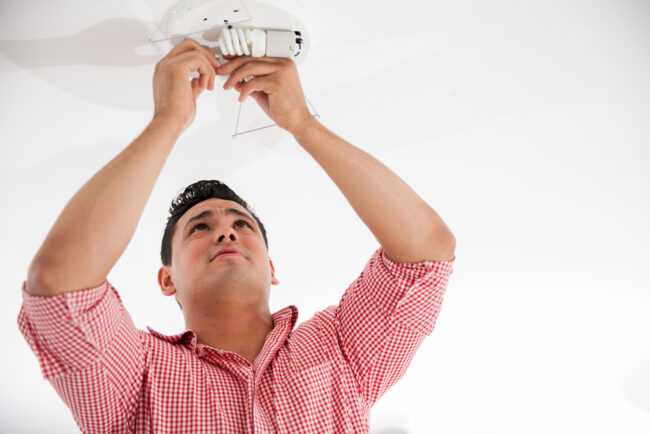
Smart bulbs are a great way to get the most out of your lighting. Smart bulbs are often color-changing or range in temperature. These bulbs will work with most standard lamps and light fixtures. 

Smart bulbs are typically LED bulbs and are also energy- and heat-efficient. In addition, they have a long life and are safer than fluorescent bulbs since they use a microchip instead of gas to create their glow. 

Smart bulbs can range in price, averaging at $7-$15 a bulb. 

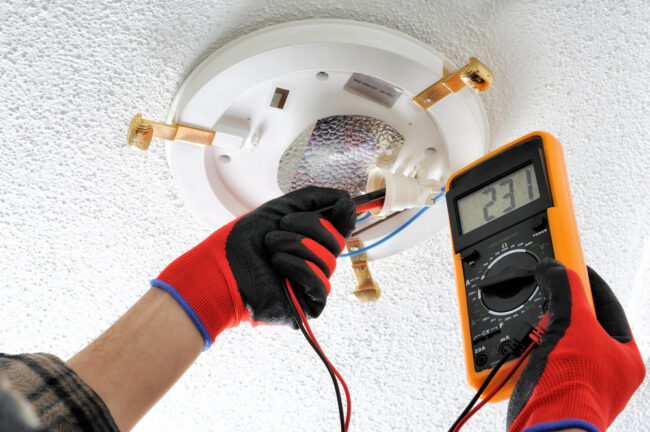
  1. Smart Plugs and Outlets

You don’t have to change all your bulbs to get the benefits of AI and voice activation. Instead, you can plug your lamps into a smart plug or swap out the entire outlet! This will allow you to use multiple light fixtures or devices in the same place. 

Smart plugs simply plug into your existing outlet as an extension. Then you plug your lamps or other devices into the smart plug, and you’re ready to go!

Smart outlets take a little more work to install, but it’s definitely within DIY reach. While specific installation steps will vary slightly by your smart outlet choice– the basic installation steps are the same. Check out this YouTube tutorial to get a good idea of what you’ll need to do! 

Special note: Always be sure to follow the brand-specific installation instructions that come with your device. 

Smart plugs and outlets range from about $15 to $30 each.
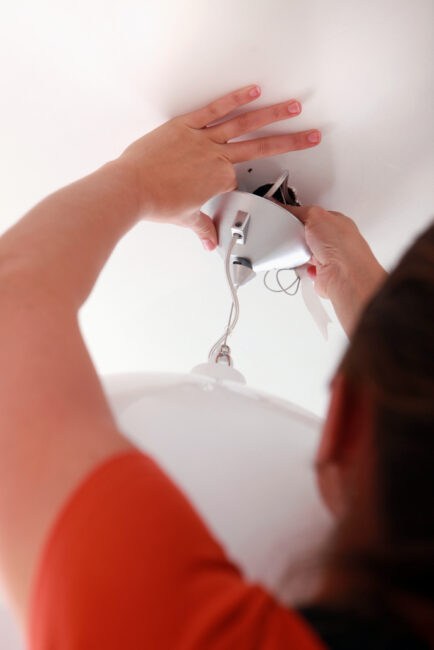
  1. Smart Switches

Try replacing your dumb light switches with something smarter! Smart light switches help you to click through programmed light scenes so you can switch from day to night to entertaining light scapes at the touch of a button. 

Installation is as simple as swapping your current light switch for the next. Check out this YouTube video for a quick and safe installation. 

Expect to pay $25 to $45 amount for your smart switch. 
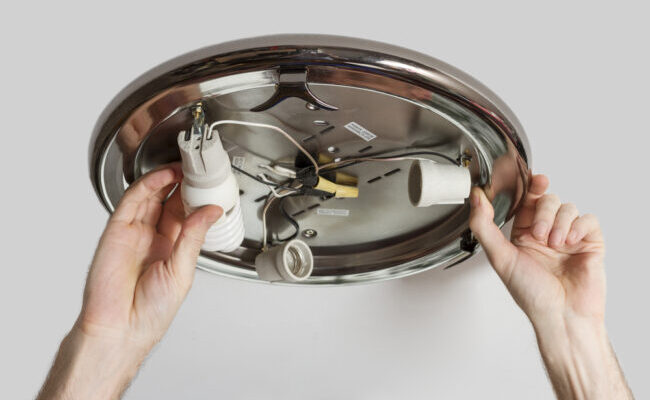
  1. Smart Bulb Bases

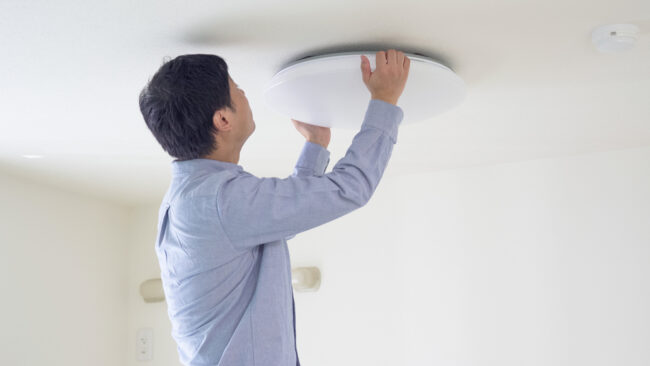
Another way to keep your existing light bulbs but enhance smart features is to add a smart base to your light bulb. Simply unscrew the light bulb, screw the new base on, and reinsert it into the light fixture. Now your bulb’s power is controlled by the base instead of relying on the light switch!

Smart bases won’t enable features to a bulb that isn’t designed for dimming, temperature, or color changes. But it will allow you to incorporate AI, voice activation, and remote reach from anywhere with your phone. 

You’ll likely pay between $15 and $30 for a smart bulb base.

  1. Smart Lighting Kits

Skip the hassle of buying individual tech with a smart lighting kit. These kits include several bulbs and other pieces of tech to get you started for a discounted price. 

These kits range anywhere from $60 to $200, depending on your selected bundle.

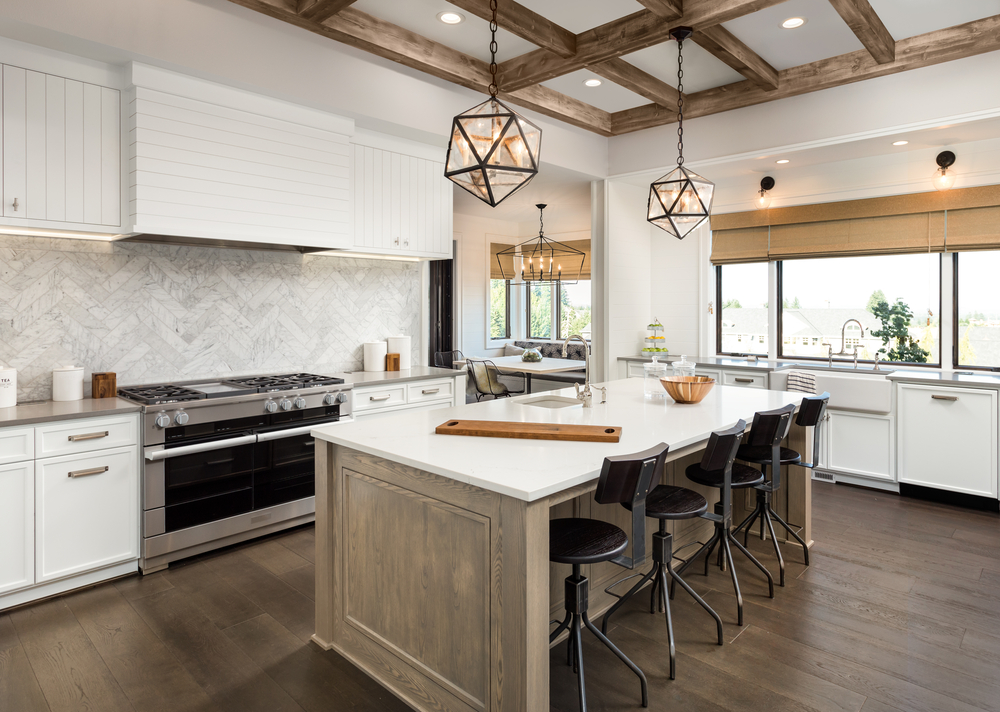
Need Help Creating Your Smart Home?

Proper lighting is essential to a fully functioning home– but it can be challenging to nail balanced brightness, great fixtures, and a budget! Contact the experts at Illuminations for advice on your project!

Filed Under: 2023, Bulbs, Buying Guides, LED, LED Lights, Light Bulbs, Smart Lights, Styles & Trends, Styles and Trends

How Many Blades Does Your Ceiling Fan Really Need?

How Many Blades Does Your Ceiling Fan Really Need?

by admin · Feb 27, 2023

Ceiling fans are great at providing comfort year-round. A good ceiling fan will help you save on energy costs by circulating the air in your home. In the summer they create a draft, making the room feel cooler. In cold weather, you can switch the fan’s direction to circulate warm air from central heating around the room. 

Ceiling fans are so ubiquitous that for many people it’s hard to imagine life without one! So what happens when your fan breaks, and it’s time to get a new one? 

If you’ve shopped for ceiling fans recently, you know that there are a lot of options. From the ultra-modern models with a single fan blade, to the “windmill” design fans with so many blades that there’s hardly any space between them – many homeowners on the hunt start to ask: 

How many blades does my ceiling fan really need? 

Does the blade count actually change anything, or is it just for aesthetics? 

In short, the answer is “yes to both.” The blade count on a ceiling fan is largely viewed as a style issue, but it does impact the way the fan works. Apart from the obvious design differences, the number of blades on a fan will also affect its noise level and energy consumption. 

Noise Level

The fewer the blades, the faster a fan needs to spin to move the same amount of air. Lots of spinning means lots of moving parts, which usually translates to more noise. Take large industrial fans, for example – they typically have two or three blades and are pretty loud. 

On the other end of the spectrum, fans with higher blade counts can move a lot of air spinning at a slower rate. Less motion means less noise – windmill-style fans with eight to ten blades are virtually silent. 

There isn’t an exact cutoff between noisy versus quiet fans, but a good middle range is around five. If you want a quieter fan, one with five or more blades will likely be your best choice. 

Energy Efficiency

Another thing to consider when choosing a fan is how much it will cost to run. Fans with more blades create more drag, requiring more energy to operate. This is one reason why large, always-on fans (like you’d see in a commercial space) often only have three blades. They may be a bit noisier, but they save on energy costs.

While its blade count does impact the energy efficiency of a fan, it’s definitely not the only factor involved. The efficiency of fans can also be affected by the length and angle of the blades and by the type of motor it uses. It’s best to check the energy rating of your fan when possible. 

Style and Aesthetics

Aside from energy efficiency and noise level, the main difference between fans with high and low blade counts is really just style and aesthetics. “Windmill” styles with eight to twelve blades can feel rustic, whereas fans with two to three blades usually feel minimalist and industrial. 

How do I know what the right number is for me?

The short answer to this question is – it really doesn’t matter very much for most people. It doesn’t matter whether noise levels, energy efficiency, or aesthetics are your top priority; it’s pretty likely that you’ll be able to find a fan that will meet your needs in all three categories. 

Most often, it’s safe to shop by your style preferences first, then find a fan that meets your noise and efficiency needs from that selection. A modern, high-quality ceiling fan will be designed to work well regardless of the blade count.

If you’re looking for a quality fan that will keep you cool for years to come, stop by our showroom or give us a call. Our lighting experts are ready and waiting to help you find exactly what you need!

Filed Under: 2022, Ceiling Fans, Informational

5 Tips to Create the Dreamiest Porch

5 Tips to Create the Dreamiest Porch

by admin · Feb 23, 2023

The front porch is an often overlooked space which is, in our humble opinion, a shame. A cozy front porch is a perfect refuge from any inside chaos. It’s the first thing a guest sees and a private place for an intimate conversation with a close friend or family. Here are some tips to help you create the front porch you’ve been dreaming about:

  1. When in Doubt, Add Plants
  2. Let Your Door Speak For Itself
  3. Lighting, Lighting Lighting 
  4. Less is More!
  5. Pick Comfortable Seating

1. When in Doubt, Add Plants

One of the simplest ways to level up your porch is to add some plants and flowers. Choose real plants if you have the time and motivation you to keep them alive or, if your thumb is less-than-green, just stick with faux. Either way, a little bit of green adds a lot of life and color to a house!

Throw a couple of potted ferns like these on either side of your door to add a touch of green without going overboard. Simple, but effective.

Look, we know not every house is blessed with beautiful draping greenery like this one, but who could resist this Secret-Garden-like oasis? If you’ve got a green thumb, this front porch is one to aspire to.

Flowers

If you want to turn the head of any passerby, flowers are the way to go. They add a pop of color and are a guaranteed way to brighten everyone’s day!

Potted flowers are a good solution if you have a minimal front yard or no flower beds. This porch’s flowers are to die for, but you don’t have to have this many for a stunning result! Even tossing a couple of pots next to your door can add vibrance and life.

Hanging flower baskets are a classic way to add some dimension to a porch. Choosing to hang flowers instead of having them on the ground can also save space so you won’t have to sacrifice the porch set you’ve had your eye on.

2. Let Your Door Speak for Itself

You can do a lot to dress up a front porch, but if the door is lackluster, you’ll be hard-pressed to make the rest of the porch shine. Whether you paint your door, replace the hardware, or replace the whole door with something more your style, don’t forget to give it some TLC!

Whoever picked the color on this door should be given an award! This minty green pops against the red brick, and the gold hardware ties the whole look together.

A simple wooden door can bring warmth to a neutral-painted house like this one. We love how the sconces match the hardware on the door of this home to create a cohesive look. Even the smallest detail is accounted for and we’re impressed! 

3. Lighting, Lighting, Lighting

Lighting is a simple way to take your porch to the next level. There are tons of options to choose from, but two of the most common (and effective) front porch fixtures are sconces and pendants. If you have a larger porch, you should also look into recessed lighting to give you more light.

Sconces

A sconce is a wall-mounted light fixture that’s often used next to or above the front door. Picking the right ones for your house makes a big impact on your porch’s aesthetic and style. Check out how well these homeowners did!

These sconces have a rustic feel that contrasts beautifully with the white siding. They give this home just a spritz of farmhouse!

This sconce has a little more flair but is still a classic style you won’t need to replace when trends change. We also giving this porch bonus points for the fan above the rocking chairs! There’s nothing better – or more refreshing – than a cool breeze in the summertime.

This porch’s clean lines flawlessly match the sconces, giving the whole look a modern edge we love!

Pendants

A pendant is a light fixture with a cord or chain and usually just one light attached. They’re commonly used above a door in an entryway with a higher ceiling. Pendants are practical, but they also make a gorgeous focal point. Here are a few to inspire your next porch project!

The warm stone flooring on this porch needs some contrast to make it feel up to date. The black-finished pendant combined with the matching black door complete the whole ensemble.

This porch is timeless. A warm door combined with a simple, but elegant pendant is a classic combination to make any house feel inviting.

Pendants are incredibly versatile and work well in a number of locations – not just above the doorway. They’re also a great choice above porch furniture to create a comfy space for a leisurely chat with a friend.

4. Less is More!

Redoing your front porch can feel overwhelming, but it doesn’t have to be. These simple porches prove that less really can be more with some expert advice!

There’s nothing prettier than a warm wood door and black shutters, especially on clean white siding. This porch has. it. all. Symmetrical greenery, gorgeous sconces, some simple furniture, and a fan are truly all you need to have a beautiful and functional porch.

If you have a small porch, using some hanging elements (pendants, flowers, etc.) will add dimension and will give you space for some furniture without sacrificing a beautiful result.

We love the creativity of this small porch! Since there’s no room for plants next to the door, this homeowner added greenery on the sconces. The arched window above the door is the prettiest focal point to bring together an elegant, but minimal look.

This porch looks bigger because of the reflection of the windows on the door. The rest of the space is also well-used. From the small plants placed on stands to make them look taller to the hanging pendant, every inch is accounted for!

5. Pick Comfortable Seating

There’s something nostalgic about sitting on the porch on a summer night – like an ode to the simpler times of days gone by. Picking comfortable seating will make you want to sit on your porch, reflecting and enjoying the simplicity of the moment.

Porch Swings

There’s nothing more soothing than the back-and-forth motion of a porch swing!

The cozy cushions and pillows on this swing make it the ideal spot to snuggle up with a blanket for an autumn nap or to curl up with a book.

This swing lends itself perfectly to a conversation with a friendly neighbor, family member, or friend.

Rocking Chairs

Make the most of warm spring and summer days by relaxing on a rocking chairs with an ice cold lemonade sitting on a table beside you!

Rocking chairs are a comfortable seating option, but they take up less space and aren’t quite as permanent as a swing. The pillows on these pretty white rockers tie in the shutters on the house and are the perfect spot to enjoy a bit of nature.

Rocking chairs are simple and inviting whether they’re styled or not. We love the idea of watching the neighborhood kids ride their bikes, watching the dogs be walked, and seeing the world slow around you as the sun sets from the comfort of your rocking chair.


Don’t let your front porch fall by the wayside any longer! When you’re ready to get to work creating the porch of your dreams, give Illuminations a call. We’ll give you all the tips you need to make your dreams a reality.

Filed Under: 2023, Outdoor Lights, Styles & Trends

How to Decorate Your Front Porch for Every Season

How to Decorate Your Front Porch for Every Season

by admin · Feb 21, 2023

20 Beautiful Front Porch Pictures to Inspire Your Seasonal Project

Your front porch is the perfect place for a seasonal refresh when you get the itch to redecorate! With some classic furniture and lighting and a few simple decor swaps, you’ll have a front porch that’ll make you want to celebrate every season.

Spring

The earth feels brand new when the last bits of winter finally melt away. It’s the best time to breathe some life into your porch. Exercise that green thumb, or fake it with some faux plants. Either way, flowers and greenery are the way to go when spring is in the air. 

This picture is a florist’s dream. Hanging many garlands may be a bit unrealistic, but adding a few flowery garlands (possibly on a railing) and a matching wreath would give a similar result without all the effort!

Flower beds are a foolproof way to add some seasonal color. These tulips and daffodils are spring staples. They’re perfectly positioned for height and dimension. Plus, a black pendant light like this is a classic element that’ll work regardless of the season! For proof, check out the same porch in our fall and winter section!

Window boxes are another simple way to liven up your porch. If your green thumb has turned a bit brown, pick some faux plants or flowers instead. Some faux plants look so realistic nobody will know the difference!

Hello yellow! The neutral green and white wreath make this yellow door POP! If your door is neutral, pick a wreath with bold colors to provide a stunning focal point. When the seasons change, simply swap out the wreath and replace the matching greenery.

A vibrant door and warm-toned wreath combo are the perfect spring-summer tie-in. With this pretty pendant light hanging above the door, this porch won’t go unnoticed no matter when you’re decorating!

Summer

Summer nights spent on the porch evoke the nostalgia of simpler days. Sprucing up your porch to fit the season will make you want to grab your favorite drink, cozy up with a book, and pass the time. No deadlines or stress will get in your way when your porch feels like summer!

Nothing says comfort like a porch swing, and this one is to die for. The warm wood tones of the ceiling and swing compliment the black paint and greenery beautifully. This homeowner also gets bonus points for the recessed lighting – a great choice! They blend in nicely without detracting from that gorgeous wood ceiling.

This All-American porch is what summer dreams are made of. The rocking chair is a classic piece of furniture the sconces will fit any season. With a porch lacking a roof overhang, they fit nicely and highlight seasonal decor. Throw in an American Flag for Independence Day and you’ve got a simple summer porch you’ll want to enjoy immediately!

Remember those window boxes full of flowers that died last season? It’s time to say goodbye. Head over to your local plant nursery and find some new flowers that’ll last in your climate. These cute flowers with the amazing green shutters are all the inspiration you need to get to work!

Every cozy porch has one thing in common – comfortable furniture! If you’re still using the stiff, sun-worn furniture you inherited from your Great Aunt Susan 10 years ago, it may be time to consider an upgrade. Pick something you’ll be making excuses to go outside and sit in!

Summer porch decor is all about the plants! These rosebushes over the architectural awning give a minimal touch of color that whispers summer. A dainty pendant is the cherry on top of this charming design. It’ll illuminate this gorgeous porch on summer nights and will transition to every season seamlessly.

Fall

These porches make us want to don our best sweaters, grab some apple cider, and head to the pumpkin patch! The crisp air and flavors of autumn are tough to beat, but these fall-inspired porches make it a close call.

Meet your new best friends this autumn: buffalo plaid, mums, and pumpkins! Throw in some subtle lanterns to tie in the sconces and a neutral wreath that coordinates with the gray pumpkins, and your porch is dressed and ready for sweater weather!

More is more on this porch. Give me all the pumpkins, hay, wheat, and leaves! Adding some lanterns with with candles was a great call here too. Instead of choosing candles that will burn out and need to be replaced, consider solar lighting that’ll charge during the day and light your way at night!

This porch is a mood. The dead hydrangeas that this homeowner somehow worked into their decor are a stroke of genius! The candles in jars add just the right touch of elegance. We’re ready for Halloween.

Speaking of Halloween, how can you not love this decor? This porch has just a touch of spooky season, but it can easily be switched out once October ends. Just tuck the jack-o-lantern away and replace the Halloween railing decor with a leafy fall garland, and you’ll have a Thanksgiving-ready porch in no time. The classic black finishes on the stairs, sconce, and door make this house easy to transition between moods and seasons.

The decor on this porch will have you heading to the pumpkin patch to get lost in a hay maze. This porch proves decorating doesn’t have to be complex. Use what you have! A watering can, a few pumpkins, and a hay bale are all great decor ideas for your fall-inspired porch.

Winter

Bring on the red and green, holiday music, and peppermint hot chocolate! The holiday spirit is alive and well on these porches. Nothing brings more joy to this season than a festive front porch.

Winter may be our favorite time of year to decorate for, but I guess we’re a bit biased. The twinkle lights hanging everywhere fill the whole neighborhood with magic. This porch is no exception! The potted and lit trees and walkway lights lead you to the door. The hanging pendant welcomes you in. You can’t help but feel the holiday spirit!

Pillars like these deserve to be wrapped in red and green. Garlands are a simple piece of winter decor anyone can find a use for! Adding in the red ribbon and festive wreaths dress this porch up for the holiday season.

This porch’s over-the-top creativity has us swooning. Hanging ornaments from ribbons next to the pendants is brilliant! Lights are incorporated throughout this design – from the coordinating pendants, the sconces, and walkway light to the Christmas lights and string of globe lights, this porch is a holiday masterpiece. Planted poinsettias bring the look together and have us dreaming of winter all year.

Decorating for the holiday season doesn’t have to be time-consuming or break the bank. Red ribbons on some existing potted plants (faux or real), an elegant wreath, and a garland turn this house into a cozy holiday home without having to battle with your attic storage year after year. This porch is just missing some sconces next to the windows with red ribbons to tie together the look!

Holiday decor is done right on this styled porch! If you don’t have evergreens in your yard to dress up, a few potted trees like these do the trick. Garlands and wreaths are holiday classics, but we love how even the smallest detail is accounted for. The chopped wood reminds us of a cozy fireplace ready to be lit. Even Santa’s burlap sack is ready for Christmas! As always, lighting is the icing on the cake. With some globe string lights and a white sconce that blends so your decor can be at the forefront, this porch is complete.

—

No matter the time of year, your porch can be a safe haven from the chaos of the everyday. Seasonal decorating can help you feel at home as you move through the year, but don’t forget to invest in decor staples, furniture, and functional pieces that’ll last the whole year. Light fixtures with a black finish, for example, will look good and stand out no matter what season you’re decorating for! For some expert advice on creating a front porch that’ll illuminate your decor, give Illuminations a call!

Filed Under: 2023, Decor & Home Accents, Holiday, How to, Outdoor, Outdoor Lights, Styles and Trends

How to Safely Replace A Ceiling Light

How to Safely Replace A Ceiling Light

by admin · Feb 19, 2023

Ceiling lights are a must-have feature in any room. Whether you don’t like the previous homeowner’s taste or you’re just ready for an update, ceiling lights can revitalize your home space. It may be even easier than you think–just follow these steps to safely switch out those old light fixtures for a new look.

What you’ll need:

  • Screwdriver
  • Step ladder
  • Voltage detector 

You may also need:

  • Wire cutters
  • Wire strippers
  • Pliers
  • Painter’s tape
  • An extra set of hands 

Part 1: Remove Old Fixture

Step 1: Turn off power

Shutting off the electricity is important to your safety. Locate the switchboard for the room you are working in and flip the switch. If you’re not sure where the switchboard is, check the basement or garage. It might also be in the front of the house or near the entrance.

Once you’ve flipped the switch for the room with the ceiling light, go back into the room and flip the switch a few times to make sure the power is off. Then, leave the light switch in the off position. Make sure you lock the circuit box or leave a note indicating that you are working. 

Step 2: Remove cover and bulbs

Use a stable step ladder to reach your ceiling light. Hold the cover, or the visible, outside piece of the light fixture, in place with one hand. Loosen the screws with a screwdriver in the other. (For heavy or large fixtures, it’s best to have someone else hold on while you work on the screws.

Once the cover is removed, unscrew the light bulbs and set them aside.

Step 3: Lower the fixture base

With the cover removed, you will be able to see the base–the part of the light fixture that attaches directly to the ceiling. Typically, the base will have tabs or nuts and screws securing it. Loosen the nuts or screws, then lower the base to access the wiring (In the rare case you’re unable to find the screws, search for the installation manual online. You can also take a picture of your base and bring it into our showroom – we’ll take a look and help you figure it out!)

Until you have disconnected the wiring, you will want to lower the base but not remove it completely—an easy way to do this is by securing it with painter’s tape or having someone else hold it in place.

Step 4: Disconnect the wires

Once you have uncovered the space behind the old light fixture, there should be a junction box where wires are connected and stored. Start by removing the caps or tape covering the wire connections. The caps will come off when twisted counterclockwise.

 Pro Tip: Take a picture beforehand so you can remember exactly how everything was put together. 

Part 2: Connect the Wiring

Step 1: Test voltage

Test each exposed wire by touching it with the tip of your voltage detector. 

If the voltage detector lights up, there is a current running through, and the wire is unsafe to touch. Double-check your circuit box and ensure the switch is still flipped. 

Once you’re sure there is no electrical current, you are safe to continue working with the wires.

Untangle the wires and detach the fixture from the ceiling completely. Either hand off to someone below or carefully carry it down the ladder.

Step 2: Check wires

Frayed wires can be hazardous -if there is any fraying on the end of the wires, trim them down with wire cutters. Then, strip off any insulation on the outside with wire strippers. You only need to strip about ½ inch of insulation for the wire connection.

Pro Tip: Check your new fixture’s installation recommendations carefully. If you’re installing a heavy fixture such as a ceiling fan or chandelier, you may also need to install an additional support in the ceiling. 

Step 3: Match and Attach

Electrical wires are color-coded. Black or red are hot wires, white is neutral, and green or bare copper are ground wires. A grounding wire sometimes connects to a grounding screw instead of another wire. Look for a matching wire in your ceiling for each wire in your fixture.

Twist together each matching wire. Either by hand or with pliers, hold the exposed ends side by side with one hand and twist with the other. (This is where your picture of the original fixture’s wiring comes in handy.)

Now that the wires are connected, it’s important to cover the exposed ends again. Screw the wire caps on by twisting clockwise over the connected ends until they hold the wires tightly in place. If your original fixture didn’t have wire caps, you can use electrical tape as well.

Make sure to check the owner’s manual for specific instructions—for example, you might have an extra red wire that connects to a black wire. If you don’t have any instructions, generally you will be fine with just matching the correct wire colors.

Part 3: Install New Fixture

Step 1: Replace junction box

With all your wiring safe and sound, the junction box is ready to be put back into place. Tighten the screws securely against the bracket until  Fold the wires up into the box so they will be hidden behind the ceiling light.

Step 2: Attach new fixture

There are several different ways your new light fixture base could attach to the ceiling—these are the most common ways. As always, check the owner’s manual for anything specific or unique about your light.

Securely attach the light base by positioning it over the mounting screws. Place a metal nut on each screw and twist by hand until they are tightly holding the base in place.

If the fixture has a mounting bracket, connect the mounting bracket to the junction box first, then hang the base over the screws.

If it’s a keyhole shape, adjust the base so the screws slide into the smaller grooves and then tighten the screws with a screwdriver until they are holding the base securely.

Step 3: Install light bulbs

Now that your base is set, it’s time to add the light bulbs. Make sure you have the correct wattage—the fixture typically indicates its maximum wattage on the package or owner’s manual. 

When choosing which bulbs to use, the lower the wattage the safer. Most light fixtures are safe with up to 60 watt incandescent bulbs. You may also want to consider more eco-friendly choices, such as CFL or LED bulbs. These options have lower wattage but produce the same amount of lighting, saving you money on electricity in the long run.  

Test the bulbs by turning the electricity back on—flip the switch on the circuit breaker then turn on the room light switch. If it is flickering, dim, or not turning on at all, turn the electricity off again and check everything—look for loose connections or mismatched wires. If your lights are bright and solid, you are ready for the final step.

Step 5: Attach cover

Flip the light switch and circuit breaker back off before installing anything else. Take your light fixture’s shade, cover, or top and climb back up the ladder. Attach it to the base by twisting screws or attaching pieces until everything is tight and secure. If it’s a hanging light, make sure it’s at the proper height before finishing your work. Every light has different connecting components, so check your owner’s manual and just make sure it’s snug.

And there you have it, your guide for installing a new, updated ceiling light. Now that you know how to install it, make sure to visit our showroom to choose the perfect fixture for your ceiling!

Filed Under: 2023, Buying Guides, Ceiling Lights, Styles and Trends, Wellness & Safety

7 Ways to Glow Up Your Pool: Lighting Tips from Lighting Experts

7 Ways to Glow Up Your Pool: Lighting Tips from Lighting Experts

by admin · Feb 13, 2023

Having a pool in your backyard is an incredible luxury. But what takes a nice pool to a jaw-dropping show-stopper is excellent light scaping. So if you’re prepping for a high-impact pool renovation, your lighting is sure to give you the luxury factor you’re looking for!

Great lighting highlights your pool features and turns them into a breath-taking statement even when you’re inside. And it extends your pool party to after-dark!

But great pool lighting can be very different from landscape or interior lighting. That’s because pool lighting requires a lot of finesse, keeping glare to a minimum. So we’ve compiled seven tips to help you keep your pool area bright, luxurious, and inviting.

Let’s dive in!

Moonlighting– General Lighting Without Glare

There’s not much that’s better than a swim in the moonlight. Unfortunately, you can’t always count on a full moon and a cloudless sky, so a lighting technique called moonlighting is the next best thing. 

Moonlighting uses an elevated light source that softly concentrates light downwards– basically, it mimics the moon! It creates soft, ambient lighting without a harsh glare on your eyes or reflecting too much light off the water. And there’s no denying that moonlighting will bring your pool from basic to luxury!

Expert Tips:

  • When you can, tuck moonlighting fixtures away in trees or your roof to make it feel more like natural moonlight.
  • Use warmer, more yellow light to keep the pool area a relaxing space. Bright white lights are more likely to create a harsh glare.
  • The size of your pool deck will determine how many lights you’ll need to get the glow just right. If you’re unsure how many you need, it’s better not to guess. Too many, or too few, won’t create the illusion. Before you buy, contact a local lighting showroom to get expert advice on your yard’s unique dimensions and needs. 

Light the Water

Another great way to gently increase visibility is to light up the water in your pool. A bright pool makes it easy to swim or chat on the deck without disrupting the mood. So put lighting the water on the top of your pool upgrade list!

Expert Tips:

  • Always use underwater-grade lighting. Electrical safety is critical when you’re around water, so make sure you get the right bulbs.
  • Proper placement matters. Keep the lights relatively close to the water’s surface, spaced at least 3-4 feet apart. It’s easy to overdo it with underwatering lighting, so remember – the fewer bulbs, the better.
  • Lighting an existing pool? Unfortunately, installing underwater lights in an existing pool is pretty difficult. Your best bet is to contact a pool installation expert to see what it will take to get your pool equipped with underwater lighting.

Keep Stairs and Walkways Safe

Your pool renovation has to keep the surrounding area in mind. Whether entertaining or playing with your family, safety is always a top concern. So always keep walkways, steps, and pool borders clearly defined and visible. The good news is, you don’t have to sacrifice style to be safe! 

Expert Tips:

  • Tuck lights under the stairs to hide the light source and reduce glare. You can also light your stairs from the side with stylish fixtures that create visual interest while lighting the way.
  • Use reflective materials around the sides of your pool to highlight the edges so they’ll catch the light without having to shine light upwards.
  • Solar lamps are an excellent option for lighting walkways. They’re very low-maintenance and come in an almost endless variety of styles.

Highlight Water Features

A waterfall or fountain brings a home pool from a fun time to a luxurious experience. But the magic shouldn’t stop after sundown! Lighting your water feature will upgrade it to an around-the-clock art experience.

Expert Tips:

  • Color-changing LEDs help to match the mood and keep your water feature flexible. Check the packaging to ensure they’re safe for outdoor use and have color-changing capabilities.
  • Tuck light sources behind or underneath the stream to light the way. You’ll need water-grade lighting for a safe light show.
  • Highlight the fountain or waterfall architecture to complete the experience. While these lights may not be underwater, you’ll still want to make sure they can handle the strain of the elements in your climate.

Make Landscaping Pop

Your home landscaping plays a vital role in every swim, day or night! So play up your trees, shrubs, and flowers in your pool renovation with a few of these lighting tips.

Expert Tips:

  • Silhouetting uses a ground light source behind a row of shrubbery to create a shadowy effect on a wall behind them.
  • Highlighting also uses a ground light source but shines in front of trees or other plants to make them look like they’re glowing.
  • Hang fairy or string lights around or between trees for a soft, enchanting touch. Plus, these are easy to hang yourself and take down for the off-season.

Bring in Island Vibes

Want to bring a piece of island living to your backyard? A few careful lighting tricks can land your home beach bash in a true paradise. And it may be easier than you think to pull off this luxury pool vibe!

Expert Tips:

  • Nothing says exotic like firey displays. So use tiki torches or a feature firepit to heat up the party!
  • Color-changing LED accent lighting transports your party anytime! Bring in island blues, pinks, and greens with a touch of a button.
  • Use highlighting techniques to bring your tropical trees and flowers into the experience.

Brighten Surrounding Architecture

Your pool may be the center of your backyard entertainment– but the surrounding architecture of your home, gazebo, or pool house is the backdrop. Don’t let your unique architecture go to waste when the lights go out. So pull the rest of your home into the pool experience with your pool upgrade!

Expert Tips:

  • Highlight arches and beams to show off beautiful architecture around the clock. You can install small spotlights, use recessed lighting, or play with string lights for a custom look.
  • Downlighting or Uplighting? You can position accent lights to shine down walls or use ground lighting to literally light up your home exterior.
  • Brighten doorways. Direct guests and family members to the right places with beautiful sconces or spotlights.

Need Help?

Proper lighting is essential to a fully functioning home– but it can be challenging to nail balanced brightness, great fixtures, and a budget! Contact the experts at Illuminations for advice on your project!


Keywords: pool renovation, upgrade your pool, luxury pool

Filed Under: 2023, Outdoor Lights, Styles & Trends

3 Ways to Layer Light and Level Up Your Interior Design

3 Ways to Layer Light and Level Up Your Interior Design

by admin · Feb 9, 2023

Have you ever been to a friend’s house whose home has that X factor? Something that made it seem really inviting even if their decor wasn’t notably upscale? That friend probably had great lighting.

Color, shape, and texture are the building blocks of interior design–but lighting dictates how everything comes together. So, what goes into a well-lit room? Design experts recommend having 5-7 different light sources in any space. These “layers” of light make it so that you can customize the mood, function, and comfort level of a room depending on how you’re using it.

There are three basic layers of lighting to consider: ambient, accent, and task lighting.

Read on to see how these layers of light work– we’ll show you exactly how things like location, bulb choice, and design combine to give you the perfect lightscape. Then the ball’s in your court! Working layer by layer, and with just a little bit of insider lighting know-how, it’s easy to give your home that X factor too– without having to replace a single decorative pillow.

Layer One: Ambient Lighting

The most basic level of lighting for any room is ambient lighting. Ambient lighting is the light that fills the room, casting an even glow from overhead. In most homes, this will come from a central flush mount (often the dreaded “boob” light), a ceiling fan and light combo, or can recessed lights.

Let’s dive into top considerations to creating great ambient lighting.

Location

If you are using one large light as your ambient light source, keep it central with maximum light flow. It’s usually a good idea to use a glass covering instead of metal or wicker shades to avoid creating shadows.

If you want to create ambient light with a grid of recessed lights instead, spacing is critical. An easy trick to determine how far apart your recessed lights should be is to divide the height of the ceiling by 2. For example: For 8-foot ceilings, divide 8 by 2 (8÷2=4) – consider staggering your can lights about 4 feet apart for optimal lighting.

Pro Tip: This formula will get you started, but there’s a lot to consider if you’re installing a new grid of recessed lights in your home. The size and trim can vary greatly, which will have a big impact on light coverage– and you need to take the shape and layout of your room into account. If you want help getting your recessed lights spaced correctly, stop by our showroom and check in with one of our lighting specialists!

Bulb Choice

Each room of your home will have different bulb requirements. For your kitchen, bathroom, and office, lean into brighter, cool light. These bulbs will activate your brain for better concentration and focus. Look for bulbs that say “bright white” or “daylight” on the packaging.


On the other hand, bedrooms and living rooms are usually dimmer and warmer to encourage relaxation. These bulbs will say things like “soft white” or “warm white” on their box.

Design Tips

While there’s not necessarily a one-size-fits-all solution, great ambient lighting will completely transform the way your room feels. Here are a few tips that will translate across most rooms and decor styles:

  1. Consider replacing the standard “boob” lights. While they’re great at lighting a space, the shape of these lights can sometimes feel boring or dated. Don’t be afraid to get creative– there are so many other options available!
  2. Play with paint colors: the color and tone of your walls have a big impact on how the ambient light reflects. Check your paint samples at different times of the day to see how they look with both daylight and your light fixtures. 
  3. Think about going bigger! If a flush-mount fixture feels underwhelming, take a look at other options like ceiling fans or pendant lights. Chandeliers are also making a comeback– they’re not just for vintage vibes! You can play up crystal delicacy for a soft touch in a modern room or branch out with wood beads or other designs.

Pro tip: If you’re planning on replacing your ceiling fixture yourself, make sure your new light is properly supported. You might need to install a sturdier electrical box to support the extra weight of a larger fixture– just check the installation guide before you get started!

Layer Two: Task Lighting

The next layer of your lightscape is task lighting. Task lighting shines extra light on a space to make doing a specific task easier and/or safer. It’s especially helpful for tasks that involve working with small objects, like sewing, or that require concentration, like reading.

Location

You need task lighting anywhere you are performing detailed work. Your home likely already has some task lights installed in common places, such as a bright wall sconce over the bathroom mirror where you get ready, and pendants or recessed lights above a kitchen counter. 

Lamps are the real MVP of task lighting, because they can go anywhere you can run a cord. You’ll find them sitting on a desk, in the garage over a workbench, illuminating the music on a piano, next to a cozy reading nook, on the bedside table, and more. 

Bulb Choice

Task lighting usually uses bright white light to get the best view and activate the attention centers of your brain. There are a few exceptions, however. If you’re lighting a reading nook or a bedroom you’ll want softer and/or warmer light to get that cozy comfort.

Design Tips

Even though task lighting is “task-oriented,” it doesn’t need to be 100% utilitarian. Here are a few ways to think about making your task lighting both beautiful and functional:

  1. When possible, work with odd numbers of light– it will feel more organic. For example, 3 or 5 pendant lights will look usually better over a kitchen counter than 4. 
  2. Experiment with different materials for lampshades. A glass shade will maximize the glow, woven shades will give a light filtering effect that softens the light, and opaque shades will concentrate the light. You can completely transform the way a lamp or pendant lights your space with a simple shade swap! 
  3. Don’t forget your bathroom vanity! Most vanities have a light above the mirror– but that’s not necessarily the best placement for getting ready. Face-level light on either side of your mirror is best for doing things like applying makeup.

Pro tip: Did you know that LED light is widely considered the best lighting for applying makeup? It’s the closest to natural daylight! Try a backlit mirror or LED strips at facelevel to see your makeup’s true colors.

Layer Three: Accent Lighting

Accent lighting is the fun layer– it leans much more into design than function. The purpose of accent lighting is to create a mood, or to highlight a specific feature in a room like an architectural detail or a piece of art. 

Location

Unlike ambient or task lighting, accent lighting doesn’t have a simple rule for best placement. Whether it’s hanging from the ceiling, sitting on a shelf, or standing on the floor, accent lighting can come from anywhere and shine on anything. 

One way to determine where you need accent lighting is by thinking about your favorite evening activities. For example, where do you and your family cuddle for movie night or bedtime stories? Turn off your ambient lighting and see where you need a lamp, some sconces, or LED strips.

Pro tip: Plan on having 2-3 sources of accent light per room.

Bulb Choice

Accent lighting that’s highlighting a feature is typically small and bright. For accent lighting that’s creating a mood, look for dimmable options. Either way, you’ll need warm bulbs to achieve a cozy glow! Look for bulbs that say “soft white” for the gentlest light, with “warm white” as a close second. 

Accent lighting opens the door for you to get creative! Check out some color-changing smart bulbs or LED strips that can really change the way your room feels with just the touch of a button!

Design Tips

Accent lighting is very specific to a person and their space, so there aren’t any hard-and-fast rules. Here are a few ideas to get your imagination flowing:

  1. Fill in the blank: if you’re missing a color or texture in your room, try bringing it in with an accent lamp. Warm up a modern space with a wooden or stone lamp, or balance your color palette with a new lampshade. 
  2. Choose the unexpected: use sconces and pendants where you’d normally place a lamp. For example, if you have a couch tucked into a corner that could use more light, save floor space by hanging a pendant above the seat.
  3. Track lighting isn’t just about the lights– it can elevate your room by highlighting other decor and collections! Try placing them above your gallery wall to elevate your wall to an art museum experience. 

Pro tip: Renting or want to avoid hiring an electrician? You can still use pendants and sconces! There are special varieties that use a plug– no hardwiring required. 

Ready to Customize Your Lightscape?

Now that you have the guiding principles ready, the possibilities are endless! If you’re ready to get serious about your home’s lighting and design, the experts at Illuminations can help you connect to a showroom near you. Contact us today!

Filed Under: 2023, Styles & Trends

« Previous Page
Next Page »

Copyright © 2025