• Skip to primary navigation
  • Skip to main content

Illuminations

  • Buying Guides
  • Styles & Trends
    • Bathroom Lights
    • Ceiling Fans
    • Ceiling Lights
    • Lamps
    • LED Lights
    • Outdoor Lights
    • Smart Lights
    • Wall Lights
  • Wellness & Safety
  • Shop Products

2023

12 Simple Bathroom Updates You Can Do Yourself

12 Simple Bathroom Updates You Can Do Yourself

by admin · Mar 1, 2023

Bathrooms are spaces that often go overlooked, but when they’re spruced up, they add some serious value to your home! Remodeling can take loads of time and effort (not to mention money), but giving your bathroom a facelift doesn’t have to. These simple tips can give you the bathroom of your dreams.

1. Organize

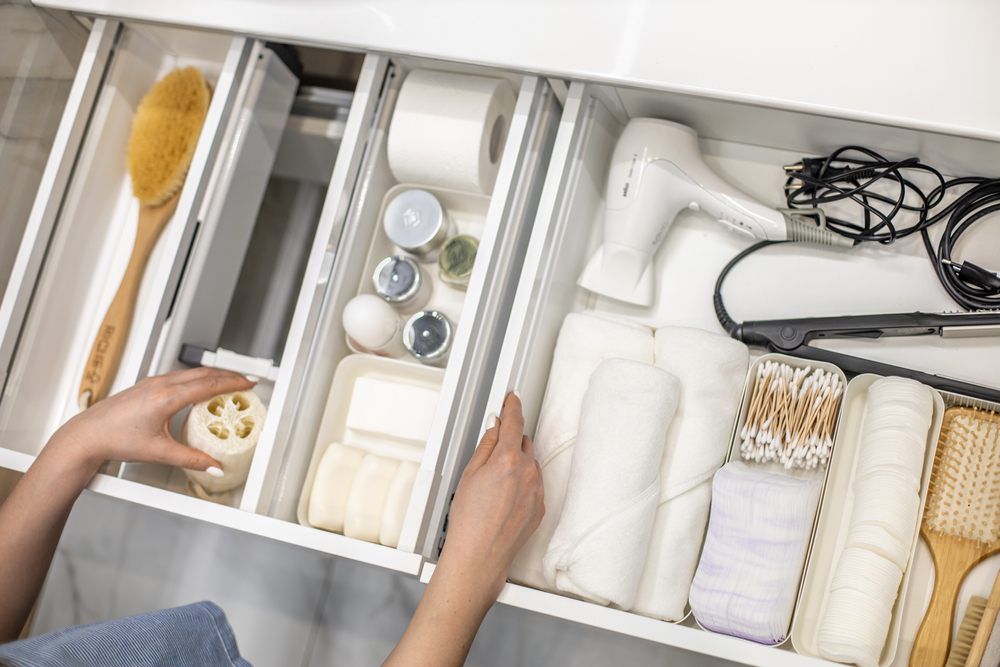
The last thing you want to deal with at the beginning and end of your day is CLUTTER. Give yourself the gift of a good system! Containers may seem unnecessary, but when you’re rushing out the door, it saves you a headache to just have an easy home for all your toiletries.
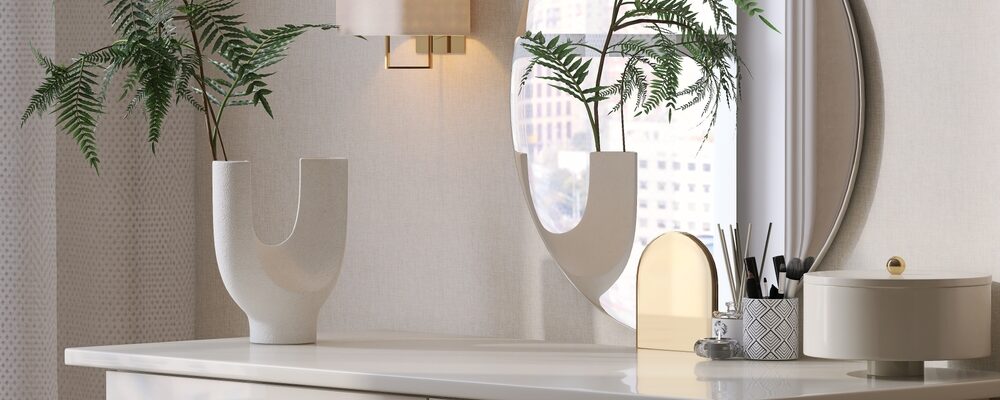
2. Add Greenery

Plants bring life, peace, and tranquility into a space. This bathroom would be the perfect escape from the stress of everyday life. The warm tones mixed with the green tell you to relax and take a break. Who are you to tell them no?

3. Change the Hardware

Arguably one of the easiest ways to take your bathroom from the early 2000s to today without spending a fortune is changing the hardware on your cabinets. Finish options are endless! The bathroom above uses gold accents to create a cohesive look with a modern feel.

4. Spruce Up the Walls

If you’re looking for a simple way to make a big impact in your bathroom and have a free weekend coming up, a fresh coat of paint and some elbow grease will make your bathroom feel like a brand new space with just a few hours of work! 

Want to take it to the next level? Bold wallpapers are in, and they really let you show off your personality! This bathroom incorporates the best of both worlds with a simple, painted board and batten wall on the bottom and wallpaper on top! It’s not as hard as it looks – check out this quick tutorial!

Renter-friendly option: Removable peel and stick wallpaper will give you the same look without having to commit long-term. Love the board and batten? There’s a renter-friendly tutorial for that too!
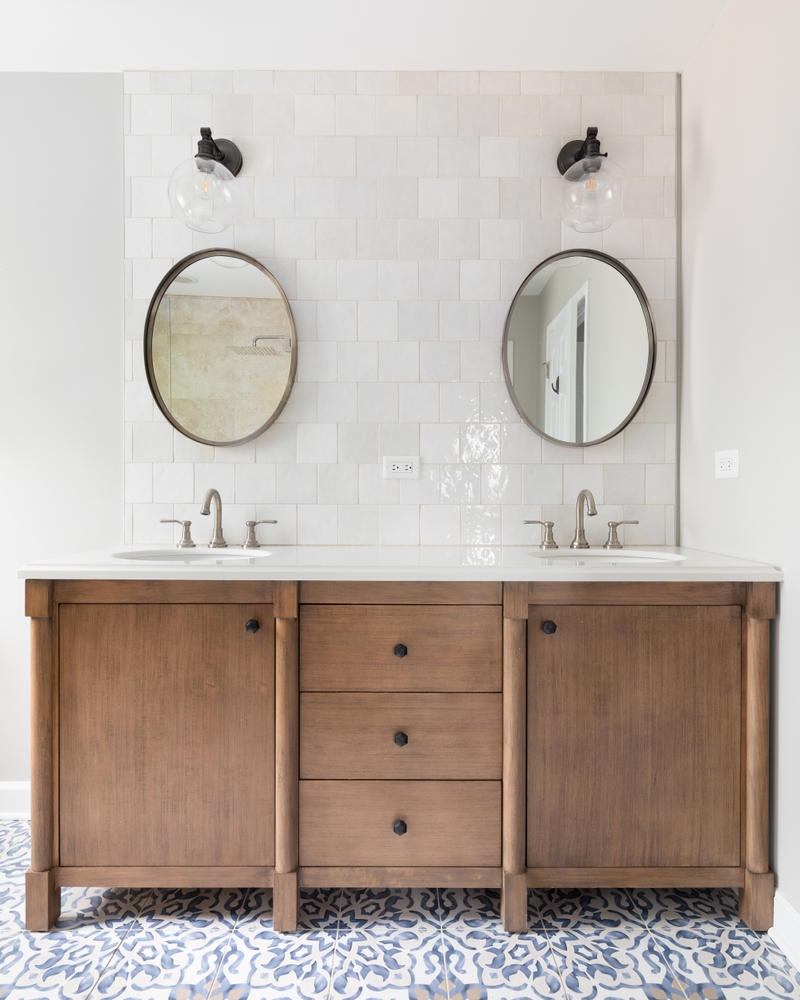
5. Update Mirrors

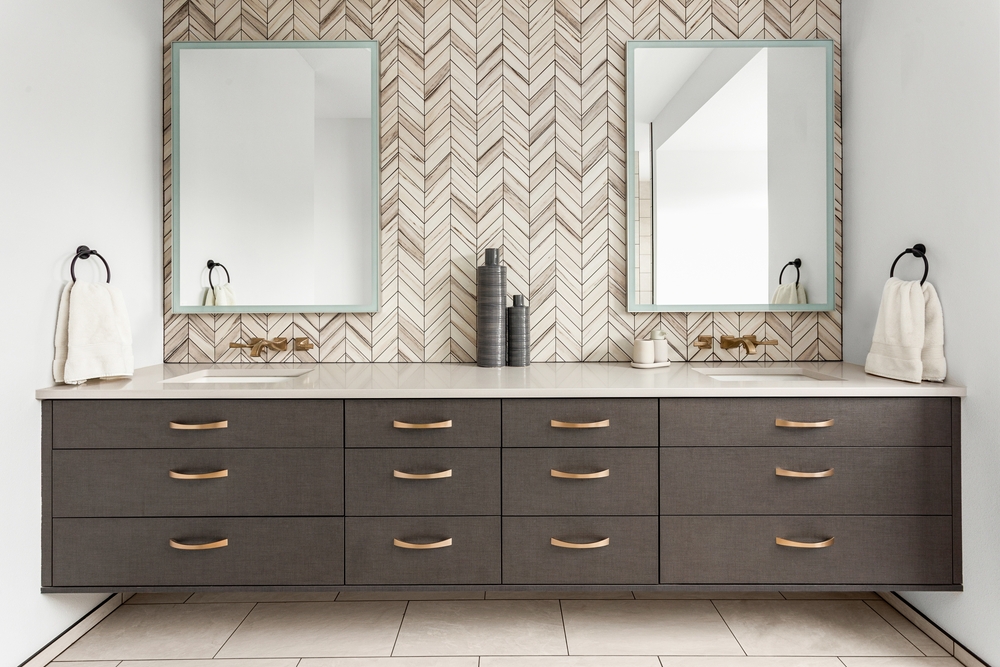
Bathroom mirrors are often neglected, but they totally change the feel of the room – don’t leave them out! These wood-framed mirrors bring warmth to this bathroom’s design and help to balance out all of the cool tones and polished finishes. 

Renter-friendly option: If replacing your mirror is out of the budget or you’re renting, adding a wood frame to an existing mirror is an easy one-weekend DIY project – just make sure you can easily remove it if you’re renting!

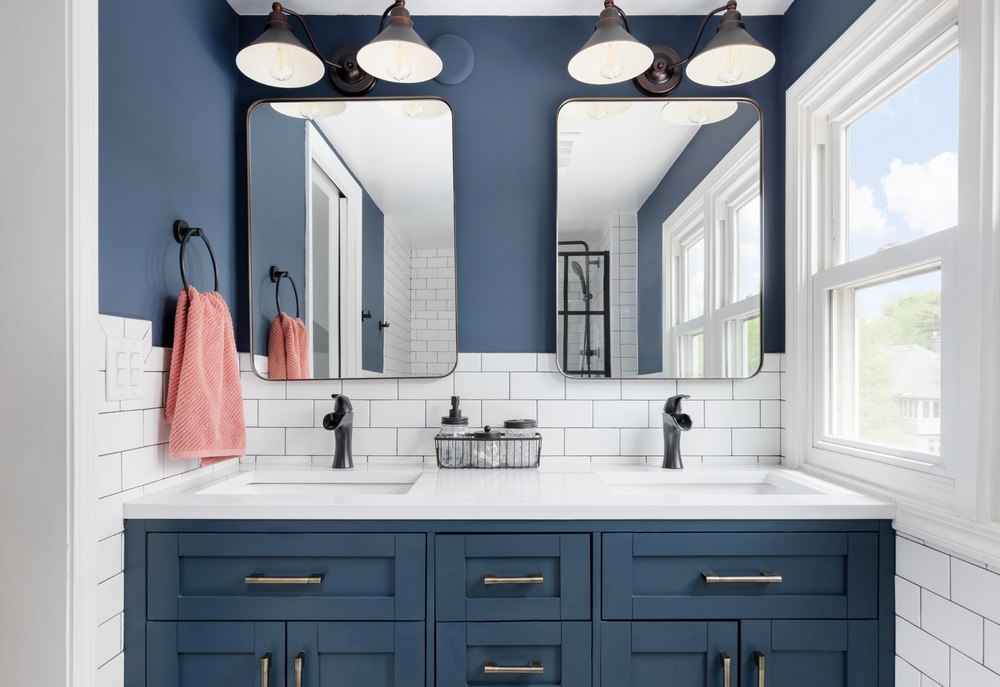
6. Paint Your Cabinets

Painting your bathroom cabinets may take a little effort, but it’s a great way to unify your space or to add a fun pop of color your bathroom. With just a small can of paint and some time, you can take your bathroom from basic to beautiful, even with a low budget. This bathroom’s painted cabinets help to ground the space, and provide much-needed contrast that takes the design from bland to balanced.

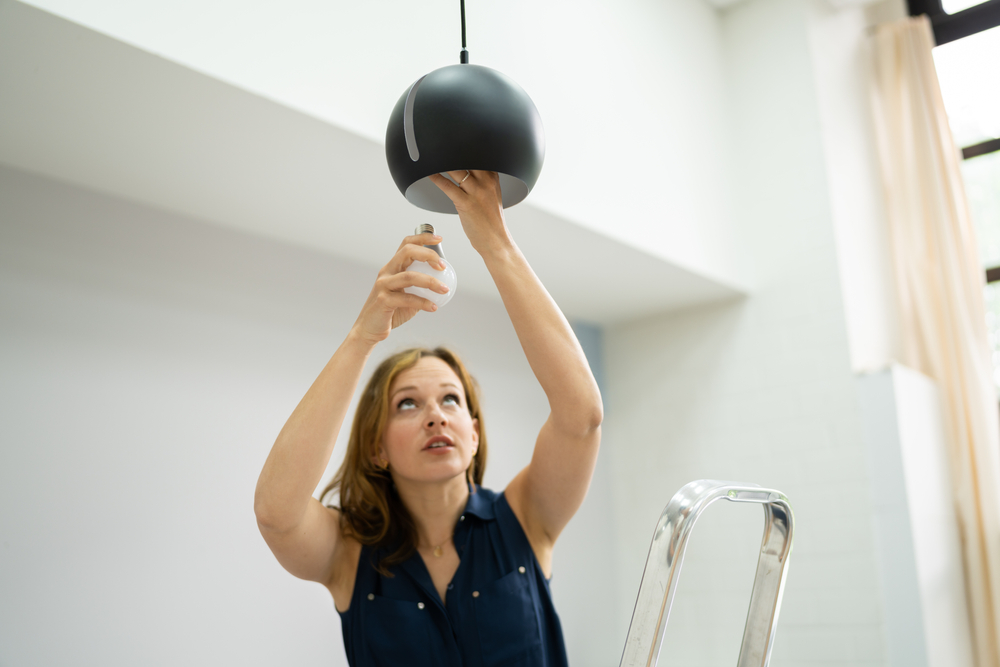
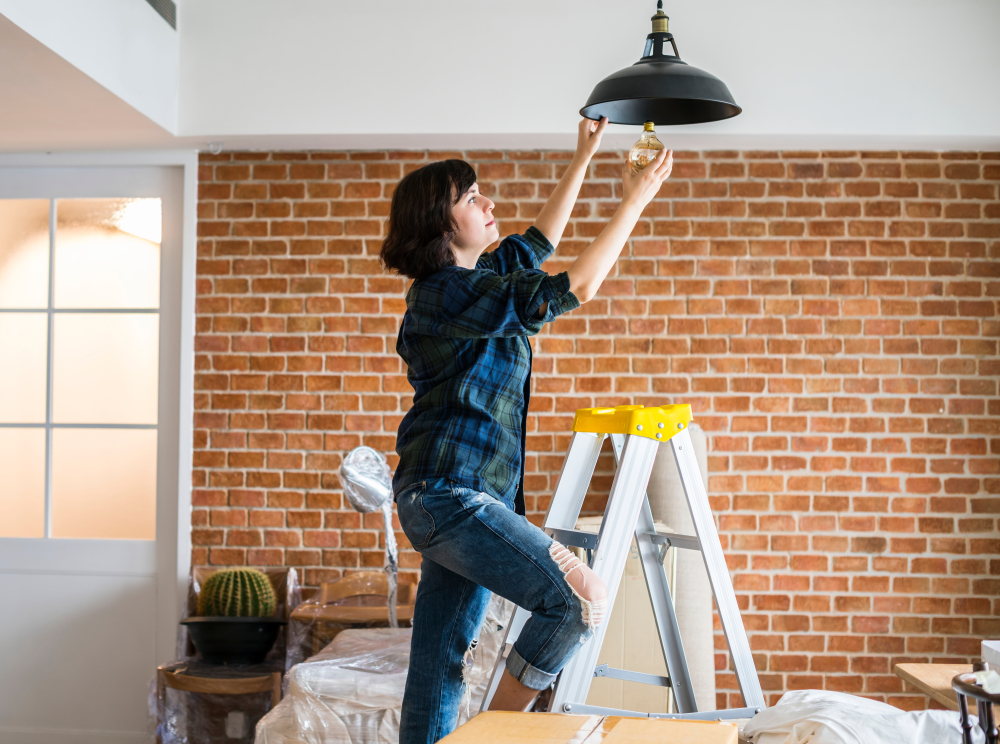
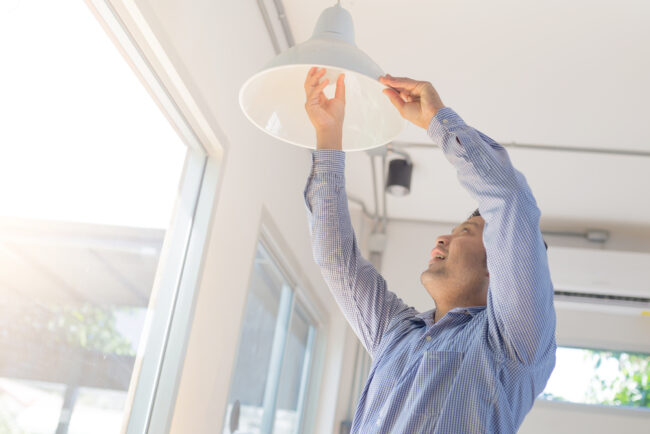
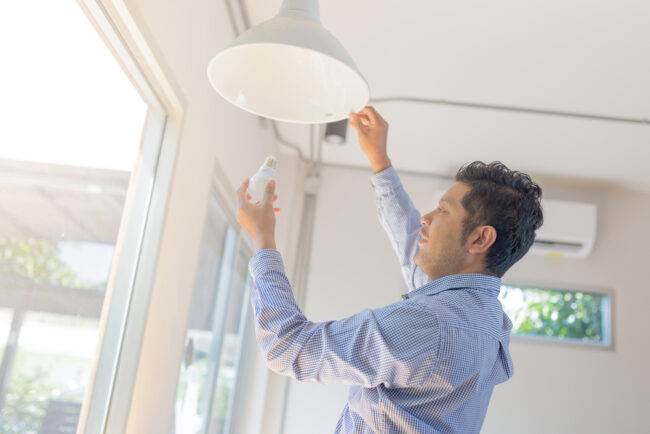
7. Replace Old Light Fixtures

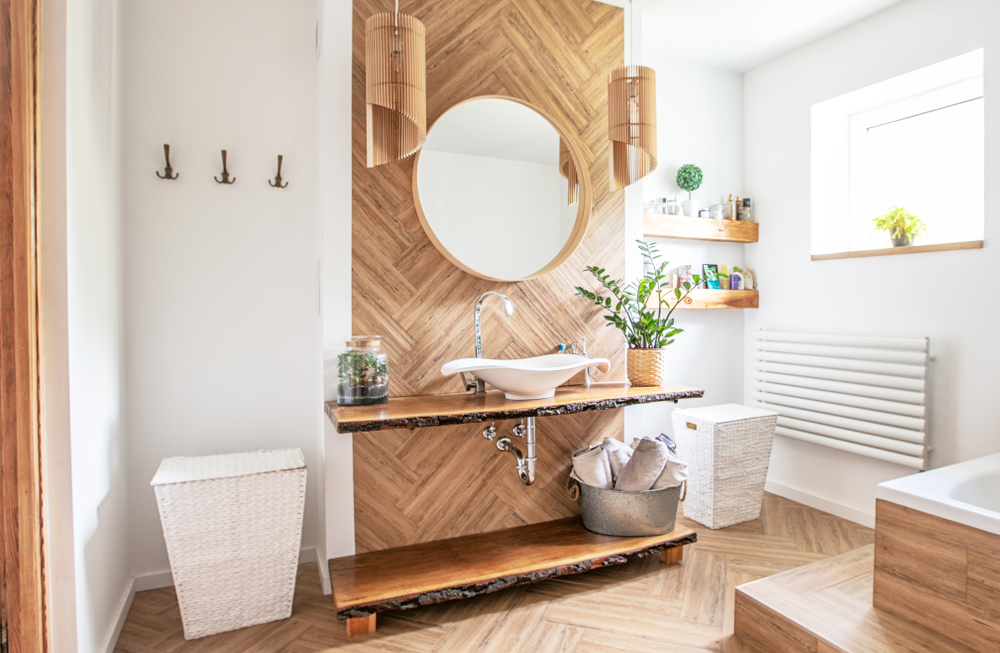
Replacing a ceiling or wall light in your bathroom with a modern fixture that’s more your style will give the entire room an instant style boost! You don’t have to play it safe here – find a fixture you love and jump in! We love the way this bathroom shows some serious creativity with these pendant lights that highlight this AMAZING wood accent wall. 

Many homeowners are wary of swapping out light fixtures, but it’s usually a pretty simple DIY. We recommend starting with your vanity light first if you’re on a budget – great front-facing light by the mirror will make the biggest impact on your morning routine!

8. Layer Your Light

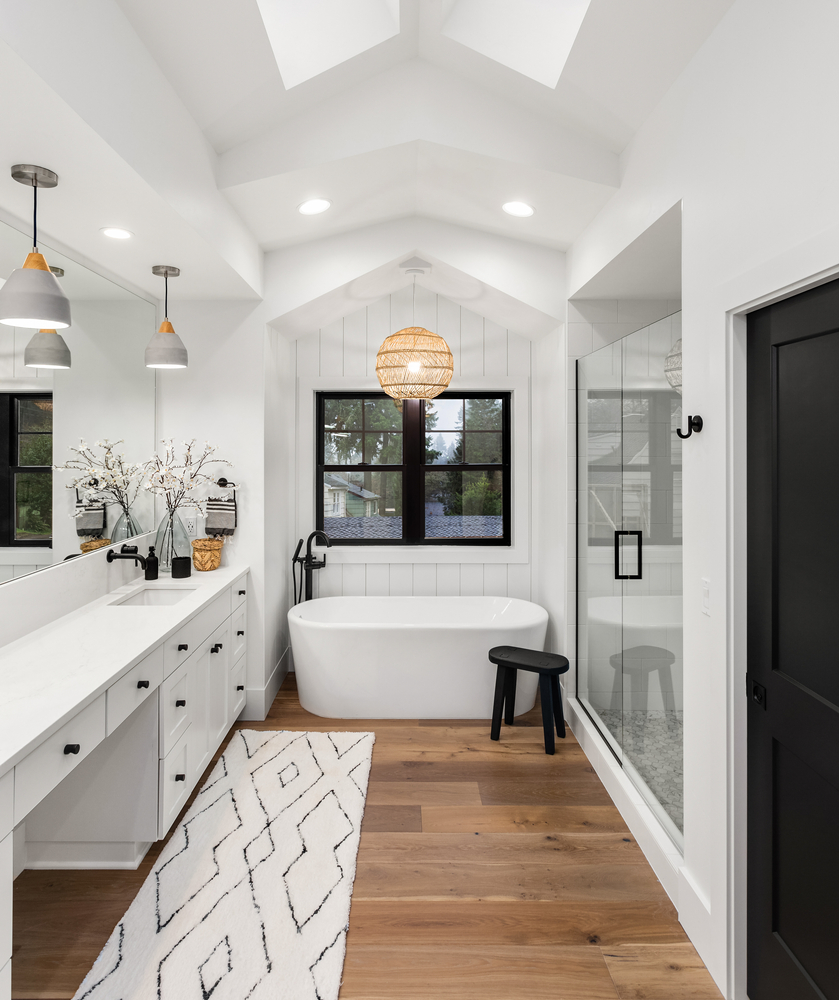
Every room in your house should have several light sources to make it feel more comfortable and eliminate harsh shadows and dark corners. In a living room, that’s as easy as tossing in a few lamps, but layering light in a bathroom can be a little trickier.

This bathroom uses a combination of pendant lights and recessed lights to make the whole space feel bright and airy. If your bathroom lighting isn’t working for you, installing an extra wall or ceiling light is the best way to go from dark and dingy to light and bright. 

If your bathroom’s already finished and rewiring isn’t in the cards – don’t worry! Fortunately, there are a lot of easy do-it-yourself options out there. 

LED light strips like the ones in this bathroom are inexpensive and as easy to install as a sticker! They’re usually used behind the mirror or under cabinets, but they can go anywhere you want some extra light. 

You can also replace a light switch or outlet cover with one that has a built-in light – no more blind fumbling for a switch in the middle of the night.

Renter-friendly option: Get a motion-sensing plug-in outlet light or a rechargeable countertop light! These are both non-permanent ways to add a layer of light and keep yourself from bumping into the counter in the dark.
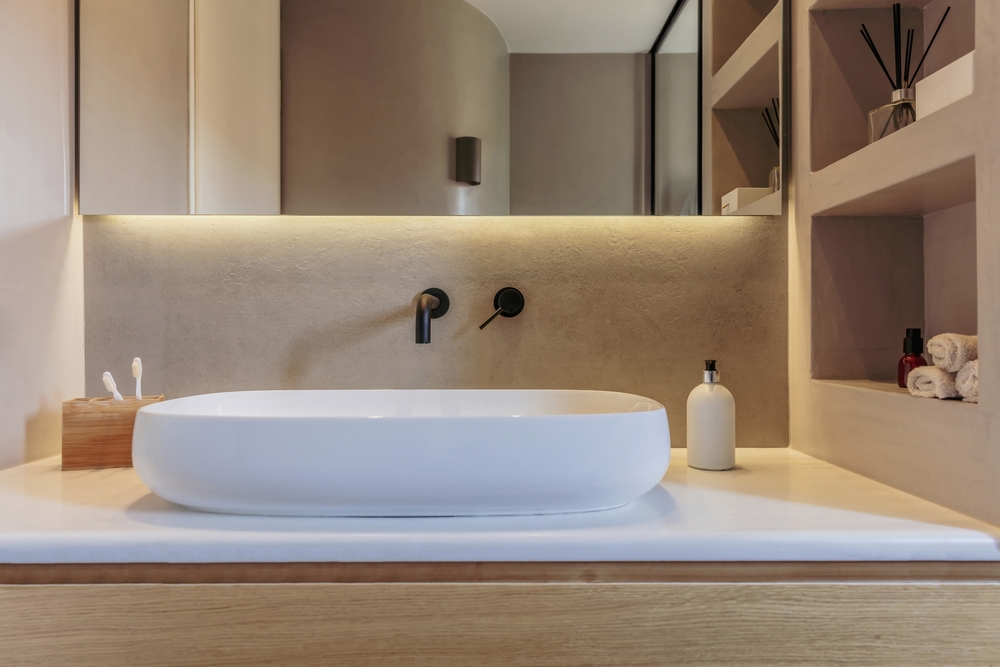
9. Update Faucets

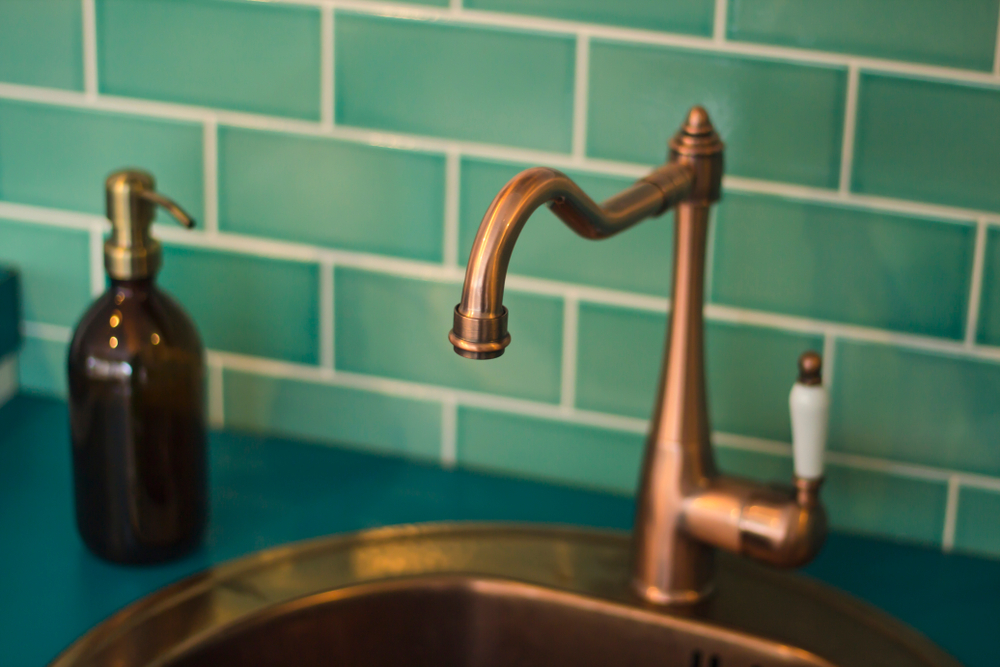
Another way to update the look of your bathroom and conserve water is by switching out your faucets. Look for a faucet with a WaterSense label to reduce your sink’s water flow by 30 percent or more. Less water flow means a lower water bill. With a lower water bill, you’ll have some extra change in your pocket to take your family out for dinner (or yourself–you deserve it!).

10. Dim the Lights

The lights in this bathroom make it a retreat from chaos. When you want a calming bath, dim the lights for optimal relaxation. Dimmable lights give you the flexibility to turn your bathroom into a spa.

Bonus points: Since dimmable lights are more energy-efficient, installing a dimmer switch will leave you with extra money to do more with your bathroom!

Renter-friendly option: Use other lower-light options like strip lights, countertop lights, or LED candles like in the bathroom above.

11. Add a Backsplash

The metallic accents and painted vanity in this bathroom are to die for, but what really makes this space magic is that classic backsplash. Not only does it breathe new life into this space, but it also protects the wall from moisture and staining, so you won’t have to worry about mold or mildew. With a little DIY magic, this bathroom feels complete!

Renter-friendly option: Use a peel and stick backsplash instead! It’ll look like tile without actually being permanent.

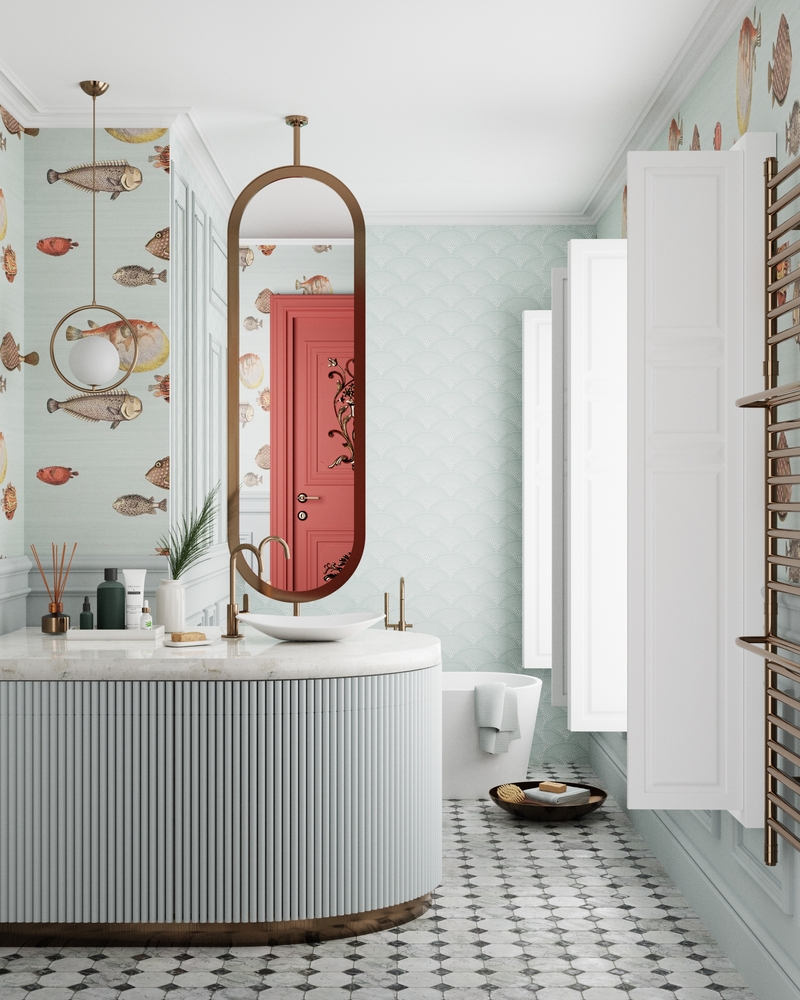
12. Update Your Tile Floor

While tile may be a bigger time or money investment, this bathroom clearly shows that it pays off. If you’re wanting to update the floor, choosing a unique tile like this is the way to go. Pro tip: while real tile will give you the best result, you can actually use a stencil to paint your floor. It will give it the same look for a fraction of the cost!

Renter-friendly option: Use removable flooring (peel and stick) to look like custom tile, or cut a vinyl piece to fit the size of any existing tile.

————–

Don’t let your bathroom fall between the cracks any longer! When you’re ready to take it to the next level, give our experts at Illuminations a call. We’d love to help you get started and give you more tips like these.

Filed Under: 2023, Bathroom Lights, Styles & Trends

Step-by-Step Guide to Home Lighting Renovation

Step-by-Step Guide to Home Lighting Renovation

by admin · Mar 1, 2023

How to Plan, Prioritize, Budget, and Make it Happen

Updating the lighting in your home is one of the quickest ways to give your house a facelift. It’s easy to accidentally overspend on your house’s lighting if you don’t have the right information, but not to worry! With a few pro tips and some help from Illuminations, your home will feel brighter and look better – without breaking the bank.

1. Make a Plan

Before you start tearing lights out, pull up a chair and make a solid plan. When you’re on a budget, prioritizing which spaces need the most love is key. Look in each room and make sure all your spaces have multiple lighting sources to eliminate shadows and illuminate workspaces. 

Once you’ve done that, think about lighting focal points. Where do you want your lights to make the biggest impact? A few places to consider starting are: above the dining room table, in the living room, and in the bedrooms.

Pro tip: Make a list of all the fixtures you want in order of importance–it will come in handy later!

2. Evaluate Your Budget

Do your research and be realistic about your needs and wants. Knowing how much you can spend and being an informed buyer will help you make the most of your money and avoid overspending. 

Take a look at your budget and decide on two numbers – the amount you’d like to spend, and the highest amount you’re willing to spend. Then, put together some ballpark estimates for the fixtures you want. 

When you walk into the showroom prepared, you can put your money where it matters most!  It’ll also help us to know what price range you’re looking at to match you with the perfect fixture!

Pro tip: Don’t forget to include the costs of professional installation and light bulbs in your estimate! 

3. Prioritize Your Needs

If you’re renovating on a budget, ask yourself: Which light fixtures will make the biggest difference in my house? Remember that list of fixtures you made earlier? Pull it out and prepare to rearrange it. 

Prioritize fixtures that give off ambient, or full-room, light. Once you have those at the top of the list, move on to task lighting. Any workspaces will need additional lighting above them (kitchen counters, bathroom vanities, desks, etc.).

If you still have room in your budget, consider adding accent lighting to features in your home you want to highlight. Moving from general to specific will help you narrow your focus to what really matters, and light your house without running low on change.

4. Pick Your Fixtures

It’s easy to get sticker shock when you start looking at light fixtures. When you’re choosing lights for your renovation, you have two options: you can get a cheap fixture that will work for now, or you can get a quality fixture that will work for years. 

While there is a time and a place for inexpensive fixtures, just remember that buying lights that will stand the test of time will actually save you money in the long run. 

You also need to keep in mind how often you want to redecorate. Trendy fixtures will look outdated much faster than classic styles. If you don’t want to be repeating this process again in 5 years, get a classic, quality fixture that won’t need to be replaced when the fads change.

Pro Tip: Selling your old fixtures online can give you a little extra to put towards your next lighting purchase.

5. Remember the Bulbs

While LED lights cost a little more up front, they use at least 75% less energy, and they last up to 25 times longer than traditional light bulbs. To be sure you’ll see savings on your electrical bill, look for bulbs with the Energy Star rating logo on the packaging. 

Don’t make the mistake of buying bulbs that you’ll just have to replace in a few months! Be sure to work LED bulbs into your budget–we promise it’ll pay off!

6. Do It Yourself

One major cost of updating lighting is installation. In many cases, a handy homeowner with the help of a few Youtube tutorials can save money by doing it themselves. You may also consider installing some lights yourself and having others professionally installed–dropping a heavy chandelier would put a dent in your budget (and your floor)!

However, if you’re going to go this route, researching and implementing all the safety precautions is non-negotiable. Being well-educated can save you from causing a fire, burns, or other safety hazards.

If you’re unsure about doing it yourself, no worries. Just make sure to factor the professional help you need into your overall budget!

—

Updating and replacing lighting on a budget can feel like a daunting task, but with these tips and our expertise, you can’t go wrong! The step-by-step guide we made will help you have amazing lighting without feeling financially strapped.

If you get stuck on any of these steps, give us a call and we’d love to chat about solutions.

Filed Under: 2023, Styles & Trends

Smart Lighting 101: 5 Top Tools to Upgrade Your Smart Home

Smart Lighting 101: 5 Top Tools to Upgrade Your Smart Home

by admin · Feb 28, 2023

Everyone talks about “smart homes,” but what does that really mean? While smart assistants are often the foundation of any smart home, they aren’t truly smart on their own. Smart lighting is another essential element of your smart home. It includes a wide range of electrical products that use software to interface with your smart hub to give you enhanced control, function, and flexibility of your lights.

We know it can be overwhelming sorting through all of the options available to you as you build your smart home. So, we put together this quick guide to some of the most popular smart lighting tools to help you get started!

Special note: Before you go out and purchase any smart light accessories, remember to check for compatibility. Each smart lighting tool is programmed to work with one or more smart home hubs or apps, like Google Home, Amazon Alexa, Apple HomePod, etc. It will be much easier to keep track of everything if you can control them all from the same place!

  1. Smart Bulbs

Smart bulbs are a great way to get the most out of your lighting. Smart bulbs are often color-changing or range in temperature. These bulbs will work with most standard lamps and light fixtures. 

Smart bulbs are typically LED bulbs and are also energy- and heat-efficient. In addition, they have a long life and are safer than fluorescent bulbs since they use a microchip instead of gas to create their glow. 

Smart bulbs can range in price, averaging at $7-$15 a bulb. 

  1. Smart Plugs and Outlets

You don’t have to change all your bulbs to get the benefits of AI and voice activation. Instead, you can plug your lamps into a smart plug or swap out the entire outlet! This will allow you to use multiple light fixtures or devices in the same place. 

Smart plugs simply plug into your existing outlet as an extension. Then you plug your lamps or other devices into the smart plug, and you’re ready to go!

Smart outlets take a little more work to install, but it’s definitely within DIY reach. While specific installation steps will vary slightly by your smart outlet choice– the basic installation steps are the same. Check out this YouTube tutorial to get a good idea of what you’ll need to do! 

Special note: Always be sure to follow the brand-specific installation instructions that come with your device. 

Smart plugs and outlets range from about $15 to $30 each.

  1. Smart Switches

Try replacing your dumb light switches with something smarter! Smart light switches help you to click through programmed light scenes so you can switch from day to night to entertaining light scapes at the touch of a button. 

Installation is as simple as swapping your current light switch for the next. Check out this YouTube video for a quick and safe installation. 

Expect to pay $25 to $45 amount for your smart switch. 

  1. Smart Bulb Bases

Another way to keep your existing light bulbs but enhance smart features is to add a smart base to your light bulb. Simply unscrew the light bulb, screw the new base on, and reinsert it into the light fixture. Now your bulb’s power is controlled by the base instead of relying on the light switch!

Smart bases won’t enable features to a bulb that isn’t designed for dimming, temperature, or color changes. But it will allow you to incorporate AI, voice activation, and remote reach from anywhere with your phone. 

You’ll likely pay between $15 and $30 for a smart bulb base.

  1. Smart Lighting Kits

Skip the hassle of buying individual tech with a smart lighting kit. These kits include several bulbs and other pieces of tech to get you started for a discounted price. 

These kits range anywhere from $60 to $200, depending on your selected bundle.

Need Help Creating Your Smart Home?

Proper lighting is essential to a fully functioning home– but it can be challenging to nail balanced brightness, great fixtures, and a budget! Contact the experts at Illuminations for advice on your project!

Filed Under: 2023, Bulbs, Buying Guides, LED, LED Lights, Light Bulbs, Smart Lights, Styles & Trends, Styles and Trends

How Lighting Affects Your Health

How Lighting Affects Your Health

by admin · Feb 26, 2023

How to Improve Your Sleep by Improving Your Lights

Sleep has massive importance on your ability to perform at your best every day, but it’s one of the most overlooked aspects of health. If you’ve ever spent the night caring for an infant every hour or finishing a paper in the wee hours of the morning, you’ve experienced firsthand the effects of sleep deprivation. Focusing becomes next-to-impossible, and getting through the day awake can be a challenge. 

Improving your sleep is key to having a better mood, better cognitive functioning, and overall improved health. According to the Sleep Foundation, “light is the most important external factor affecting sleep.” Everyone knows it’s easier to sleep when it’s dark, but the link between lighting and sleep goes deeper than that. By learning more about this link, you can learn how to create an environment that will give you the sleep you’ve been dreaming of. 

The Effects of Sleep (and Sleep Deprivation)

Before we discuss changing your lighting to help your sleep hygiene, let’s talk about why sleep is so important to your overall health. When you sleep consistently, you can “think more clearly, have quicker reflexes, and focus better” (NIH). The National Institute of Health says, “sleep…affects growth and stress hormones, our immune system, appetite, breathing, blood pressure and cardiovascular health.” Part of caring for yourself includes improving your sleep.

When you don’t get consistent and continuous sleep (7-8 hours per night for adults), your health suffers. Some of the more obvious effects of sleep deprivation include a worse mood, impaired cognitive functions, and a shorter attention span. But, did you know that not getting quality sleep can also increase your risk of hypertension, obesity, and Type 2 diabetes? While you sleep, your body performs important functions. If you have trouble sleeping consistently without waking up, it’s time to think about your lights.

Circadian Rhythms

Light and sleep are two sides of the same coin. Light regulates your body’s circadian rhythm – your internal clock that tells your body when to sleep and wake. When light enters your eye, your brain processes information about the light and senses the time of day. Then, a signal is sent from your brain to your body to regulate organs and other systems in your body. (Sleep Foundation) 

If you lived in a world where you were exposed to natural light only, your circadian rhythm would align with sunrise and sunset. However, since we live in a modern world where bright lights are available at the flick of a switch, you need to be more intentional about selecting the lights you expose yourself to, especially in the evenings. The lights you’re using may be affecting you more than you realize!

Melatonin

Light also affects the production of melatonin. Melatonin is a hormone your body makes naturally to help you regulate your circadian rhythm. It makes you feel drowsy and promotes quality sleep. The pineal gland in your brain (pictured above) initiates the production of melatonin in response to darkness. When you’re exposed to light, melatonin production slows down or stops. For some people, synthetic melatonin may be recommended or prescribed, but improving sleep hygiene should always be your first step toward healthier sleep.  (Sleep Foundation) 

Light and Sleep Hygiene

While we want you to sleep well no matter what, your body’s circadian rhythm can be a little sensitive. To account for that fact, you’ll need to manipulate your environment a little. Circadian rhythms are particularly sensitive to light two hours before bed and one hour after waking up. During these times, adjusting your lighting is imperative.

If you have bright household or bedroom lights, dimming them two hours before bed will prepare your body for better sleep. Increasing your light in the morning will keep you alert during the day. Getting dimmable lights is one way to control your lights’ brightness. Using several light sources (lamps, overhead lighting, etc.) is also an option. If dimmable overhead lights don’t work for you, find a dimmable bedside lamp instead! In the morning, turn on the brightest lights in your room and bathroom while you get ready to help yourself wake up. (CDC)

Light Color Effects on Sleep

The color of light you choose at different times of the day will also impact your circadian rhythm and night sleep. According to the CDC, blue and white lights make the biggest difference on your circadian rhythm, especially during the sensitive period at night. 

Blue and Bright White Light

White light contains blue light. Common sources of this light are the sun, LED lights, and digital screens. Exposure to white light can help to improve your mood and keep you feeling more alert and focused. During the day, using white light to wake up and to stay productive is a great idea.

If you’re having trouble sleeping, it’s best to avoid blue and white light sources at night. Yes, that means you really shouldn’t be scrolling on your phone in bed – you might think it’s helping you to unwind, but that light is actively disrupting your circadian rhythm. Some phones have a “night mode” that you can enable that will warm up the temperature of the light, which helps a little, but you’re better off reading a book with a warm, dimmed light. 

Yellow, Red, and Orange Light 

Warm Light, seen as yellow, orange, or red, comes from places like a fireplace or an edison bulb. LED bulbs can also be purchased that give off this type of light – they’re often called “warm white” or “soft white.” Yellow and orange lights have very little effect on your internal clock, so picking these colors for your room shouldn’t interfere with the sleep you’re dreaming of. Red light is the only color that has no effect on your circadian rhythm. 

Get Better Sleep with Smart Lighting Choices

Changing your environment to promote better sleep can be as simple as switching out a few light bulbs. Pay attention to which kinds of light you have in your home, especially in the places you spend time at night. If you spend your evenings in the living room under bright white bulbs, that could be impacting the sleep you’re getting.

Fortunately, switching out the color of your light bulbs is a relatively easy fix for most fixtures. To give yourself the best lighting for a good night’s sleep, we recommend choosing warm white bulbs for your bedroom and bedside tables, and for the rooms you use in the evenings, such as the dining room, den, or living room.

Rooms where you need to focus, like the kitchen or your office, often have bright white lighting. Minimize your time in these places, or look at adding lamps or under-cabinet lighting that can allow you to use the room with a warmer, less bright light. 

The multi-use spaces in your home where you need to focus during the day and relax at night can be the hardest. Lamps and/or dimmer switches in these areas are a must for good sleep hygiene. Another option would be to install color-changing bulbs that can take you from bright white to soft white throughout the day. Color-changing bulbs usually require you to change the color manually with a remote. If you’re willing to spring for smart bulbs, many can be programmed to change throughout the day or on command.

We know that fixing your lighting environment won’t magically take away all of the things that keep you up at night. But we can guarantee that making smart lighting choices at home will help you to go from early-morning alertness to late-night drowsiness without your light bulbs messing up your internal clock. 

—

Choosing the right lighting is important for your health. If you need help optimizing your home’s lighting for a good night’s sleep, give the lighting experts at Illuminations a call, or stop by our showroom to chat in person! We’d love to help. Sweet dreams!

—

*Disclaimer: Lighting, while important, won’t replace expert health care. If you have concerns about your sleep, please remember to make an appointment with your doctor.

Filed Under: 2023, Healthy Lighting, Life & Style, Lighting Types, Sleep, Wellness & Safety

5 Tips to Create the Dreamiest Porch

5 Tips to Create the Dreamiest Porch

by admin · Feb 23, 2023

The front porch is an often overlooked space which is, in our humble opinion, a shame. A cozy front porch is a perfect refuge from any inside chaos. It’s the first thing a guest sees and a private place for an intimate conversation with a close friend or family. Here are some tips to help you create the front porch you’ve been dreaming about:

  1. When in Doubt, Add Plants
  2. Let Your Door Speak For Itself
  3. Lighting, Lighting Lighting 
  4. Less is More!
  5. Pick Comfortable Seating

1. When in Doubt, Add Plants

One of the simplest ways to level up your porch is to add some plants and flowers. Choose real plants if you have the time and motivation you to keep them alive or, if your thumb is less-than-green, just stick with faux. Either way, a little bit of green adds a lot of life and color to a house!

Throw a couple of potted ferns like these on either side of your door to add a touch of green without going overboard. Simple, but effective.

Look, we know not every house is blessed with beautiful draping greenery like this one, but who could resist this Secret-Garden-like oasis? If you’ve got a green thumb, this front porch is one to aspire to.

Flowers

If you want to turn the head of any passerby, flowers are the way to go. They add a pop of color and are a guaranteed way to brighten everyone’s day!

Potted flowers are a good solution if you have a minimal front yard or no flower beds. This porch’s flowers are to die for, but you don’t have to have this many for a stunning result! Even tossing a couple of pots next to your door can add vibrance and life.

Hanging flower baskets are a classic way to add some dimension to a porch. Choosing to hang flowers instead of having them on the ground can also save space so you won’t have to sacrifice the porch set you’ve had your eye on.

2. Let Your Door Speak for Itself

You can do a lot to dress up a front porch, but if the door is lackluster, you’ll be hard-pressed to make the rest of the porch shine. Whether you paint your door, replace the hardware, or replace the whole door with something more your style, don’t forget to give it some TLC!

Whoever picked the color on this door should be given an award! This minty green pops against the red brick, and the gold hardware ties the whole look together.

A simple wooden door can bring warmth to a neutral-painted house like this one. We love how the sconces match the hardware on the door of this home to create a cohesive look. Even the smallest detail is accounted for and we’re impressed! 

3. Lighting, Lighting, Lighting

Lighting is a simple way to take your porch to the next level. There are tons of options to choose from, but two of the most common (and effective) front porch fixtures are sconces and pendants. If you have a larger porch, you should also look into recessed lighting to give you more light.

Sconces

A sconce is a wall-mounted light fixture that’s often used next to or above the front door. Picking the right ones for your house makes a big impact on your porch’s aesthetic and style. Check out how well these homeowners did!

These sconces have a rustic feel that contrasts beautifully with the white siding. They give this home just a spritz of farmhouse!

This sconce has a little more flair but is still a classic style you won’t need to replace when trends change. We also giving this porch bonus points for the fan above the rocking chairs! There’s nothing better – or more refreshing – than a cool breeze in the summertime.

This porch’s clean lines flawlessly match the sconces, giving the whole look a modern edge we love!

Pendants

A pendant is a light fixture with a cord or chain and usually just one light attached. They’re commonly used above a door in an entryway with a higher ceiling. Pendants are practical, but they also make a gorgeous focal point. Here are a few to inspire your next porch project!

The warm stone flooring on this porch needs some contrast to make it feel up to date. The black-finished pendant combined with the matching black door complete the whole ensemble.

This porch is timeless. A warm door combined with a simple, but elegant pendant is a classic combination to make any house feel inviting.

Pendants are incredibly versatile and work well in a number of locations – not just above the doorway. They’re also a great choice above porch furniture to create a comfy space for a leisurely chat with a friend.

4. Less is More!

Redoing your front porch can feel overwhelming, but it doesn’t have to be. These simple porches prove that less really can be more with some expert advice!

There’s nothing prettier than a warm wood door and black shutters, especially on clean white siding. This porch has. it. all. Symmetrical greenery, gorgeous sconces, some simple furniture, and a fan are truly all you need to have a beautiful and functional porch.

If you have a small porch, using some hanging elements (pendants, flowers, etc.) will add dimension and will give you space for some furniture without sacrificing a beautiful result.

We love the creativity of this small porch! Since there’s no room for plants next to the door, this homeowner added greenery on the sconces. The arched window above the door is the prettiest focal point to bring together an elegant, but minimal look.

This porch looks bigger because of the reflection of the windows on the door. The rest of the space is also well-used. From the small plants placed on stands to make them look taller to the hanging pendant, every inch is accounted for!

5. Pick Comfortable Seating

There’s something nostalgic about sitting on the porch on a summer night – like an ode to the simpler times of days gone by. Picking comfortable seating will make you want to sit on your porch, reflecting and enjoying the simplicity of the moment.

Porch Swings

There’s nothing more soothing than the back-and-forth motion of a porch swing!

The cozy cushions and pillows on this swing make it the ideal spot to snuggle up with a blanket for an autumn nap or to curl up with a book.

This swing lends itself perfectly to a conversation with a friendly neighbor, family member, or friend.

Rocking Chairs

Make the most of warm spring and summer days by relaxing on a rocking chairs with an ice cold lemonade sitting on a table beside you!

Rocking chairs are a comfortable seating option, but they take up less space and aren’t quite as permanent as a swing. The pillows on these pretty white rockers tie in the shutters on the house and are the perfect spot to enjoy a bit of nature.

Rocking chairs are simple and inviting whether they’re styled or not. We love the idea of watching the neighborhood kids ride their bikes, watching the dogs be walked, and seeing the world slow around you as the sun sets from the comfort of your rocking chair.


Don’t let your front porch fall by the wayside any longer! When you’re ready to get to work creating the porch of your dreams, give Illuminations a call. We’ll give you all the tips you need to make your dreams a reality.

Filed Under: 2023, Outdoor Lights, Styles & Trends

How Many Light Bulbs Do You Need? Understanding Lumens

How Many Light Bulbs Do You Need? Understanding Lumens

by admin · Feb 21, 2023

Are you updating your light bulbs, but not sure how bright you need them? Or how many bulbs your room needs?

You’re not alone in the confusion. It can be difficult reading the package in the hardware store and understanding what the bulb will do for your home. 

This post will briefly touch on how lumens work and then guide you on how to make sure you have the right light for each room in your house.

What Are Lumens?

With major innovations in lighting over the past twenty years, bulbs have become much more efficient. That’s great news for your electric bill and the environment! But a side effect is that watts are no longer a good measurement for brightness. 

Watts measure the amount of energy used by the bulb. When all bulbs were incandescent, this also indicated brightness– the higher the watts, the more energy used, the brighter the bulb. 

But with more efficient bulbs, like halogens and LEDs, much less power is used while still producing bright light. So a 40 watt incandescent light gives off the same light as an 8 watt LED! 

So how will shoppers know that an 8 watt LED will replace their 40 watt incandescent? Instead of measuring power use, lumens measure brightness. Now no matter the energy efficiency, you can compare bulbs apples to apples. 

How Many Lumens Do I Need?

So how many lumens do you need for your space? To calculate the right lumen range, you need to know the square feet of the space and the proper foot candles for the area. 

The square footage of your room will help you know how much light you need– the bigger the space, the more light you need. To find out your square footage, simply measure the length and width of the room, then multiply those two numbers. 

For example, if your room is 10 feet by 12 feet, your room is 120 square feet (10×12=120). 

“Foot candle” is a less familiar term, but it means the brightness of a light source from one foot away. The target foot candle range will depend on the activity of the room. For workspaces like kitchens and offices you’ll want more light (more foot candles), and for bedrooms and dining rooms you’ll want less light (fewer foot candles). 

Once you have the square feet of your room and the target foot candles, then you can determine how many lumens you need. Simply multiply your square feet by the desired foot candles!

Let’s say that your bedroom is 120 square feet. Multiply 120 by 10 for the low end and by 20 for the high end of the target zone. 

120 x 10 = 1200

120 X 20 = 2400

Now you know that you need between 1200 and 2400 lumens for your bedroom!

Simple Cheat Sheet

If you don’t want to worry about foot candles, here’s a chart with a general estimate of how many lumens you need per square foot per area of your home. Remember, these calculations help determine the total light a room needs. But you’ll often concentrate light above tables, countertops, or a desk.

So if your living room is 15 feet by 20 feet, your total square footage is 300 (15 x 20 = 300). Then multiply that by the recommended 10 lumens to get a minimum of 3,000 lumens for your living room (300 x 10= 3,000). 

How Many Bulbs Do I Need?

It may seem overwhelming to need a few thousand lumens for your room. Don’t worry– you will still use relatively few bulbs to get all the light you need. For reference, an 8 w LED bulb will give off about 450 lumens of light. 

With just a few bulbs, you’ll have all your lighting covered. Put three in the ceiling fan, add a lamp with one bulb, and you’re done!

Need Help?

Proper lighting is essential to a fully functioning home– but it can be challenging to nail balanced brightness, great fixtures, and a budget! Contact the experts at Illuminations for advice on your projec

Filed Under: 2023, Bulbs, Buying Guides, Informational, Light Bulbs

How to Decorate Your Front Porch for Every Season

How to Decorate Your Front Porch for Every Season

by admin · Feb 21, 2023

20 Beautiful Front Porch Pictures to Inspire Your Seasonal Project

Your front porch is the perfect place for a seasonal refresh when you get the itch to redecorate! With some classic furniture and lighting and a few simple decor swaps, you’ll have a front porch that’ll make you want to celebrate every season.

Spring

The earth feels brand new when the last bits of winter finally melt away. It’s the best time to breathe some life into your porch. Exercise that green thumb, or fake it with some faux plants. Either way, flowers and greenery are the way to go when spring is in the air. 

This picture is a florist’s dream. Hanging many garlands may be a bit unrealistic, but adding a few flowery garlands (possibly on a railing) and a matching wreath would give a similar result without all the effort!

Flower beds are a foolproof way to add some seasonal color. These tulips and daffodils are spring staples. They’re perfectly positioned for height and dimension. Plus, a black pendant light like this is a classic element that’ll work regardless of the season! For proof, check out the same porch in our fall and winter section!

Window boxes are another simple way to liven up your porch. If your green thumb has turned a bit brown, pick some faux plants or flowers instead. Some faux plants look so realistic nobody will know the difference!

Hello yellow! The neutral green and white wreath make this yellow door POP! If your door is neutral, pick a wreath with bold colors to provide a stunning focal point. When the seasons change, simply swap out the wreath and replace the matching greenery.

A vibrant door and warm-toned wreath combo are the perfect spring-summer tie-in. With this pretty pendant light hanging above the door, this porch won’t go unnoticed no matter when you’re decorating!

Summer

Summer nights spent on the porch evoke the nostalgia of simpler days. Sprucing up your porch to fit the season will make you want to grab your favorite drink, cozy up with a book, and pass the time. No deadlines or stress will get in your way when your porch feels like summer!

Nothing says comfort like a porch swing, and this one is to die for. The warm wood tones of the ceiling and swing compliment the black paint and greenery beautifully. This homeowner also gets bonus points for the recessed lighting – a great choice! They blend in nicely without detracting from that gorgeous wood ceiling.

This All-American porch is what summer dreams are made of. The rocking chair is a classic piece of furniture the sconces will fit any season. With a porch lacking a roof overhang, they fit nicely and highlight seasonal decor. Throw in an American Flag for Independence Day and you’ve got a simple summer porch you’ll want to enjoy immediately!

Remember those window boxes full of flowers that died last season? It’s time to say goodbye. Head over to your local plant nursery and find some new flowers that’ll last in your climate. These cute flowers with the amazing green shutters are all the inspiration you need to get to work!

Every cozy porch has one thing in common – comfortable furniture! If you’re still using the stiff, sun-worn furniture you inherited from your Great Aunt Susan 10 years ago, it may be time to consider an upgrade. Pick something you’ll be making excuses to go outside and sit in!

Summer porch decor is all about the plants! These rosebushes over the architectural awning give a minimal touch of color that whispers summer. A dainty pendant is the cherry on top of this charming design. It’ll illuminate this gorgeous porch on summer nights and will transition to every season seamlessly.

Fall

These porches make us want to don our best sweaters, grab some apple cider, and head to the pumpkin patch! The crisp air and flavors of autumn are tough to beat, but these fall-inspired porches make it a close call.

Meet your new best friends this autumn: buffalo plaid, mums, and pumpkins! Throw in some subtle lanterns to tie in the sconces and a neutral wreath that coordinates with the gray pumpkins, and your porch is dressed and ready for sweater weather!

More is more on this porch. Give me all the pumpkins, hay, wheat, and leaves! Adding some lanterns with with candles was a great call here too. Instead of choosing candles that will burn out and need to be replaced, consider solar lighting that’ll charge during the day and light your way at night!

This porch is a mood. The dead hydrangeas that this homeowner somehow worked into their decor are a stroke of genius! The candles in jars add just the right touch of elegance. We’re ready for Halloween.

Speaking of Halloween, how can you not love this decor? This porch has just a touch of spooky season, but it can easily be switched out once October ends. Just tuck the jack-o-lantern away and replace the Halloween railing decor with a leafy fall garland, and you’ll have a Thanksgiving-ready porch in no time. The classic black finishes on the stairs, sconce, and door make this house easy to transition between moods and seasons.

The decor on this porch will have you heading to the pumpkin patch to get lost in a hay maze. This porch proves decorating doesn’t have to be complex. Use what you have! A watering can, a few pumpkins, and a hay bale are all great decor ideas for your fall-inspired porch.

Winter

Bring on the red and green, holiday music, and peppermint hot chocolate! The holiday spirit is alive and well on these porches. Nothing brings more joy to this season than a festive front porch.

Winter may be our favorite time of year to decorate for, but I guess we’re a bit biased. The twinkle lights hanging everywhere fill the whole neighborhood with magic. This porch is no exception! The potted and lit trees and walkway lights lead you to the door. The hanging pendant welcomes you in. You can’t help but feel the holiday spirit!

Pillars like these deserve to be wrapped in red and green. Garlands are a simple piece of winter decor anyone can find a use for! Adding in the red ribbon and festive wreaths dress this porch up for the holiday season.

This porch’s over-the-top creativity has us swooning. Hanging ornaments from ribbons next to the pendants is brilliant! Lights are incorporated throughout this design – from the coordinating pendants, the sconces, and walkway light to the Christmas lights and string of globe lights, this porch is a holiday masterpiece. Planted poinsettias bring the look together and have us dreaming of winter all year.

Decorating for the holiday season doesn’t have to be time-consuming or break the bank. Red ribbons on some existing potted plants (faux or real), an elegant wreath, and a garland turn this house into a cozy holiday home without having to battle with your attic storage year after year. This porch is just missing some sconces next to the windows with red ribbons to tie together the look!

Holiday decor is done right on this styled porch! If you don’t have evergreens in your yard to dress up, a few potted trees like these do the trick. Garlands and wreaths are holiday classics, but we love how even the smallest detail is accounted for. The chopped wood reminds us of a cozy fireplace ready to be lit. Even Santa’s burlap sack is ready for Christmas! As always, lighting is the icing on the cake. With some globe string lights and a white sconce that blends so your decor can be at the forefront, this porch is complete.

—

No matter the time of year, your porch can be a safe haven from the chaos of the everyday. Seasonal decorating can help you feel at home as you move through the year, but don’t forget to invest in decor staples, furniture, and functional pieces that’ll last the whole year. Light fixtures with a black finish, for example, will look good and stand out no matter what season you’re decorating for! For some expert advice on creating a front porch that’ll illuminate your decor, give Illuminations a call!

Filed Under: 2023, Decor & Home Accents, Holiday, How to, Outdoor, Outdoor Lights, Styles and Trends

« Previous Page
Next Page »

Copyright © 2025