• Skip to primary navigation
  • Skip to main content

Illuminations

  • Buying Guides
  • Styles & Trends
    • Bathroom Lights
    • Ceiling Fans
    • Ceiling Lights
    • Lamps
    • LED Lights
    • Outdoor Lights
    • Smart Lights
    • Wall Lights
  • Wellness & Safety
  • Shop Products

2022

How to Choose the Right Bathroom Vanity Lighting

How to Choose the Right Bathroom Vanity Lighting

by admin · Apr 16, 2024

When done right, your bathroom lighting should be able to take you from a bright morning routine to an evening spa break to a midnight trip to the restroom without feeling too over or underpowered in any scenario.

Most builder-grade vanity lights just don’t cut it. They’re often too high, too bright or dim, and don’t really add much to the design of your bathroom. So if you’re ready to try something new, we’ve compiled a list of the most common vanity light fixtures to help you figure out precisely what you (and your bathroom routine) need to create the bathroom oasis you deserve. 

Here is a short list of light fixtures and bulbs to consider so that you’ll be prepared to balance the functionality and style according to your budget and available space.

Types of Vanity Light Fixtures

Your bathroom vanity includes the mirror, counter, sink, and surrounding lighting. Vanity lighting is often the only source of light in the bathroom – and it largely determines your experience there. So it’s important to get it right!

There are several types of vanity light fixtures, each with its own set of benefits. Which one you choose is up to you – but make sure you consider both style and function to make sure you’re happy with the result.

Vanity Light Bar 
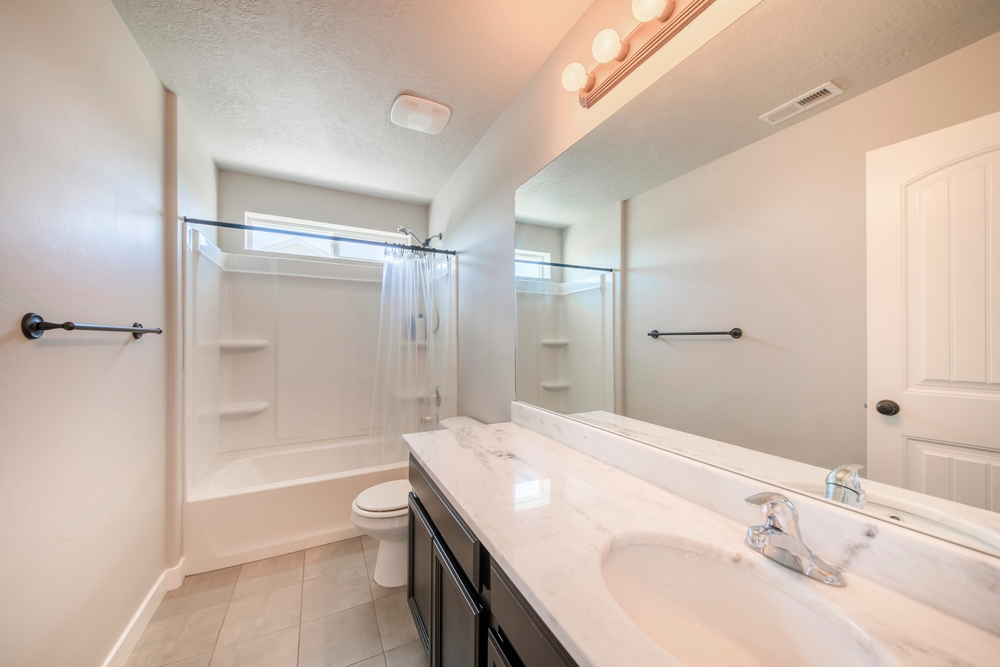
Light bars are the most common fixture for bathroom vanities because they’re easy to install and give off a lot of light. Light bars consist of a long base (the bar) with light emanating from its entire length. They’re usually mounted just above the mirror from a single, central wiring box. 

Most people picture a base with multiple bulbs sticking out into the room, like you’d see in a “builder’s grade” new home or surrounding the mirror in a makeup artist’s studio. Other light bars consist of a single, long light source, such as a sleek LED bar or a fluorescent tube. 

The advantage to installing light bars is that they create even lighting with fewer shadows. (Anyone who’s ever done makeup or shaved using a bathroom mirror knows how important that is!)

Pro tip: The most crucial part of successfully using a light bar is getting the proper proportions. Ensure the bar is at least 75% the mirror’s width and never longer than the counter below. Keeping the bar at least 6-6.5 ft high will give even light without shining directly into your eyes. 

Mirror-framing Sconces 

Sconces are light fixtures that attach to the wall rather than the ceiling. They’re often found above the center of the mirror, although it’s worth considering placing your sconces on either side of the mirror– you’ll get the best light for your morning routine and playfully break from tradition! 

The number of bulbs and types of shades will impact your placement. Some shades only allow for downward light, so those work best up high. Glass shades are a little more forgiving – they’ll shine light on your face when installed above or to the side of the mirror. 

Not only are sconces an excellent fit for lighting your vanity, but they also make a statement. You’ll show that you put real thought into your bathroom design by using a non-traditional fixture.

Pro tip: We recommend mounting sconces with the center of the fixtures about 60″ high and about 28″ apart. Try installing one on either side of your mirror to get even, shadow-free light on your face as you’re getting ready.

Unexpected Pendants
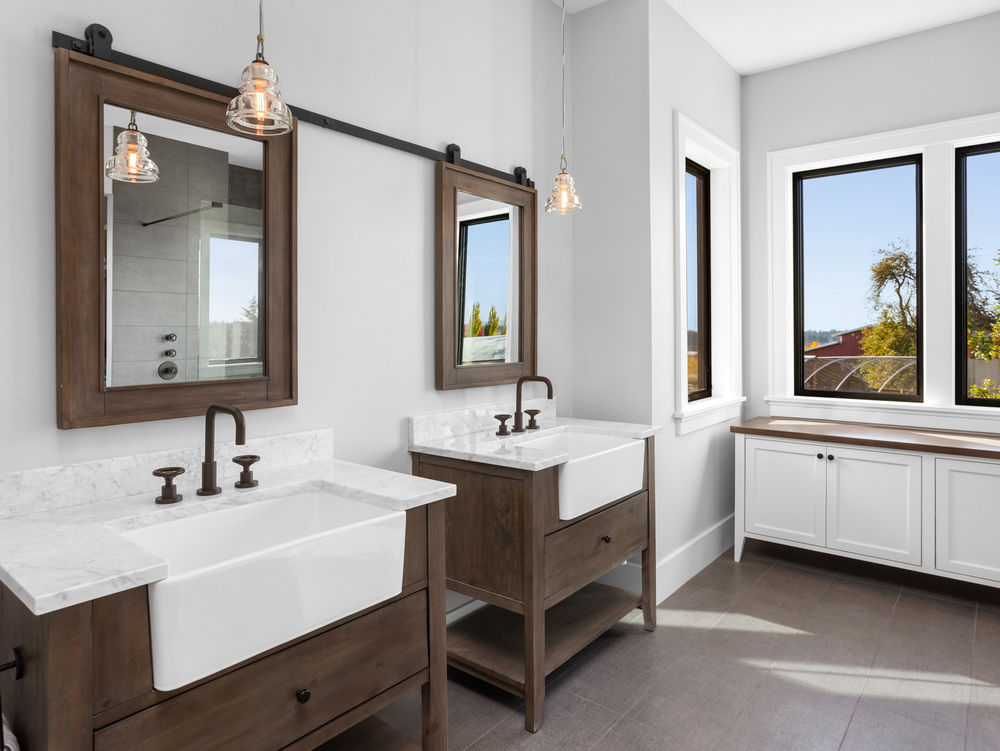
If you’re looking for a way to make your bathroom look unique, try out pendant lighting. These fixtures hang directly from the ceiling, with the bottom of the shade right above eye level. Not only are pendants a bold statement, but they’re also a versatile option if you’re short on space.

In a bathroom, sconce and pendant placement guidelines are very similar. A single pendant directly over the mirror is an excellent option for small bathrooms. They also work well as a pair, framing the mirror on either side. 
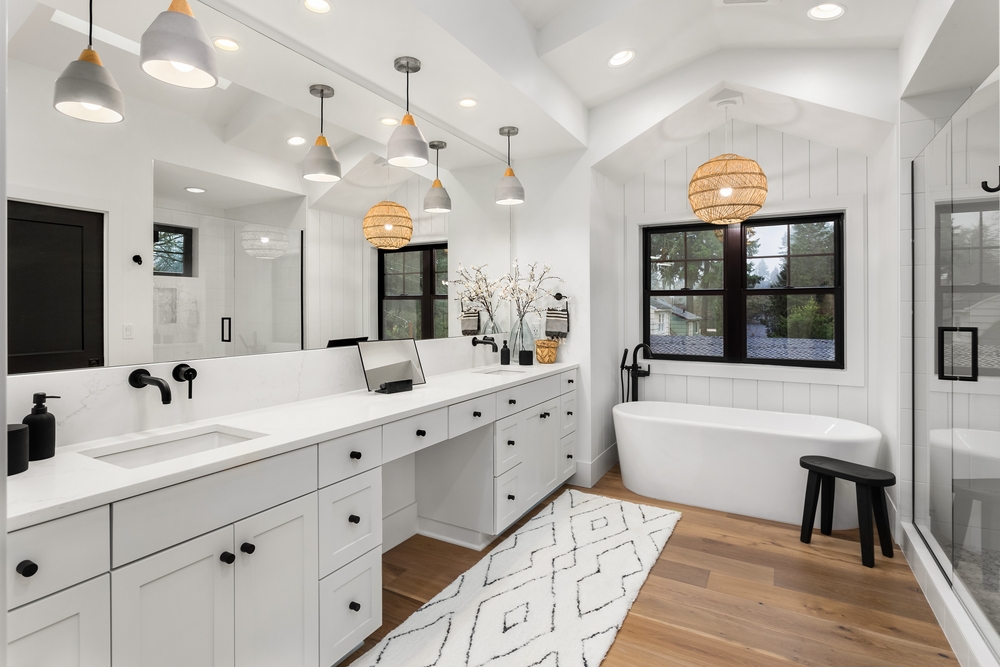
Because pendants have an extra “wow” factor, they’re also sometimes used in larger groups to create a design element. For example, this designer hung multiple pendants along the mirror – and we think it turned out great!

Pro Tip: We recommend spacing your pendants about 30 inches apart to avoid harsh lighting. Also, keep in mind the pendant’s ability to shine directly onto the mirror– a thin or transparent shade will reflect a lot of light. It’s a good trick to make your space feel brighter but may cast unexpected shadows.

Modernize with LEDs
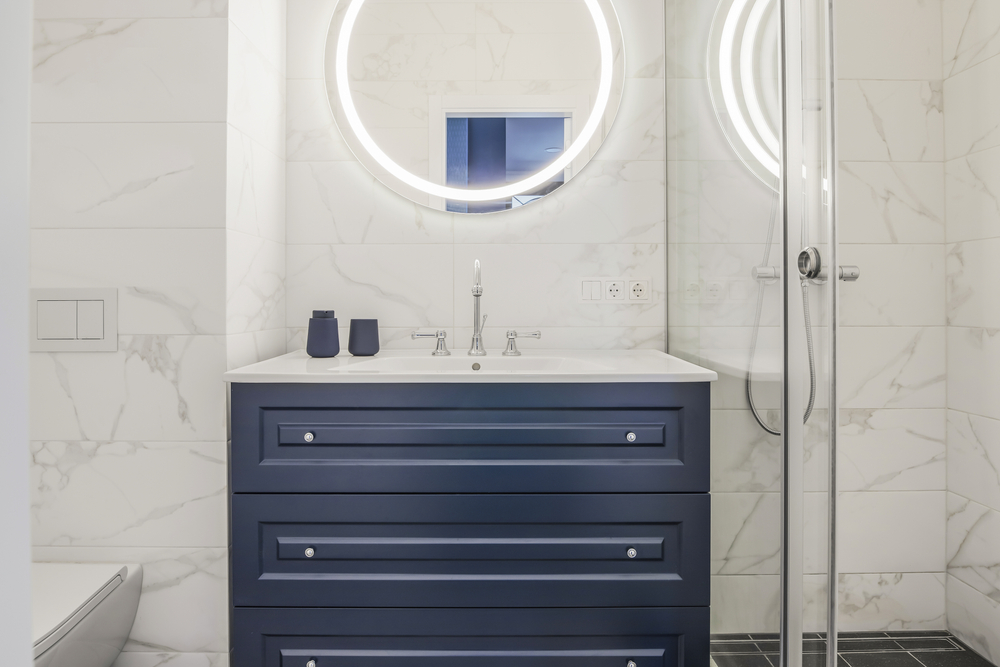
For a modern (and energy-efficient) touch, consider opting for LED lights. They last for years, cost little to run, and come in a wide variety of color options.  LED light bulbs can be installed in almost any fixture in place of a traditional bulb.

Some light fixtures come with LED lights already integrated, which means you’ll never have to change a bulb for the life of the fixture. While these mirrors come in a variety of styles, they’re most often found in sleek, modern bathrooms with a minimalist feel. 
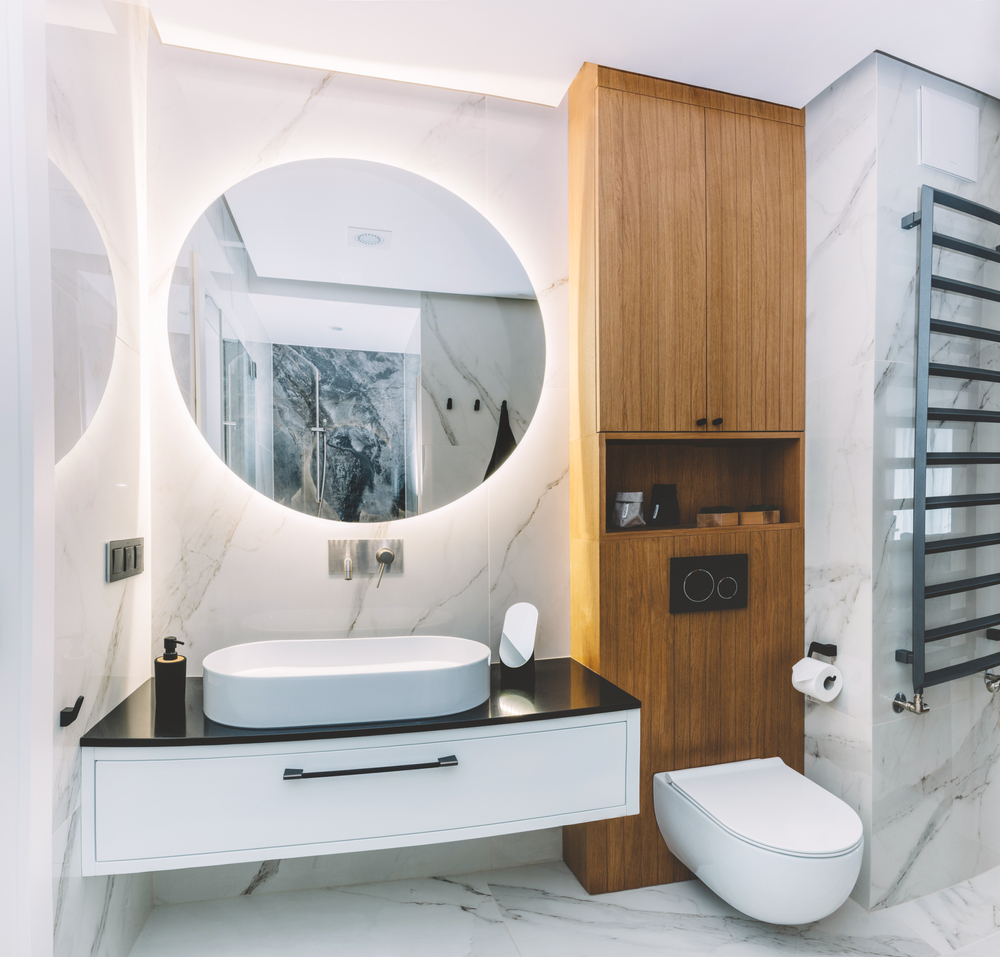
LED strip lights may be an unexpected choice for the bathroom. They’re easy to install (some are even peel-and-stick!) and will make your bathroom feel high-end with just a little bit of creativity. As vanity lighting, try installing them behind a mirror to give a soft, luxurious glow. 

Pro tip: Because they are so small, LED strip lights can be tucked in unexpected places, like along the underside of a mirror to light the counter, or along the bottom of a floating vanity to light the space underneath. Adding light to dimly-lit edges and corners of your bathroom will make it feel bigger!

When to Hire a Pro

If you own a newer home and have tools handy, you can probably handle most light fixture upgrades yourself. But not all fixture update projects are created equal. For example, you may have an older home that requires electrical updates, don’t own tools, need new circuits for new fixture locations, or simply don’t feel comfortable with an electrical project. 

Electricians will ensure your new fixture is installed quickly and safely. Not sure how to hire a qualified electrician? No problem! Your local lighting showroom can often connect you to a great pick– and offer a wider selection of fixtures while you’re there!

Ready to update your bathroom vanity? The experts at Illuminations can help you find the right fixture for your room, budget, and style. Contact us today!
Filed Under: 2022, Bathroom, Bathroom Lights

How Light Bulbs Made the Industrial Revolution Possible

How Light Bulbs Made the Industrial Revolution Possible

by admin · Mar 26, 2024

The Industrial Revolution was marked by invention, early machinery, and mass production. Likewise, modern methods of supplying fuel, preserving food, producing clothes, and providing health care began with the Industrial Revolution. And a crucial common factor across the modernization of these industries? 

Light bulbs.

Let’s set the stage. As the global population increased in the 1800s, a vicious cycle emerged. With more food, medicine, and shelter available, more children survived to adulthood. More adults meant more families with children, creating greater demand again. So over and over, more people were born and lived longer than before and increased demands on the global economy.

As early supply chains attempted to provide basics to the growing population, its success led to more people surviving.

The Industrial Revolution characterizes an era of inventors, undoubtedly fueled to relieve suffering and improve old methods. In short, it was an attempt to tame this cycle by providing more goods faster, easier, and in better conditions.

But the trouble was, demands for goods often rose faster than was safe to produce them. As a result, many industries struggled to find ways to increase production, but the light of a candle could only go so far into the night, and it came with dangerous risks and consequences.

Coal Miners: The Backbone of the Industrial Revolution

Let’s start with some of the most heavily relied-upon characters of the Industrial Revolution– coal miners. As demands for residential heat grew, so did the need for fuel for factories and trains.

Coal miners dug deep underground to supply the world with the required fuel. It was dangerous work, not only because of the use of explosives underground but because it was so dark. Lack of proper light made accidents common and kept production slow.

Candlelight was the only source of artificial light then. This posed a problem because mines often release flammable gases. The slightest fire exposure in the tunnels regularly resulted in explosions with hundreds dead. Inventors tried– but were unsuccessful– to create proper fire shields. As the need for coal grew, so did the number of fire-related incidents and deaths in the coal mines.

Reducing Fire Risk in Textile Factories

Another significant mark of the Industrial Revolution was the beginning of mass-produced clothing. Before factories existed, most clothing was tailor-made for each family member. Wealthy families hired sewists, and low-income families made their own clothing.

Textile factories promised to speed clothing production and free up time for other work. But unfortunately, textile factory workers faced a similar problem to that of the coal miners. 

Before making clothing, cotton had to be spun into thread, then woven into fabric. This fabric would then be cut into patterns and sewn into finished clothing. The system of processing cotton led to very dusty rooms filled with tiny floating pieces of raw cotton. Even the smallest flame could catch the floating cotton, creating a runaway fire in moments. These fires took down entire factories in moments, often with few survivors.

Unlike the miners, textile workers could use the light of day through windows. But there was little sunlight in rainy regions or during the winters. So textile production had to slow or risk the use of candlelight according to the weather or season.

Here again, the invention of the electric light bulb allowed for safer work and better conditions for these workers. Electric light reduced the strain on workers and evened out available work hours. The growing population could now count on having enough clothing.

Impact on Food Preservation

The United States population exploded between the 1800s and 1900s as territory expanded. Consequently, the demand for food increased with these settlements and cities.

People’s access to food in the early 1900s was determined mainly by what they could grow themselves. You would eat some of the fresh food you could grow during the summer and store the rest to survive the cold winters. As a result, starvation was a constant threat, and malnutrition was common.

During the Industrial Revolution, many factories opened and started to mass-produce canned food. While canning factories did not risk the same dangerous fire as miners and textile workers, they still had limited light.

Enabling Quality Healthcare

Finally, light bulbs improved the quality of healthcare in hospitals around the globe. The 1800s showed a marked increase in understanding human anatomy and how to save a person’s life after a severe injury.

However, medical attention requires detailed work, and poor sanitation and techniques cost thousands if not hundreds of thousands of lives. Even the simple fact that candles and firelight distort color made it difficult for early medical professionals to accurately gauge a patient’s health status. 

Beyond surgeries, hospital care, or home visits, the development of new medicines was also limited before the Industrial Revolution. For example, penicillin was developed in the 1920s – 1940s and is widely regarded as the first true antibiotic. The drug was developed through the work of many scientists observing bacteria cultures in universities, and it saved countless lives during World War II alone.

Although light bulbs alone did not allow for the creation of penicillin, the availability of consistent light (partnered with microscopes and other technology) is clearly linked with a massive spike in new medication since the early 1900s. 

Lightbulbs: The Unsung Hero of an Industrialized World

We owe our modern, comfortable world to many inventions of the late 1800s and early 1900s. Still, there is no doubt that none of them would have been as successful without the invention of the electric light bulb. And so, the ordinary light bulb is the unsung hero of the modernization of the world.

So, the invention of the electric light bulb created the possibility of an industrialized, modern world– a world where people had enough heat, food, and medicine. The light bulb allowed for safer working conditions and paved the way for other inventions that advanced humanity as a whole.

Electric light provided bright, steady light for miners without a significant risk of explosion. As a result, artificial light significantly reduced the number of deaths. As a bonus, it also allowed them to work faster. Thus, miners could better fuel the world, unleashing the Industrial Revolution.

Food production through factories was unleashed with electric lights. The world now had an efficient and cheap process to provide food that could last months or years on the shelf.

As one could imagine, electric light significantly improved healthcare quality. Surgeries were performed with much better lighting, and follow-up care received better attention. Doctors and nurses could discover infections faster and perform precision work with accuracy.

Aside from hospital care, proper lighting enabled the creation of new medicines and techniques. Electric lighting was not the only factor to decrease medical-related deaths. Still, the widespread availability of steady light enabled doctors and scientists to make significant strides in proper care.

—————

At Illuminations, we are proudly following in the footsteps of these early lighting engineers. We are just as passionate about lighting the world as they were as we supply homes and businesses with the latest designs and functionality. Talk with an expert at Illuminations today to get custom advice on your lighting needs.

Filed Under: 2022

Lumens vs Watts: What’s the Difference?

Lumens vs Watts: What’s the Difference?

by admin · Mar 5, 2024

Light bulbs have been lighting up our world for over a hundred years, but do we really understand how they work? When you go to the store to buy a replacement bulb, the box labels are filled with numbers and industry terms that can leave you wondering how to know which bulb you actually need.

Fortunately, understanding the difference between lumens and watts is fairly straightforward. Take a quick minute to read this quick summary, and you’ll be ready to hit the stores to find exactly what you need.

Lumens

Lumens measure the amount of light a bulb emits. The technical definition is “the unit of luminous flux, equal to the luminous flux emitted in a unit solid angle by a point source of one candle intensity.” In less scientific terms, the higher the lumen rating, the brighter the bulb. Most mainstream bulb labels use the full term, but if you can’t find the word “lumens” on the label look for its abbreviation, lm.

How many lumens do I need?

Contrary to popular belief, you shouldn’t put the brightest bulbs you can find in every area of your home. The rooms in your home will all need different levels of light, depending on how you use them. Use bulbs with a high lumen count in areas where you need a much brighter light, like above your kitchen counters. You need much less light in your bedroom, so consider going with lower lumen count bulbs in warmer colors to keep it a relaxing space where you can get some sleep.

While there are complicated equations out there that you can use to calculate your “exact” lumen requirements, the trouble is that every person and every space is different. You may find that you prefer brighter lights than what’s “necessary” in one place and dimmer lights in another. Your best bet is to try a few different bulbs, or better yet – get a dimmer switch so that you can customize your light levels depending on your needs for the day.

Pro Tip: Lumens can be added across several light sources in a space. It’s not an exact science because it doesn’t take into account distance from the source and the angles of the light, but if you have three 800lm bulbs in a room, it will be lit with roughly 1800lm.

Watts

Watts measure the amount of power consumed by the bulb. One watt isn’t much, it’s equal to 1/746 horsepower. It’s named after James Watt, a Scottish inventor credited for creating a steam engine during the Industrial Revolution. The symbol for watts is “W”.

Most electrical devices are rated in watts, although large appliances that use more power are often measured in kilowatts, which is equal to one thousand watts. (1W = 1000kW)

The wattage of a bulb will tell you only how much power it consumes, not how bright it is. The lower the watt rating on the bulb, the cheaper it will be on your energy bill to light your house.

Before you buy, always check your light fixture for its watt rating. Never put a bulb with a higher watt rating than the fixture can handle. If the bulb tries to pull more power than the fixture can handle, it could start a fire.

 Energy-Efficient Bulbs

Before the days of LED bulbs, it was pretty easy to get a good idea of how bright a bulb was by simply looking at the wattage. The higher the watts, the brighter the bulb. LED lightbulbs can give off the same amount of light as a traditional bulb using far fewer watts. This is what the labels mean when they say the bulbs are “energy efficient” – they need less power to provide equivalent light.

TL;DR Lumens and Watts

Lumens and Watts both describe how a lightbulb works. Lumens measure the amount of light a bulb emits – the higher the lumens the brighter the bulb. Watts measure the amount of power a light bulb uses. Newer light bulbs like LEDs can produce a lot of light (lumens) using very little power (watts), making them more energy-efficient.

——–

Need help finding the right light bulb? Give the experts at Illuminations a call!

Filed Under: 2022, Energy, Energy Efficient Lighting, General Lighting Tips, Informational, Light Bulbs, Lighting Types

9 Solutions for Your Dark Closet Problems

9 Solutions for Your Dark Closet Problems

by admin · Feb 13, 2024

Did you know that a quality walk-in closet is in the top five sought-after features in homebuyers? An inviting walk-in includes a clean space with plenty of light and storage.

Lighting is a powerful design element, and it’s especially important in small spaces. Average closets typically have one light source in the middle of the ceiling. Closets like this can feel smaller than they are, dated, cluttered, and even dusty. Great lighting, however, makes a closet feel inviting, up-to-date, intentional, and extravagant.

An impactful closet “lightscape” doesn’t necessarily require a large amount of money or professional work. Below are easy tips and tricks to making a walk-in closet feel like a million bucks on any budget.

1. Layer Lighting

When designing any space, it’s a good idea to think about light in layers. Using a variety of light sources makes the space feel intentional and adds functionality. Map out the closet and think about which lighting elements would make the most impact. Remember, there’s no such thing as too much light!

A few good questions to ask are:

  • How many different light sources will the space need?
  • Can you incorporate natural light?
  • What is the existing hardwiring footprint?
  • Will this be a DIY project, or will the budget allow for professional help?
  • What is the desired feel? Cozy, bright, elegant, modern?
  • What materials and finishes will pull the lighting and space together?

2. Ceiling lighting

A great place to start the closet upgrade is replacing the ceiling light fixture.A simple, upgraded flush-mount fixture with extra bulbs can really make a huge difference – all of that extra light will make your closet feel bigger, plus it’ll be easier to find what you need. 

Swapping out a ceiling light is a relatively simple DIY because is uses the existing wiring. Your new light will come with an installation guide to walk you through how to set it up – just make sure you turn off the breaker first! 

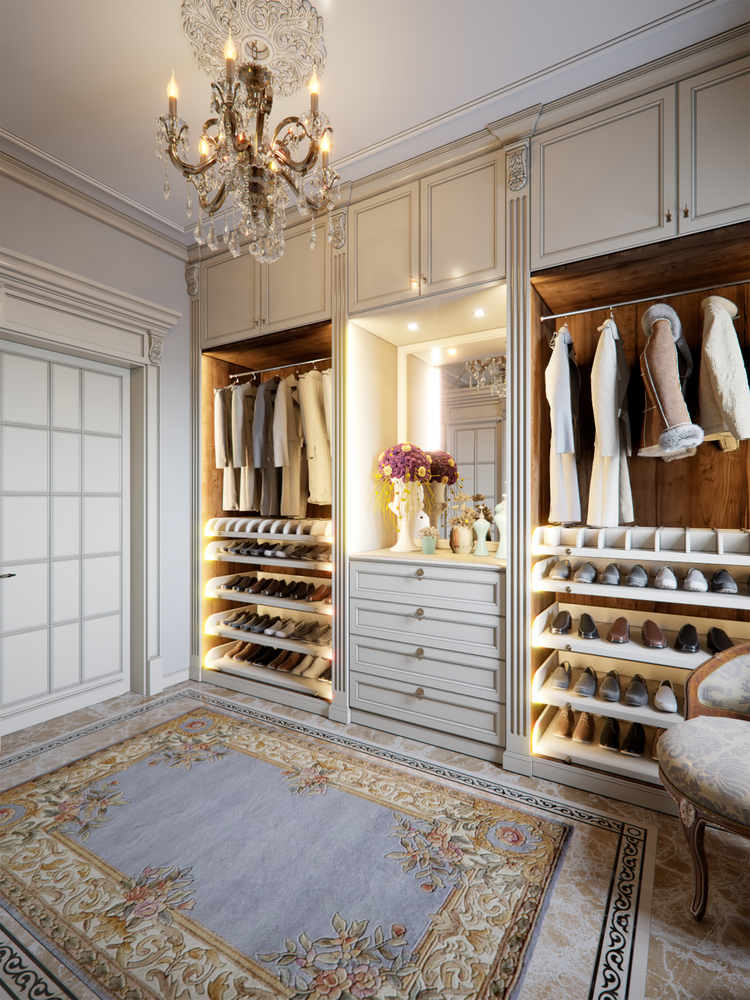
While most closets have a simple low-profile ceiling light – there’s no rule that says you have to do that in your closet! You don’t have to save the fancy light fixtures for the places your guests will see! A statement light fixture can set the tone for the style in your closet, it’s a great place to have a little fun! A soft and elegant chandelier? Maybe an edgy modern light fixture? Be it be colored, metallic, rustic, crystal, or anything in between, the possibilities are endless!

3. Shelf lighting

Shelf lighting adds sophistication to the space and increases the utility. LED strip or track lights are excellent for highlighting shelves. Upgrade the shelves through decluttering, updating storage containers, and sprucing up shelf decor.

LED strips are an excellent option for dressing up the dressing room. LED strips are relatively cheap and can come in a variety of colors. Colored lights instantly transform the closet without spending time or money on paint! LED strips can be battery-powered or hardwired,  so professional help may not be required. They have a low running temperature, so they won’t burn or damage clothes.

4. Natural Light

Natural light can make a walk-in feel like a room instead of a closet! You just feel better in a room with natural light, so adding a window to the place where you get ready will definitely make your time there more enjoyable. Adding a window does require professional work, but you’ll likely see some of that cost back with an increased home value. 

Struggling to find a suitable wall to add a window? Think outside the box with a skylight or a row of narrow windows at the top of the wall!

5. Hidden Lights 

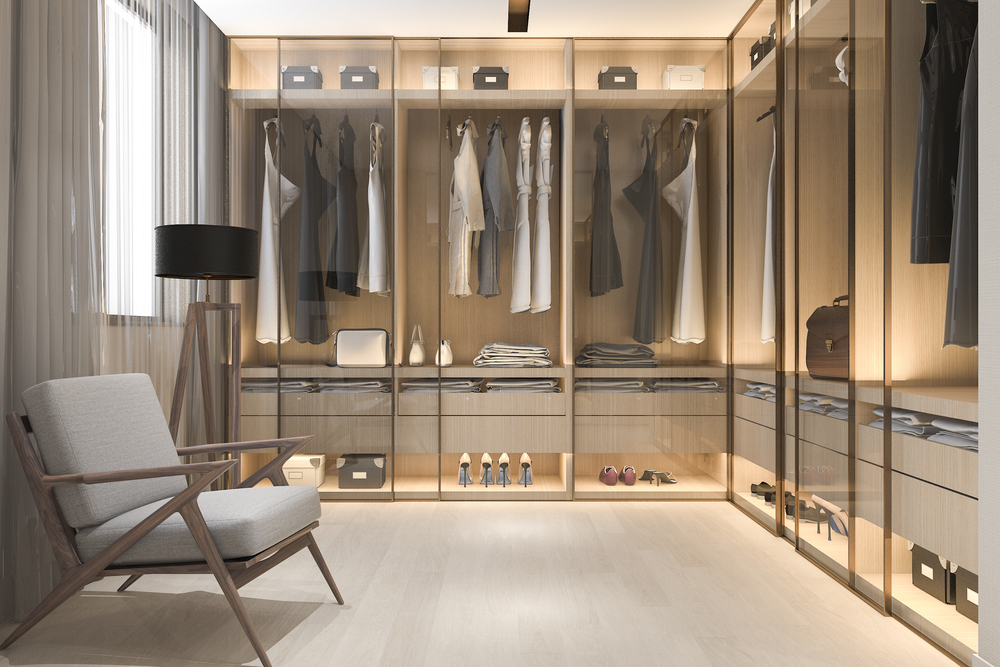
Hidden lights can take any ho-hum closet and make it feel like a high-end custom installation. The best part is – this closet lighting hack is so simple and affordable! Battery-powered puck lights or LED strips can be tucked under a low shelf, out of view on the top shelf, or behind built-ins. 

These lights may be small, but they make a big impact by reflecting light off the walls, floor, or ceiling. The reflections create an illusion of space, which will make any closet feel bigger and classier. 

For a battery-free version – give us a call and we’ll help you find what you need to create a hardwired experience that you can flip on and off with a light switch. You might need to hire an electrician to run the wiring, but you won’t ever have to worry about replacing or recharging.

6. Lumens and Hue

The quality of the light in a room will dramatically impact the way it feels. Take at the brightness and color of the light in your closet – not all bulbs and fixtures are equal!

Lumens measure the brightness of a bulb. Bright light (around 100 lumens) allows for the true colors of clothes and accessories to shine. Dimmer bulbs are useful for mood lighting or highlights.

A bulb’s hue refers to its color, most often as yellow or white light. Yellow light feels softer on the eyes and creates a romantic mood. White light helps the brain to be alert and pay attention.

Closets can use a mix of lumens and hues. A mirror or vanity are great places for bright, white light, where it is important to see the true color. Collectibles might look best under warmer, softer light, gently highlighting them.

7. Spotlights

A great way to showcase a collection of purses, shoes, or watches is by having dedicated lighting. LED strips, puck lights, or even hardwire new little lamps are effective options. Little lights give collectibles the attention they deserve and immediately customize the space.

Now that your collection is out of the dark, you can enjoy it any time!

8. Go Green

We’ve talked a lot about LED strip lights (pictured here), but there are several other LED options that make for a great choice in your closet’s ceiling and wall fixtures! 

No matter your aesthetic, LED bulbs are always a great choice for closets. They are energy efficient, which cuts down on the utility bill, and they last much longer than other lightbulbs. LEDs also produce very little heat, so they’re a safer choice to have near your clothing.

The technology has come a long way on these – some bulbs are motion-sensing, making your walk-in light up at your presence. Others are smart-home enabled, so you can control them with an app and set a schedule. There are even ceiling lights that have LEDs fully integrated, so you’ll never replace a bulb for the life of the fixture.

9. Get Help from the Pros

Closet design can be overwhelming. A lighting professional can be a great asset when planning and carrying out an upgrade! We can help you hone in on the most important elements to create the perfectly-lighted closet of your dreams.

Ready to get started on your dream closet? We’ll connect you with the pros who can guide you through the process. Our showroom offers a great selection of bulbs and fixtures, and our lighting experts can help you find the best lighting solutions to make your dreams a reality.


Filed Under: 2022, Bedroom Lighting

How to Choose the Right Recessed Lights for Your Home : An In-Depth Homeowners Guide

How to Choose the Right Recessed Lights for Your Home : An In-Depth Homeowners Guide

by admin · Feb 6, 2024

Recessed lights go by many names, such as downlights, pot lights, can lights, and puck lights. No matter the name, they all refer to light fixtures that are installed inside (recessed into) your ceiling. They shine light into the room without hanging down into the space like a chandelier or a flush mount fixture. 

There’s a lot to know about recessed lights before you install them in your home, but it can be hard to find all of the information you need in one place. So we’ve put together this handy guide with everything you need to know in one place to help you decide which recessed light is right for you!

Recessed Lights 101

Before we get into the nitty-gritty details, here’s a quick overview of some of the most important terms you need to know when shopping for recessed lighting.

Recessed Lighting Terms

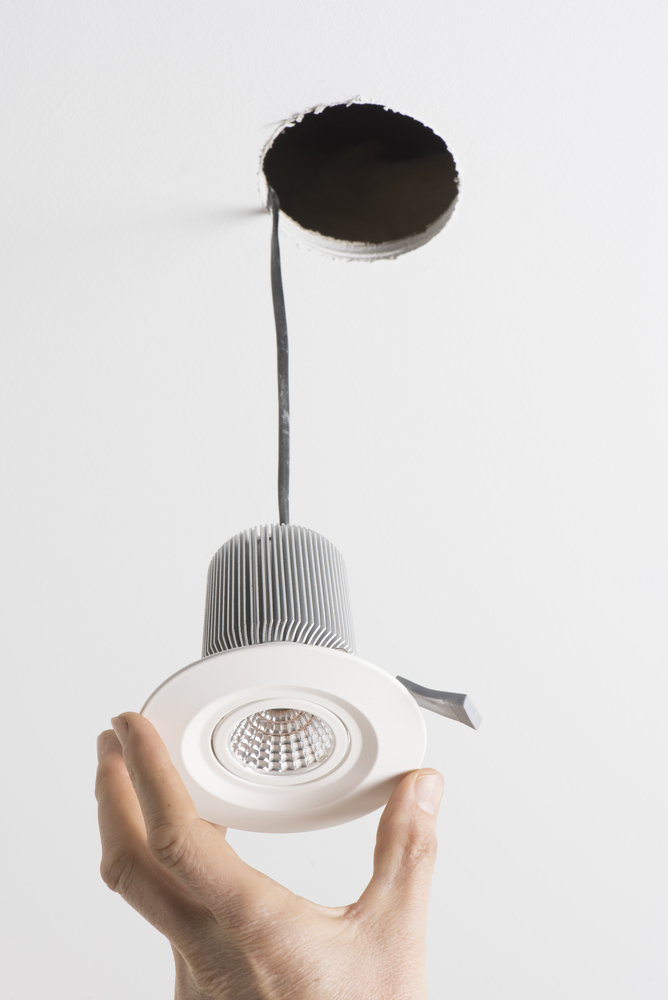
There are three parts to a recessed light: the housing, the bulb, and the trim. The housing holds all of the wires and connectors inside a protective case that sits inside your ceiling, out of sight. The bulb is the part that gives off light. The trim is the visible portion of a recessed light that covers the housing and the hole in the ceiling, giving it a finished look. 

You’ll also need to pay attention to how widely the trim allows the light to shine – this is called the Beam Angle. Recessed light beam angles can range from a narrow 15-degree spotlight to a 120-degree floodlight. Generally speaking, anything from 60 to 120 degrees will work well for general lighting in your home.

Types of Recessed Lights

Traditional – These are the original recessed lights. They’ve been around the longest, but they have their pros and cons. They’re cheaper to purchase but more expensive to operate than LED options. They also produce heat, so you’ll need to be conscious of location.

LED – These newer recessed lights may cost more upfront, but they use considerably less power to run, which makes them cheaper to use. LED bulbs last for a very long time, so you won’t have to pay to replace them every year. They also produce minimal heat, making them a safer alternative to traditional lights. 

Ultra-Thin / Canless – These are a small subsection of LED recessed lights that have been designed specifically for use in remodels. The housing in these recessed lights is about as thick as drywall, so they’re much easier to install in an existing ceiling.

Ease of Install

If you’re replacing an old recessed light with a new one, installation is a pretty basic homeowner DIY. If you’re trying to add recessed lights where they weren’t before, that’s usually a much larger project. 

Recessed lights typically have a large housing, which means they need to be installed between the framing lumber in your ceiling. In new builds, this isn’t a problem because the spacing of your lights can be planned out during construction. If you’re installing recessed lights after the fact, creating an evenly spaced grid of lights can be a little bit more difficult. You’ll likely need to hire an electrician or contractor to help run the wiring correctly.

Canless lights are often the best choice for renovations because they can be installed almost anywhere in the ceiling. While easier to install, it’s still a pretty significant electrical project. If you’re comfortable with that type of DIY work you can give it a try, but most homeowners usually hire a professional.

Sizing

Homeowners are often surprised at the size of their recessed lights after they’ve been installed. It’s important to know that the measurement on the packaging of a recessed light refers to the size of the light’s housing, not to the size of the trim.

The measurement on the packaging tells you how large the hole will need to be in your ceiling so that you can plan out your spacing. You’ll also need to take into account the size of the trim.

Remember, the trim on a recessed light is there to cover the edges of the light and the hole, so it sits below the drywall and extends out from the fixture. Because trim styles vary, a 4” recessed light could appear 5, 6, or even 7 inches wide once installed.

Make sure you double-check that you measured the right part before you cut, or you could end up with a lot of drywall patching!

How to Choose the Right Size

Recessed lights come in a lot of different sizes, but the 6” size has been an unofficial industry standard for a long time. Now, with LED technology, manufacturers are finding ways to create the same amount of light in smaller packaging. Their smaller 4” counterparts pack a pretty big punch for their size, and they just might end up being a better fit for your space.

Light Coverage 

If you’re lighting an entire room with recessed lights, both 4” and 6” sizes will do the job well. They are pretty interchangeable as a general lighting option, but there are a few things to consider.

Ceiling Height: You’ll need to consider the height of your ceilings. Both 4” and 6” work well at standard ceiling height. For vaulted ceilings, you might want to consider sticking with larger lights with wide beam angles – the taller the ceiling, the more evenly diffused the light will be across your space. 

Existing Fixtures: If you’re adding recessed lights to work together with an existing light fixture like a chandelier or a ceiling fan, take stock of the way the existing fixture lights the space at different times throughout the day and at night. 6” recessed lights can help raise overall ambient light if the room is too dim. 4” lights are often a better choice if you need lighting around the dark edges of a room. 

How You Use the Room: The rooms in your home don’t need an equal amount of light in every square inch. Your rooms will feel better if the lighting is tailored to the way you use them. 

For example, this kitchen has beautiful pendant lights, but on their own they’d cast shadows onto the kitchen worksurfaces. This homeowner installed a row of recessed lights around the perimeter of the kitchen to provide better light on the countertop prep surfaces. In the dining area, a softer chandelier on a separate switch lights the table, which gives it a more comfortable, relaxing feel for when it’s time to eat.

Cost

4” lights are going to cost you less upfront simply because they’re smaller and cost less to make – although prices are going to vary based on materials, finishes, and special features. They also cost less to run because they use less power. 

6” lights may cost more, but (depending on the specific fixture) you may be able to use fewer 6” lights to achieve the same coverage as a larger number of 4” lights. 

If you’re on a tight budget, you’ll want to map out your room with both sizes and then run the numbers both ways to make sure you’re getting the best deal. 

Decor

For years now, homeowners have been ditching ceiling lights in favor of a grid of recessed lights. But, the lack of visual interest is starting to sway designers back towards beautiful statement ceiling light fixtures like chandeliers and pendants. 

In rooms where modern statement fixtures are providing most of the ambient light for space, larger recessed lights aren’t really necessary. 4” lights are a much better option for creating beautiful layers of light without over-lighting your space. You’ll find this size most often in rooms with a modern design.

You’ll find 6” lights most often in large open rooms that need a lot of light, and in rooms with more traditional decor. 

Because 6” lights are more common, they currently have more trim styles available. If you have a specific style of trim in mind, make sure you find out if it’s available in the size you want before you buy!

Location/Uses

4” recessed lights are most commonly used in smaller spaces like hallways, home offices, and over the kitchen sink. They’re perfect for lighting a reading or craft area where you want to see what you’re doing. They’re also a great size for highlighting artwork or architectural features without washing them out. 

6” lights do their best work lighting a large room like a living room or dining room. They’re also a great choice for rooms with high ceilings, as their larger size will help to spread the light more uniformly throughout the space.

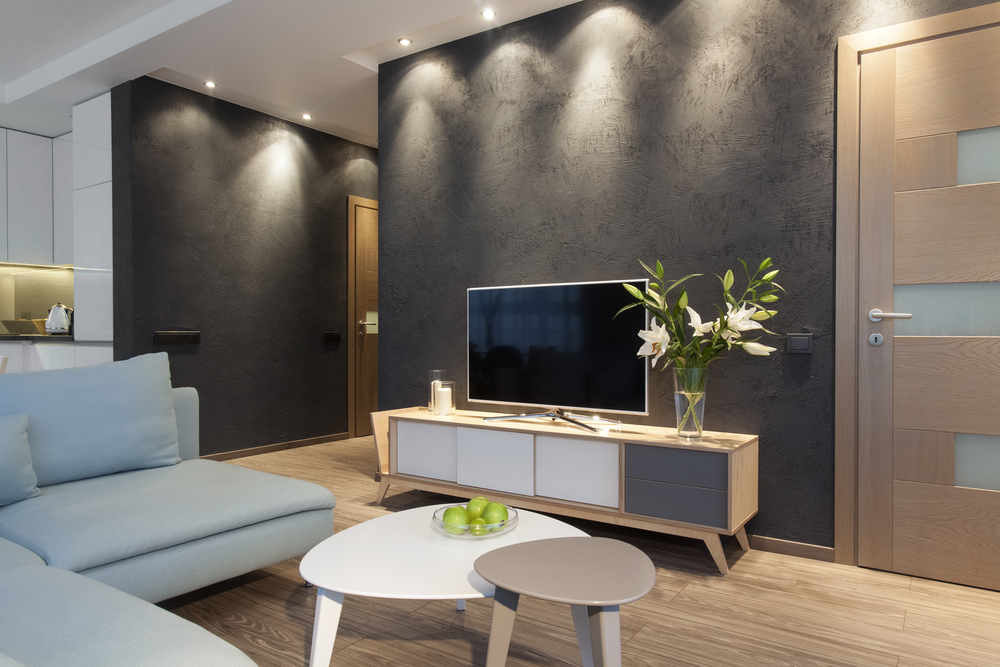
Properly placed recessed lights can make your rooms feel bigger if you employ a technique called Wall Washing. Wrapping your room in 4” recessed lights will evenly coat the wall with light, making the entire space feel more spacious. This is a great trick for smaller spaces like hallways and narrow rooms, and it helps to hide imperfections in the wall finish. 

Placement is important here – if your recessed lights are installed too close to the wall, they’ll create a cone of light (called wall grazing) which will not have the same space-creating effect. The goal is to get soft, even coverage across the wall without any harsh lines.

Overview

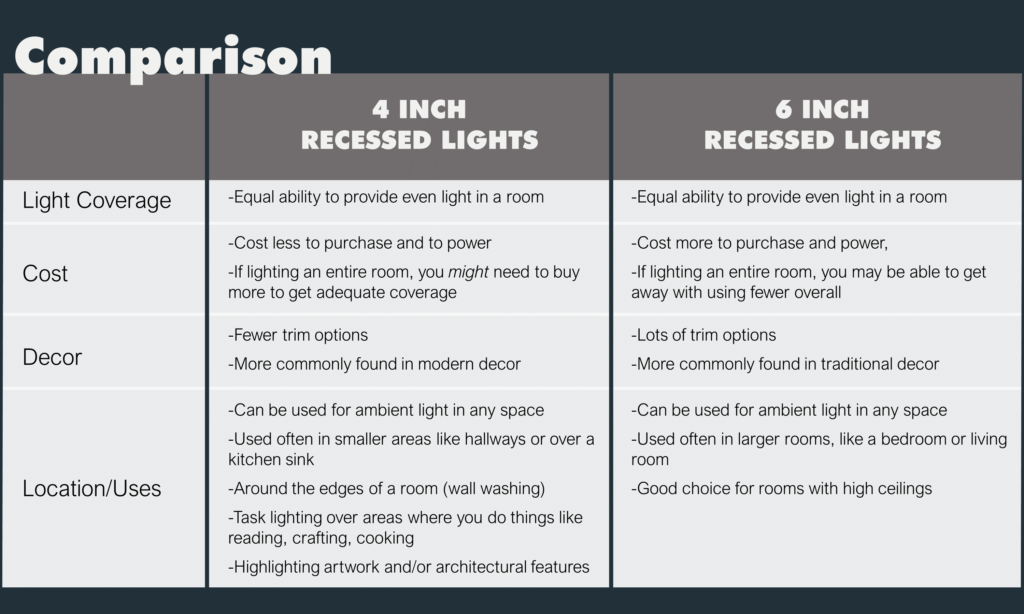
To sum it all up, here’s a handy comparison between 4” and 6” recessed lights. 

Other Things to Consider

The size you choose matters, but there are other things you need to consider before purchasing! LED recessed lighting has come a long way in the past few years, and new features are regularly being added to the lineup.

Color

LED lights come in a wide variety of colors, measured in Kelvins (K). 

Warm light (up to 3000K) appears orange or yellow, like the light from traditional incandescent bulbs. It feels soft and cozy, and is a great choice for places where you want to wind down and relax, like a bedroom or a living room. 

Daylight light (between 3000K – 4000K) is similar to the light at midday. It feels bright and white, and is a great choice for most rooms in the house. 

Cool light (above 4000K) starts to appear blue as the Kelvins increase. Blue light feels crisp and energetic and is often used in offices and hospitals to help keep people alert. Be careful with blue light in your home – it can keep you up at night! 

The color you choose for your lights will change how the paint on your walls looks, so it’s a good idea to experiment with it first before you commit. 

Color Changing lights – Some LED lights are color-changing, meaning they can be set to emit warm or cool light, which takes the stress out of worrying which temperature to choose. Some lights can be changed with a switch in the housing, which is great for homeowners that want to choose what they like, set it, and forget about it. Others can be changed with a remote control or a smart hub, making the lighting in your house truly customizable to any activity.

Dimmable

We recommend installing LED lights on a dimmer switch whenever possible! Because they are so bright, it’s nice to be able to dim the lights to a level that you’re comfortable with throughout the day. Most LED lights are already dimmable, but some aren’t, so you’ll need to double-check before purchasing if this is a feature you want in your home!

Smart Technology

Smart LED recessed lights come with the ability to communicate with other technologies in your home, like a smart hub. Depending on the features, this means you could set your lights on a schedule or even turn them on with a voice command instead of a switch. 

There are a lot of things to consider when you’re installing recessed lights. Our lighting experts know all of the ins and outs and would love to share their knowledge with you to help get you started. Give us a call or stop by our showroom and see for yourself how recessed lighting can completely transform your home.

Filed Under: 2022, How to, Informational, Recessed Lighting

Eco-Friendly Interior Design: 5 Tips For a Sustainable and Stylish Home

Eco-Friendly Interior Design: 5 Tips For a Sustainable and Stylish Home

by admin · Jan 30, 2024

There are many advantages to making your space more eco-friendly. By reducing your home’s carbon footprint, you can save money and even improve your home’s air quality. The trick is doing it without compromising on style. If you’re struggling to find sustainable yet stylish swaps for your space, look no further! Below we have rounded up some of our favorite eco-friendly interior design ideas.  

1. Bring The Outside In 

Indoor plants make for great decor – they are lush and give your space dimension, texture, and color. House plants can also be powerful air purifiers and help reduce the levels of CO2 in your home. If you’re already a plant parent, you may want to consider an indoor vegetable or herb patch. These small but mighty gardens look great on any window sill, plus you can eat their produce! A dedicated LED grow light will ensure you can harvest your indoor garden all year round.

2. Opt For Natural Fibers 

Whether you’re in the market for a new rug, light fixture, or pouf, look for items made from natural fibers such as jute. Jute is a material made from the jute tree, which is a fast grower and needs very little water to survive. Jute is also bio-degradable and recyclable – making it super eco-friendly!  When it comes to upholstery, opt for bamboo fabrics. Latex is another solid option as it comes from the rubber plant. 

3. Pick Low or Zero VOC Paints 

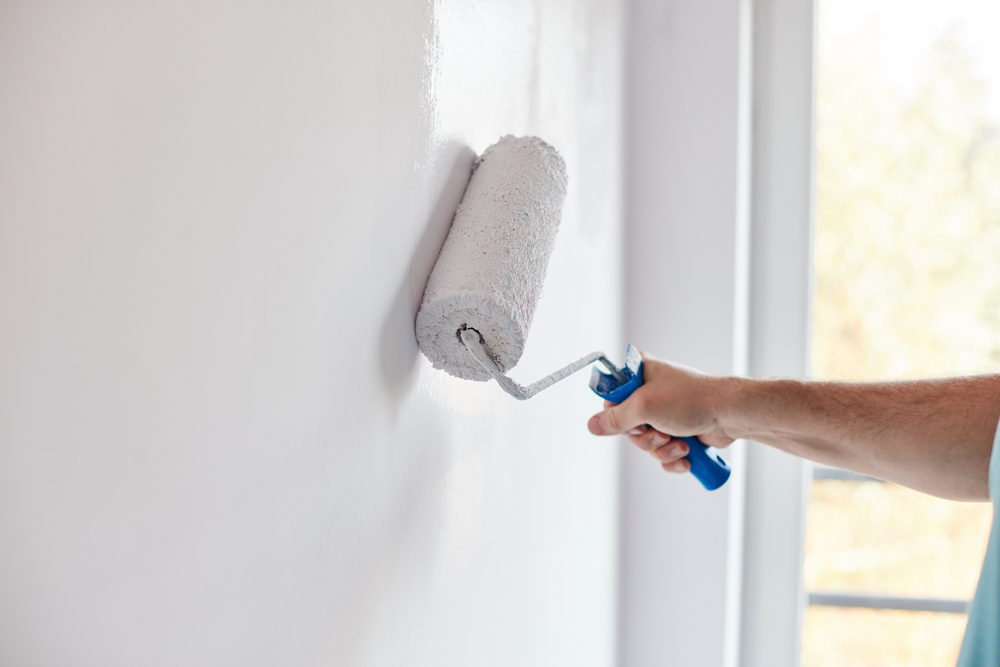
One of the most important decorating decisions you will likely make is the color of your walls. Your color palette will determine the mood of your space and set the tone of your home style. The problem with paint is that many contain harmful VOCs – or volatile organic compounds. The best eco-friendly interior design paints are labeled “low VOC” or “zero VOC.” These paints are water-based, are lower in odor, and are a more eco-friendly option.

4. Swap Your Bulbs 

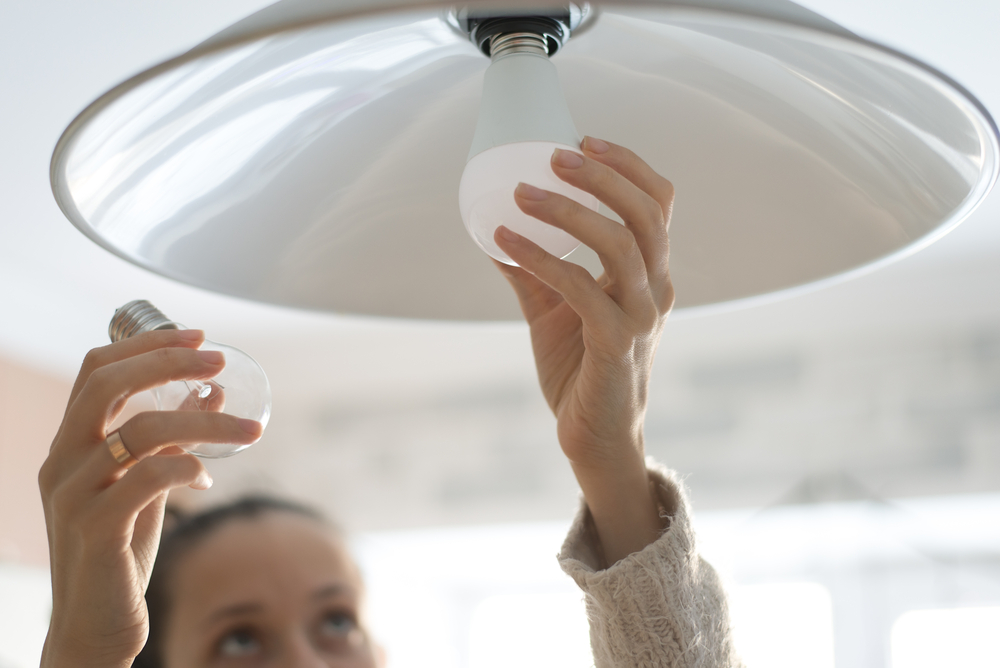
Every good interior designer knows that a room’s lighting will make or break the space. To make your existing lighting more eco-friendly, opt for high-quality LED bulbs. They consume less energy than regular bulbs, and they last much longer. This means fewer bulbs are being manufactured and ending up in landfills – and your utility bills will be lower.  

5. Dim Your Lights

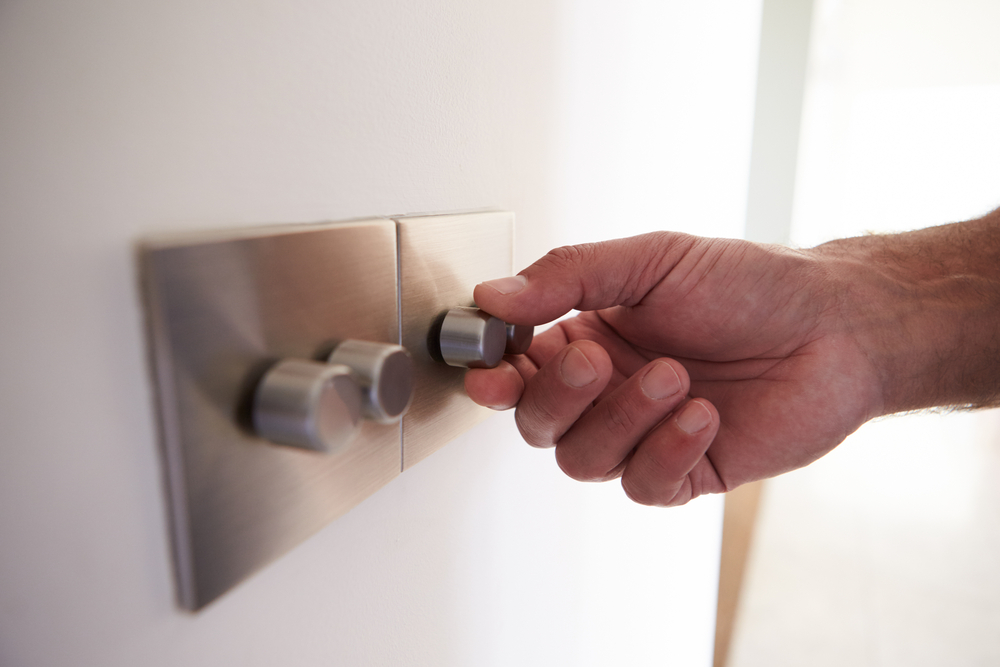
Dimmers are excellent for many reasons, and they can totally transform your space. With just your fingertips, you can go from bright and fresh to warm and moody. Dimmed lights also use less energy than regular lights, which is good for the planet and your wallet. Interior designers also love dimmers for the plate switches. They are sleek and sophisticated and are sure to elevate any room. 

To find out more about sustainable lighting options, give us a call or stop by our showroom. Our lighting experts can help you find exactly what you need to go green.

Filed Under: 2022, Energy Efficient Lighting, Life & Style

Top Tips to Keep Your Home and Family Safe

Top Tips to Keep Your Home and Family Safe

by admin · Jan 23, 2024

Household accidents cost time, money, and suffering. From burns to falls, break-ins to credit fraud, it can feel overwhelming to protect your home and family. 

In this article, we’ll cover some top tips to keep your home and family safe. In this article, we’ll cover some top tips to prevent household accidents. The good news is that you’re probably already doing most of these – and many of the fixes are low-maintenance and low-cost.

Fire Safety 

Parents often think of the stove or oven when they think of fire hazards (we’ve all heard the Thanksgiving turkey mishap stories!), but forgetting to maintain fire prevention measures in the home is just as dangerous.

Fire Extinguishers & Smoke Alarms

Since people rarely need to put out a fire in their home, many homeowners forget where their fire extinguisher is, and it ends up buried in the back of a closet or cupboard. Fire extinguishers need to be replaced about every 12 years, and often need recharging as soon as six years. Be sure that your extinguishers are ready to go and that your family knows where it is and how to use them. 

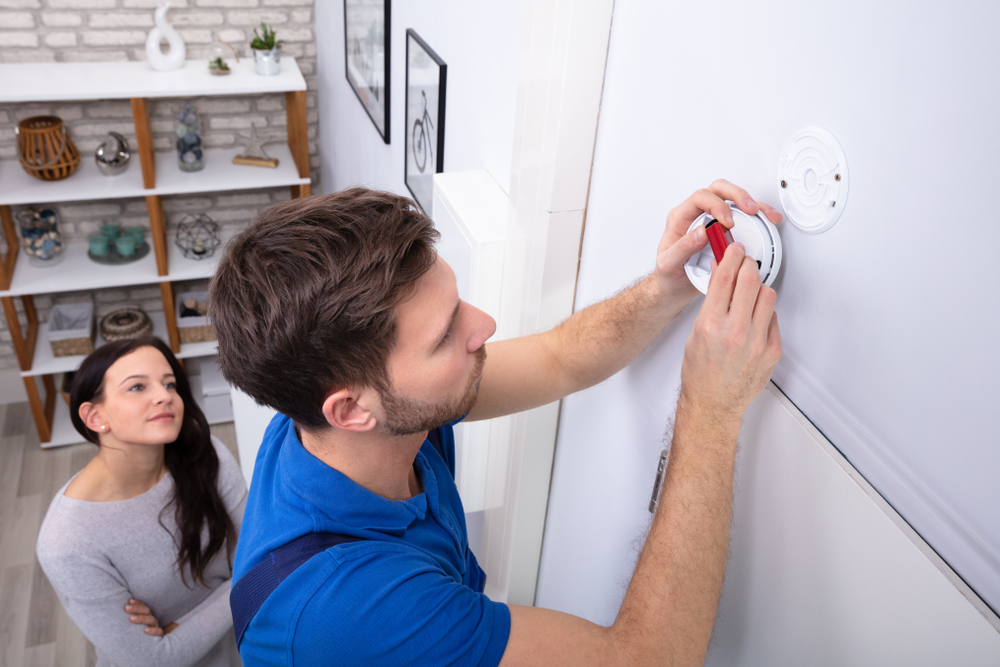
Smoke alarms should be replaced after 10 years. Keep batteries on hand and replace them once a year. It’s best to test them once a month – it’s a great opportunity to do a family fire drill! Set up a meeting place and practice getting out of the house quickly so that kids will know what to do in case of an emergency. 

Candles

Candles are fun for mood lighting, but they are also a fire hazard. Never leave a candle unattended! For safer mood lighting, consider switching to softer light bulbs and dimmer switches. Color-changing LED bulbs are a fun option – some can be controlled by an app that lets you customize the lighting in your room with just the touch of a button.

Old Wiring

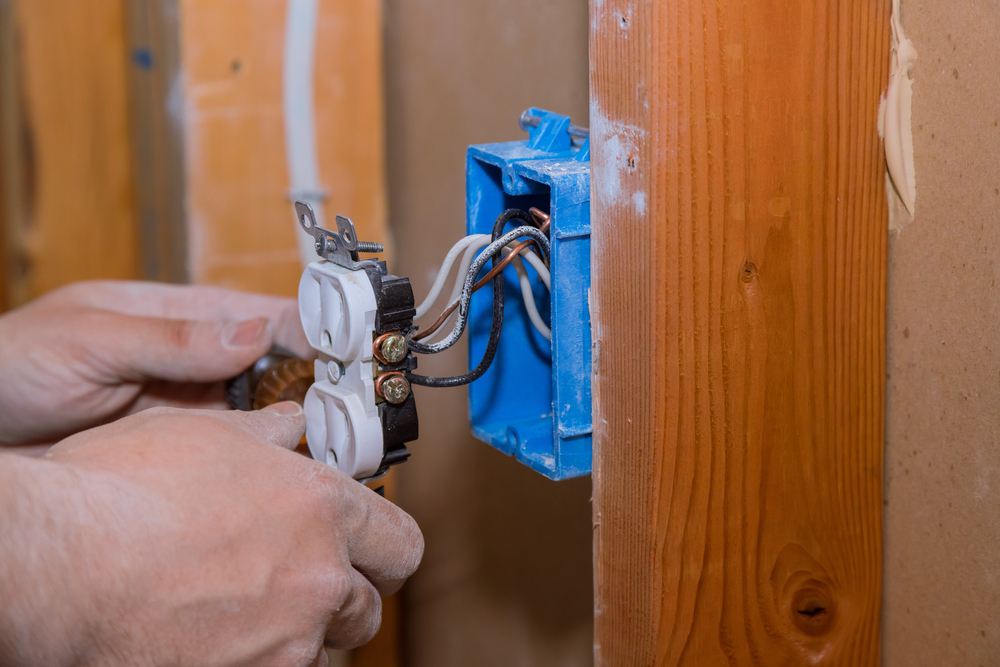
Electrical wiring is encased with a plastic or silicone coating to prevent fires, but that coating wears off over time. Electric codes also change over time, so many older homes may already have outdated and unsafe wiring. If your circuit breakers trip regularly, your lights flicker, or you hear a buzzing sound by your outlets, you should have your wiring professionally checked. Need a recommendation for a good electrician in the area? Give us a call!

———————

Childproofing 

Homes are filled with hazards for curious little ones― washing machines, driers, water heaters, and even daily toy messes can lead to serious injury. Here are a few simple ways to keep kids safe!

Appliances 

Appliances are everywhere, and kids love to help grownups with laundry and cooking. Make sure the washer and dryer are in their own enclosed space and that the doors are sturdy. Help your children know that the laundry room isn’t a place to play or hide. In the kitchen, simple tools like burner locks ensure that little chefs don’t start cooking on their own. There are also locks to ensure that oven doors can’t open either.

Toy Clutter

Tripping over toys is another leading cause of falls― bumped heads, sprained ankles, and avoidable tears. Keep walkways clean by confining toys to bedrooms or toy rooms. Encourage cleanliness by installing low shelves or get kid-friendly storage containers!

Lamps and Sockets

Most parents know that electrical sockets need to be covered – it’s childproofing 101. But what is there to do with the outlets in use? Most homes use lamps in one form or another. They’re great for adding a little extra light in a dark corner and for giving soft light in calm spaces, like a child’s bedroom. To childproof a floor lamp, place it behind a large piece of furniture so that it can’t be pulled over. For table lamps, make sure it’s out of reach up high and that the cord is inaccessible. 

———————

Prevent Trips and Falls

Falls are the leading cause of injury worldwide in adults over 60 years old. Although falls are most serious for the elderly, all ages are at risk of injury from falls. Every homeowner should review common fall zones to protect family and guests.

Banisters

Make sure that all stairways have a banister for support. A sturdy banister can be the difference between a simple slip and a broken leg. Ensure that all banisters are secure and won’t pull away from the wall when yanked on.

Stair Lights

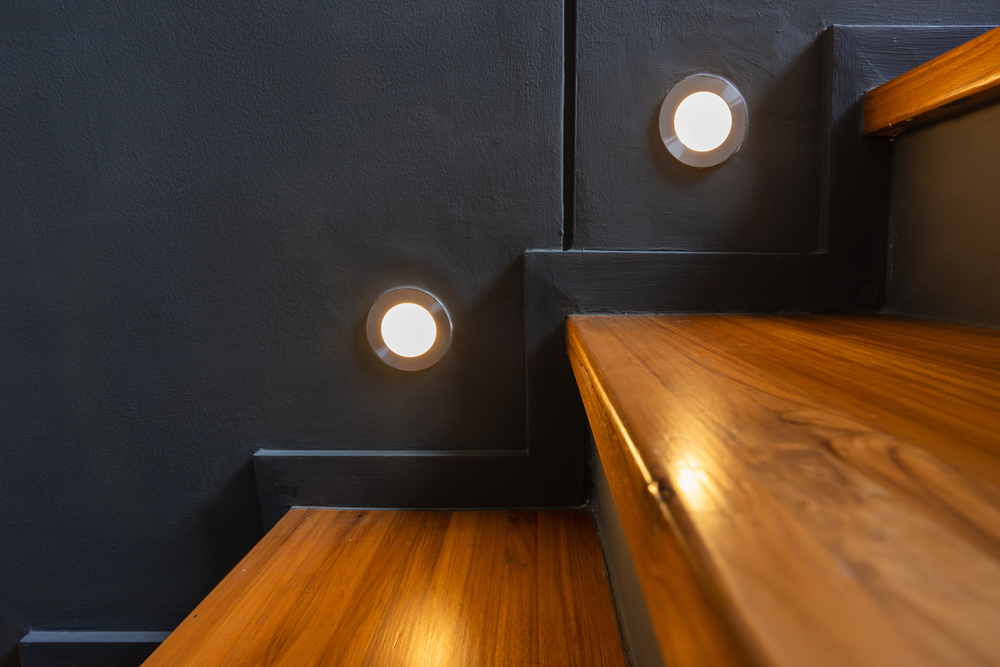
Simple stair lights help you see where you’re going, even when the overhead lights are off. Installing them can be a large or small project – it just depends on your budget and willingness to DIY. LED strip lights and motion-sensing stick-on battery lights are easy beginner projects that will make your stairway safer. You can also hire a contractor to hardwire lights to a switch if you don’t want to worry about replacing batteries. 

Loose Carpets or Rugs

Loose flooring is another common tripper― whether it’s your kindergartener running at full speed or your partner with a tall load of laundry, rugs should not get in the way. If you notice your carpet is pulling up at the edges, contact a professional to help reinstall it or find a DIY method. Only use rugs with flat edges and avoid ones that curl upwards.

Safeguard Personal Information

From hackers to natural disasters, it’s essential to keep personal information safe. Here’s some basics:

Computer Safety

Be sure to keep security software updated, so you have the best protection possible. Update your passwords regularly and avoid using the same password for multiple accounts. It’s also a good idea to keep computers out of sight when you’re out of the house― you never know who’s checking for valuables when you’re away.

Credit Monitoring

Hackers are everywhere. The 2017 Equifax Data Breach showed how important it is to monitor our credit reports. Many monitoring services are easy to use. Some lock your social security number so that no one but you can use it. Safely store or destroy documents with bank account information or social security numbers.

Prevent Fire or Water Damage

Birth certificates, titles, and passports are important documents – and you don’t want to be without them in an emergency. The best practice is to store these documents where they’ll be safe from fire or water damage. Small home safes are an excellent option for most. For high-value items, getting a security box at your bank may be necessary for peace of mind. Whatever your preference, make sure you’re housing your documents safely.

Intruder Prevention

Did you know that 34% of burglars simply walk in through an unlocked front door? Or that most break-ins occur between 10 am and 3 pm when houses are usually empty? A few simple tools and habits will keep you well prepared against burglary.

Lock Your Doors and Windows

It’s always a good habit to keep your doors and ground-level windows locked. Most robberies are the result of opportunity, not a criminal master plan. A simple fix here would be to upgrade your deadbolt or add a second lock up higher on the door. 

Security Alarms

Security alarms and smart doorbells have become much more popular in middle-class homes. There is a wide range of security systems and providers. Many security systems pair with apps so you can alarm or monitor your home from anywhere. Finally, most security providers will give you signs with the security systems. Posting that you have a security system may be one of the most effective deterrents to theft.

Motion-activated Lights

Keep the exterior of your home well-lit to discourage nighttime crime. If you use video surveillance, it’s important to make sure you don’t have blind spots in your lighting. No matter what, it’s a good idea to have lights on your property’s front, sides, and backyard, especially near the entrances. Motion-activated lights are a great option for most people – they conserve power (which lowers your electricity bill), and they’ll often scare away potential intruders when the light turns on.

Outdoor Safety

Summer nights are a fun time to be together as a family. A few tips and tricks will create quality memories without emergency room visits.

Outdoor Lighting

Proper outdoor lighting will make your yard safer, no matter the time of day. Whether it’s a powerful light on the driveway for evening basketball games or soft lights on the back patio for an outdoor dinner, consider the ways you use your yard and choose lights that will make it the safest for you and your family to enjoy.

Pool

The CDC states that there are an average of 33 drowning incidents per day in the United States. To keep your home’s pool safe, maintain a sturdy fence around the pool area if you have young children or pets. Always have a buddy whenever someone is in the pool, and always have life vests on hand. Keep pool maintenance chemicals in a safe location.

Landscaping

Maintaining a yard is a lot of work, and it comes with a lot of tools. Keep play areas and walkways clear by trimming back bushes and trees, and consider lighting well-used walkways (like the path to your front door or to your backyard shed) to make them safe after dark. Store yard tools somewhere safe when not in use, and make sure chemicals like gasoline and pesticides are either up high or behind a lock. 

Expert Help

We understand that making your home safe is of the utmost importance. The lighting in your home should play a central role in both safety and comfort! For help choosing lighting that will make your home and family safer, stop by our showroom or give us a call to speak to our lighting experts!

Filed Under: 2022, Life & Style

Next Page »

Copyright © 2025