• Skip to primary navigation
  • Skip to main content

Illuminations

  • Buying Guides
  • Styles & Trends
    • Bathroom Lights
    • Ceiling Fans
    • Ceiling Lights
    • Lamps
    • LED Lights
    • Outdoor Lights
    • Smart Lights
    • Wall Lights
  • Wellness & Safety
  • Shop Products

admin

10 Creative Ways to Style Your Hallway

10 Creative Ways to Style Your Hallway

by admin · Apr 30, 2024

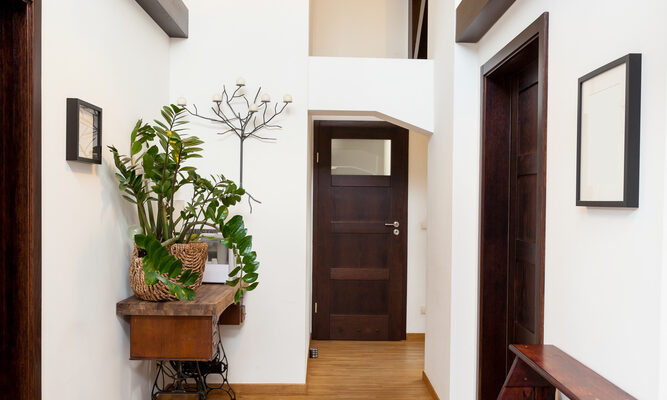
Do you have a hallway that feels disconnected from the rest of your home? Does it feel like dead space that could be more useful or interesting, but you’re unsure what to do?

We get it. Hallways can often be long and dark and usually have little open wall or floor space. But that doesn’t mean it has to be dull, dead space!

This article will cover ten ways to brighten up your hall, so you can love walking through your entire home. Of course, not everything will fit in every hallway– but remember that great design is all about layering. Try mixing a few elements from this list to get a polished, inviting hall or entryway.

1. Paint

Changing up the color palette of your hallway is an easy way to create interest– without taking up space. You can paint the walls your favorite color, get an exciting runner rug, or install a cool light fixture. This strategy is sure to surprise your guests and make the walk to your room much more enjoyable.

Why you’ll love it:

  • Great for small spaces
  • Few tools and no special skill sets
  • Inexpensive

Need help choosing a color? Then use color psychology to match the vibe of where the hall leads. 

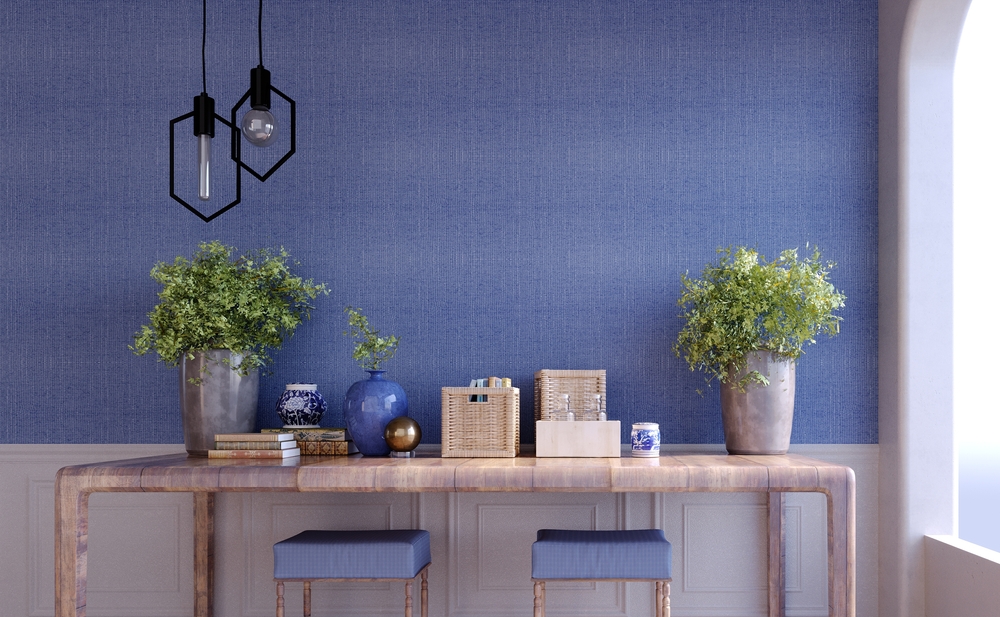
2. Patterned Wallpaper

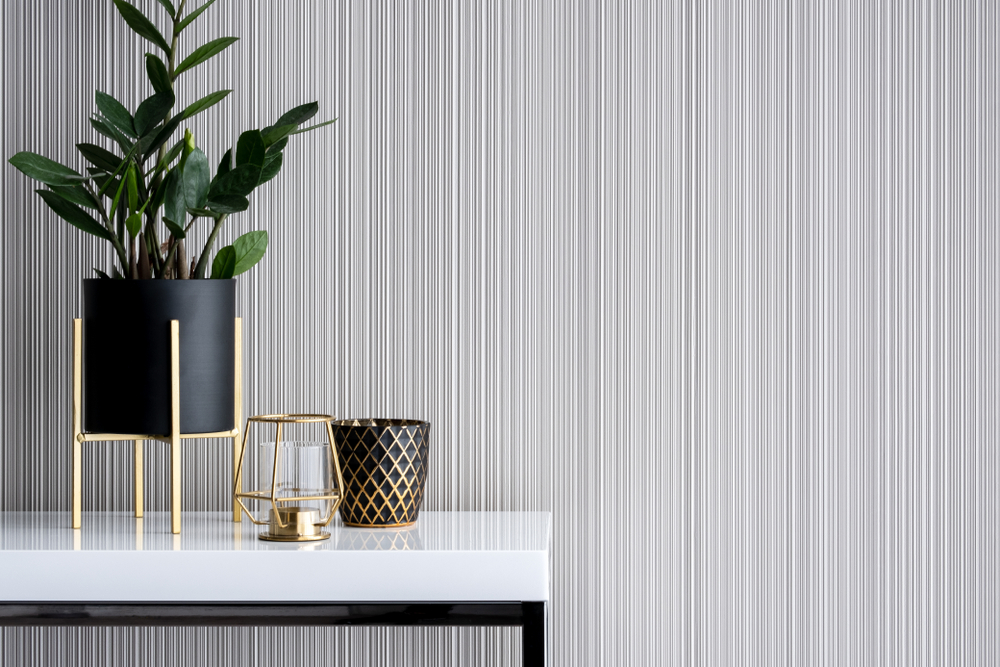
If painting isn’t your thing, or if solid colors just won’t cut it – then try mixing it up with patterns! It’s a great way to add dimension to a room. Wallpaper is an easy way to refresh your walls (or doors) without needing much skill.

Why you’ll love it:

  • Endless choices, from minimalist to maximalist
  • Wallpaper selection for all skill levels
  • Faster than custom paint jobs

Renting? No problem! You can still customize your walls with removable stick-on wallpaper!

3. Wainscoting

If you want to look subtly expensive, then Wainscoting is a great route. Adding geometric elements with trim gives your walls texture and interest without complications. They’re especially great for stairways or hallways since they don’t occupy any floor space.

Why you’ll love it:

  • Few tools required
  • Materials are relatively inexpensive
  • Customizable dimensions for your space

Don’t want to buy a table saw for the project? Measure ahead of time, then have the pieces cut at the hardware store.
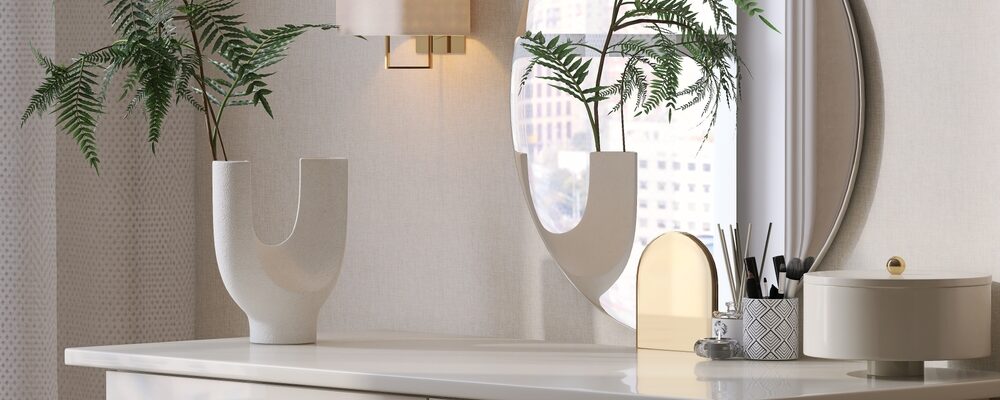
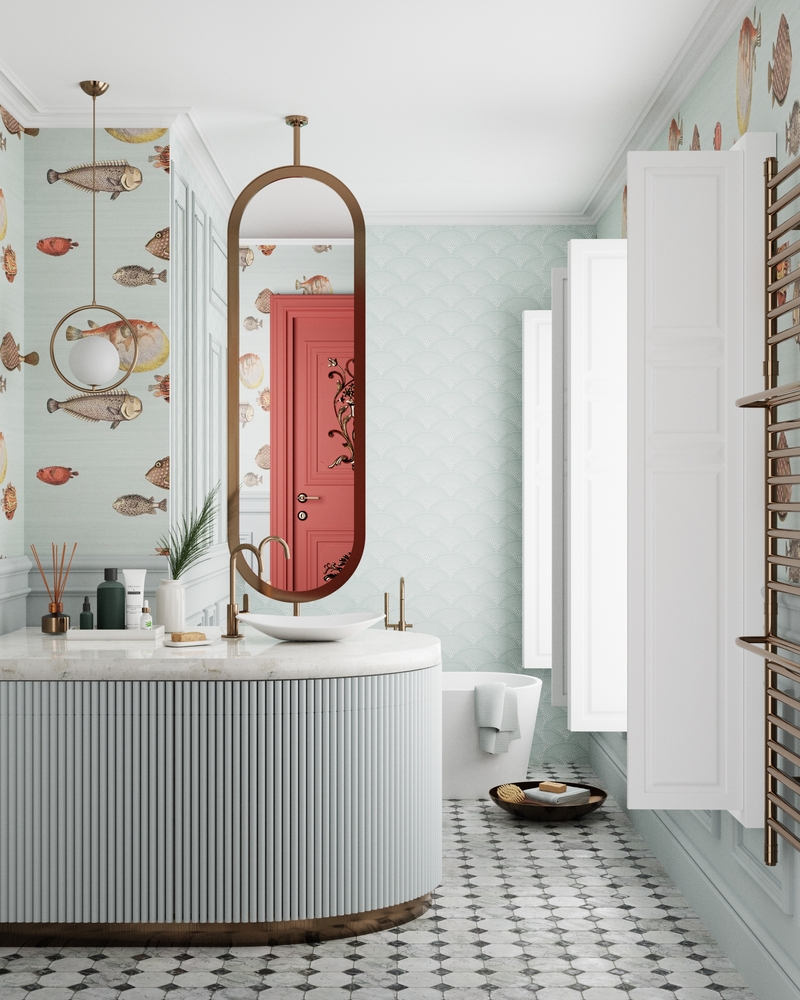
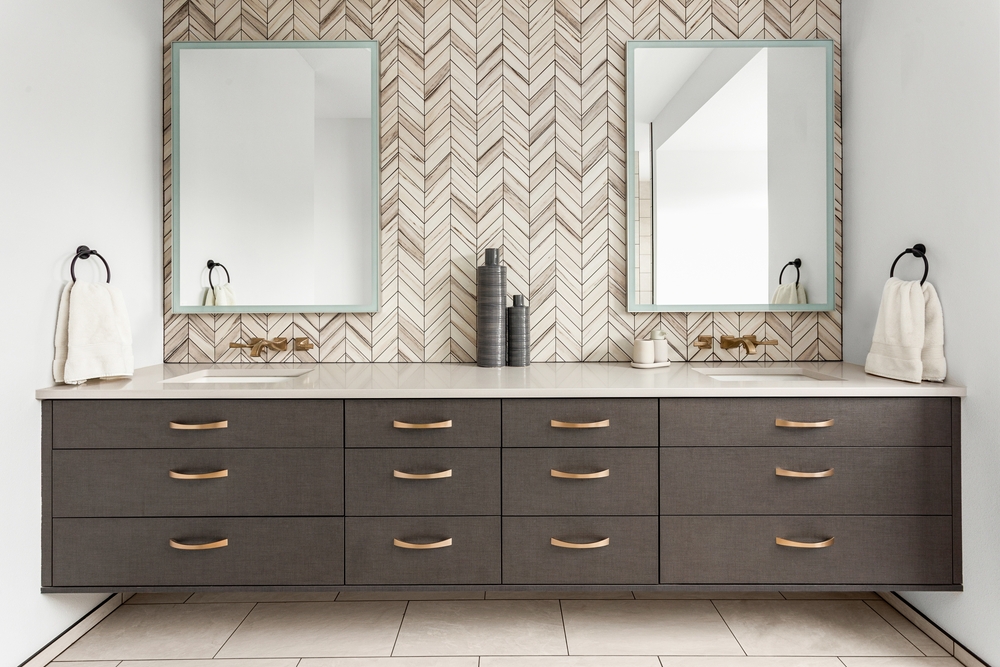
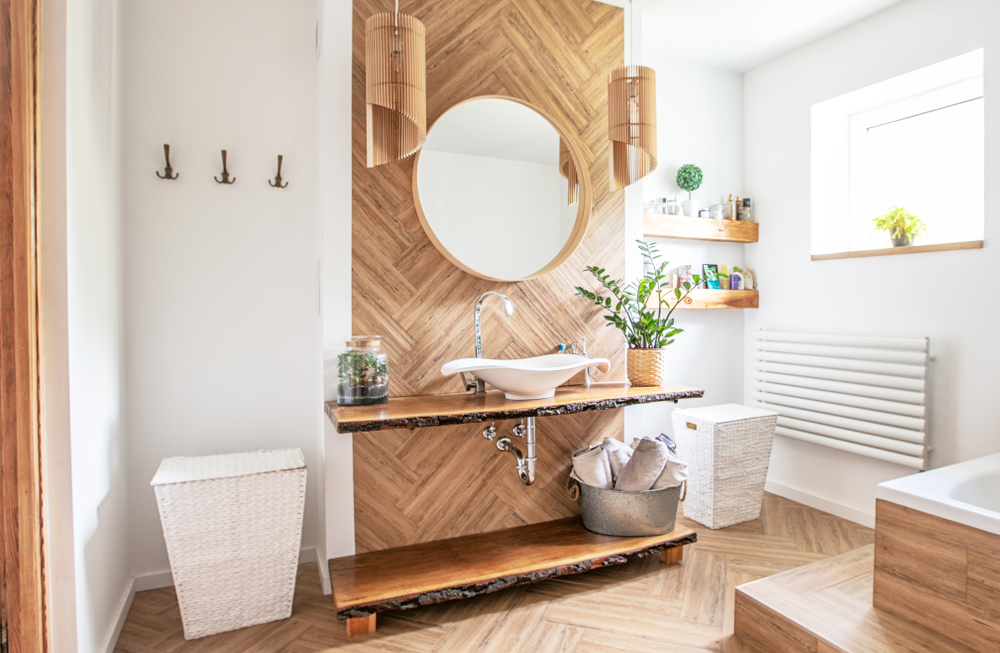
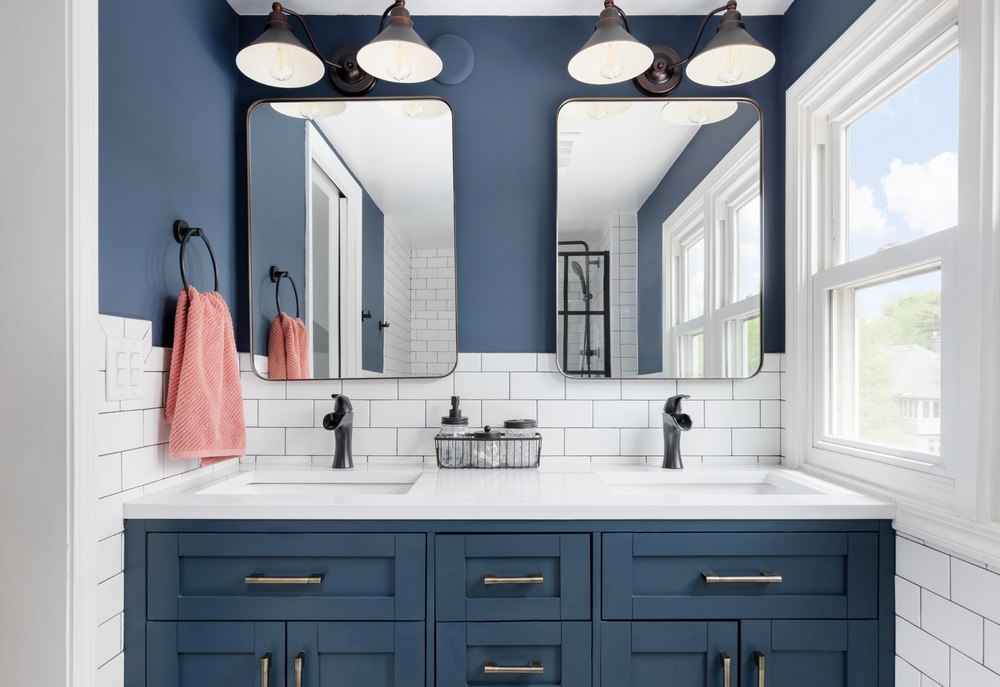
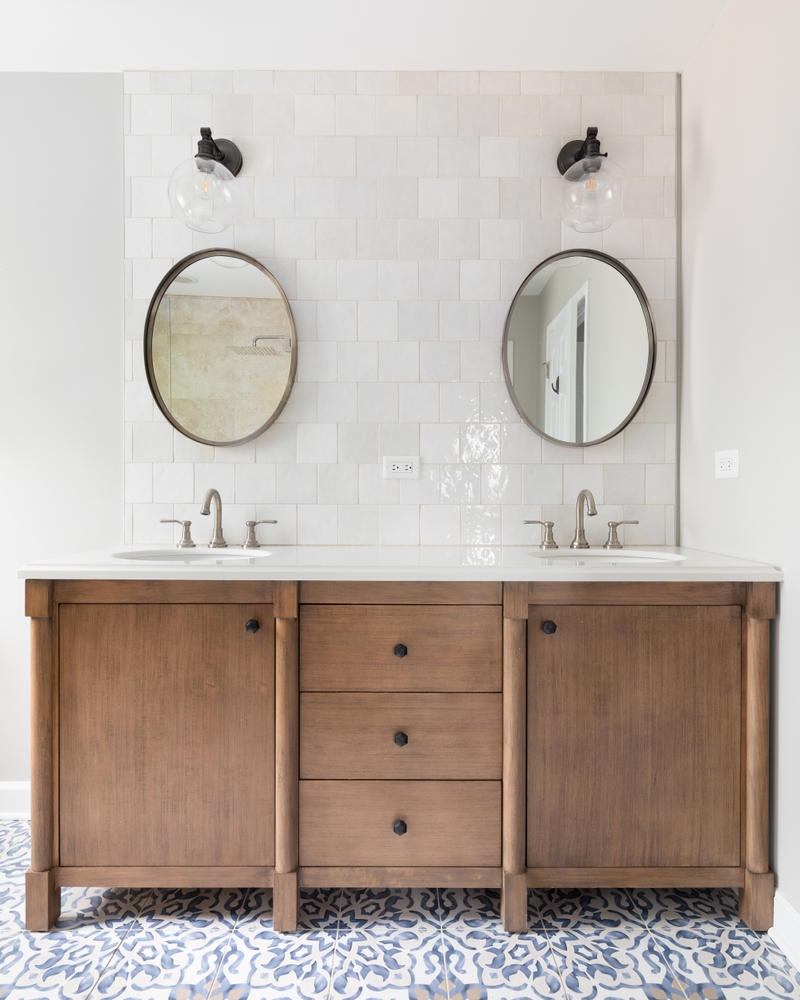
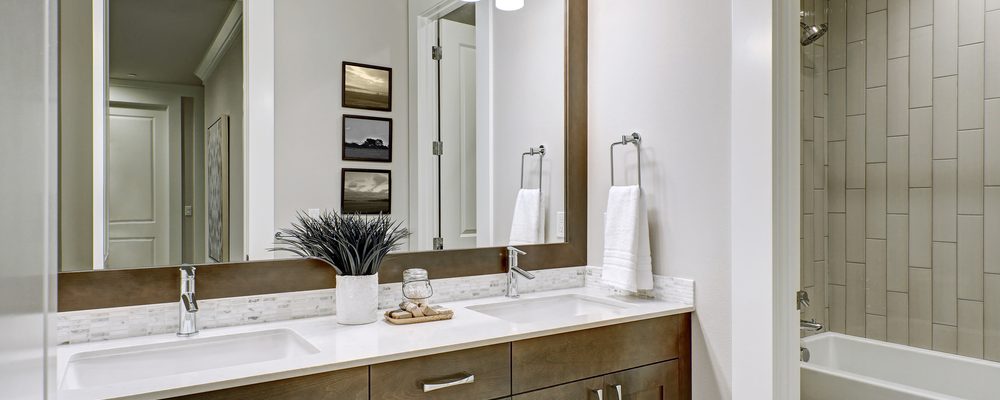
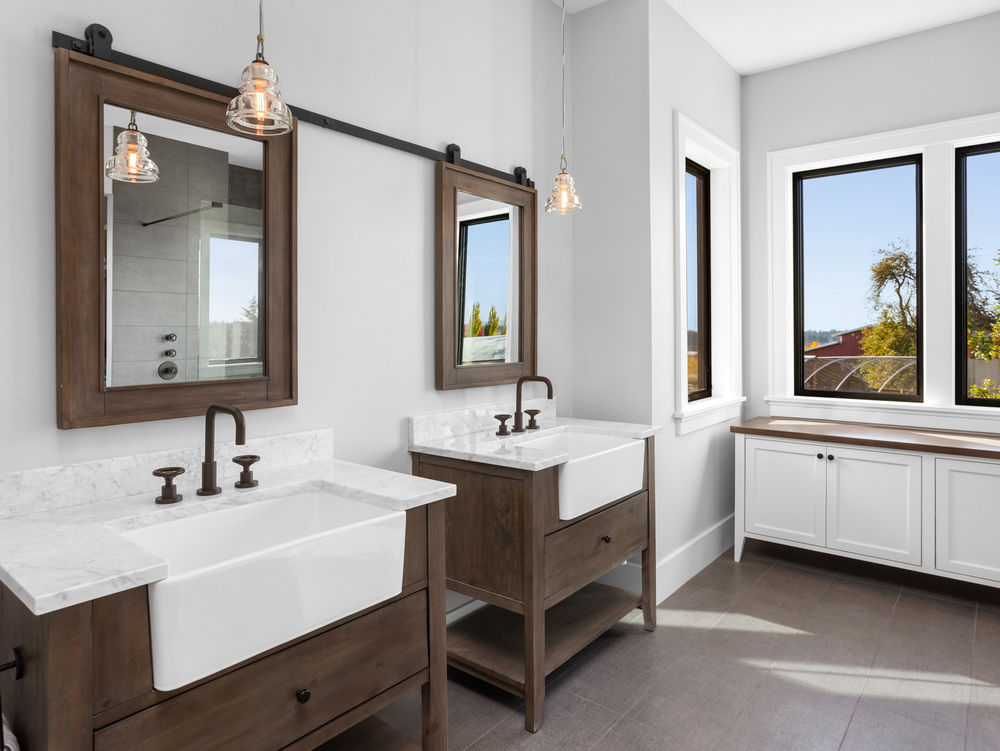
4. Mirrors

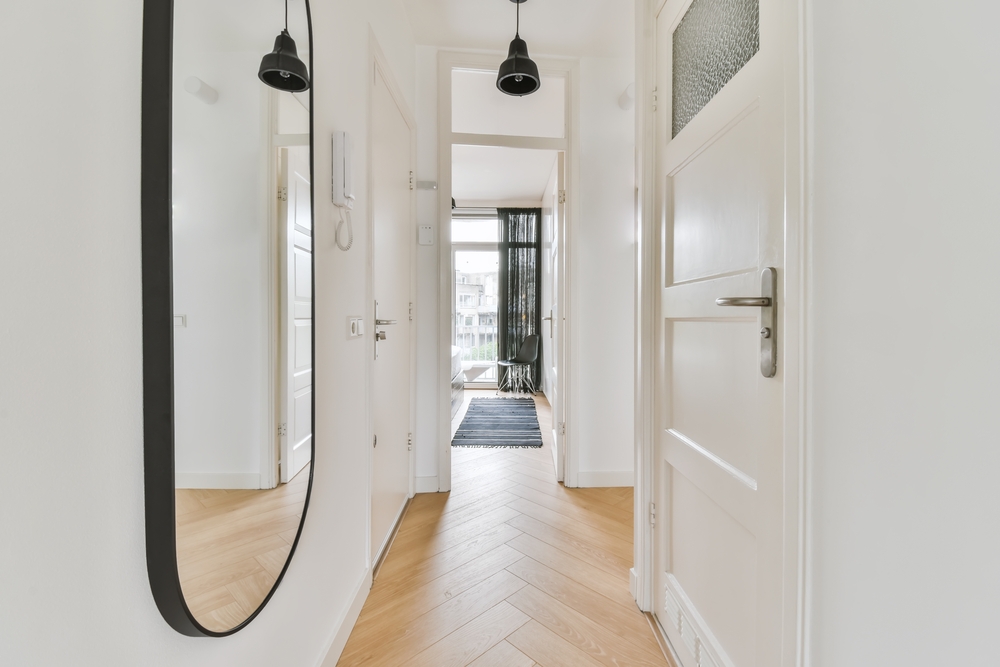
Mirrors are genius design elements. Playing with the style of the frame and the shape of the mirror gives you a lot of room to add personality to your walls, but the best part is that they can make any space feel bigger and brighter.

Why you’ll love it:

  • Fits available wall space– big or small!
  • Makes any space look larger by reflecting light
  • No special tools or skills required

Don’t have a lot of wall space? Then try finding small mirrors and hang them as a collection– art over function.

5. Gallery Wall

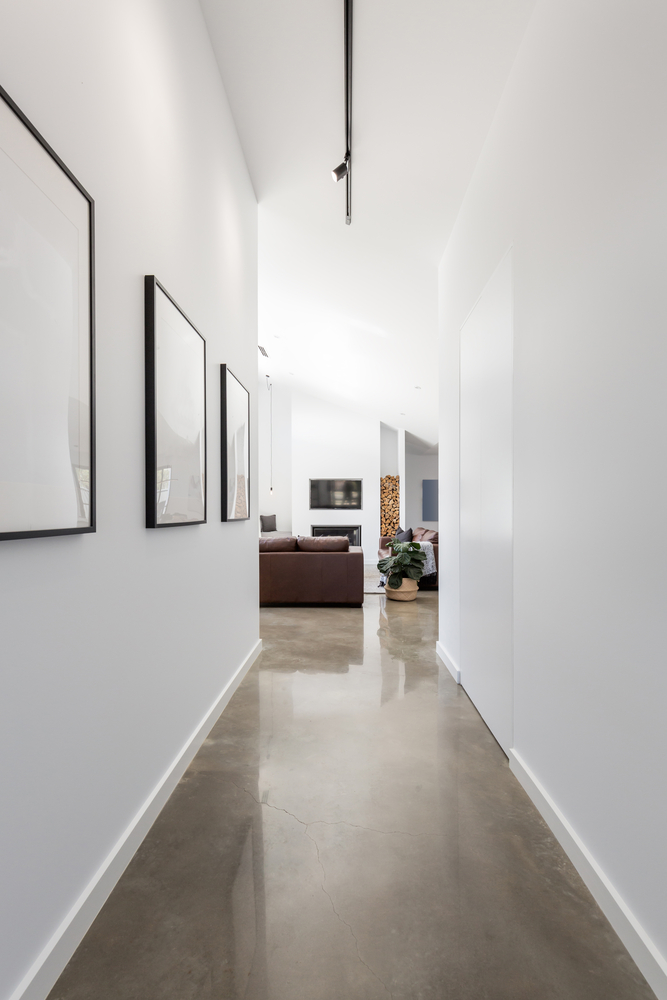
Even with a lot of doors, most hallways have a stretch where you can stash a mini-gallery wall. Class it up with sconces or track lighting, and then you’ve got a casual museum experience.

Why you’ll love it:

  • Easy to refresh
  • Frames provide a second level of design
  • Easy to customize and install

Switching out art with the seasons will add intention to your design and help your space reflect your mood.
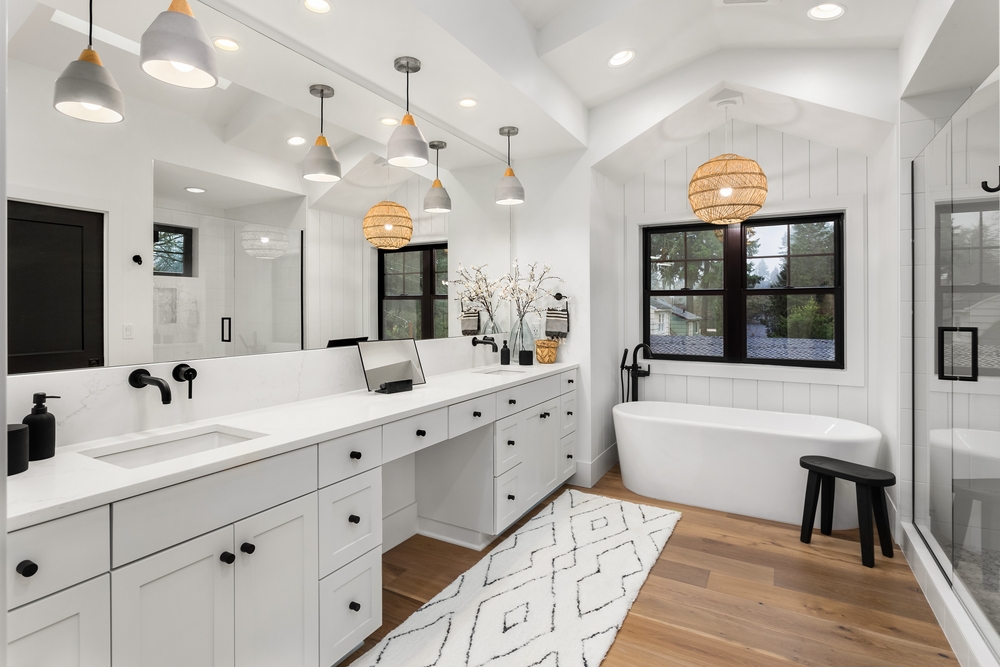
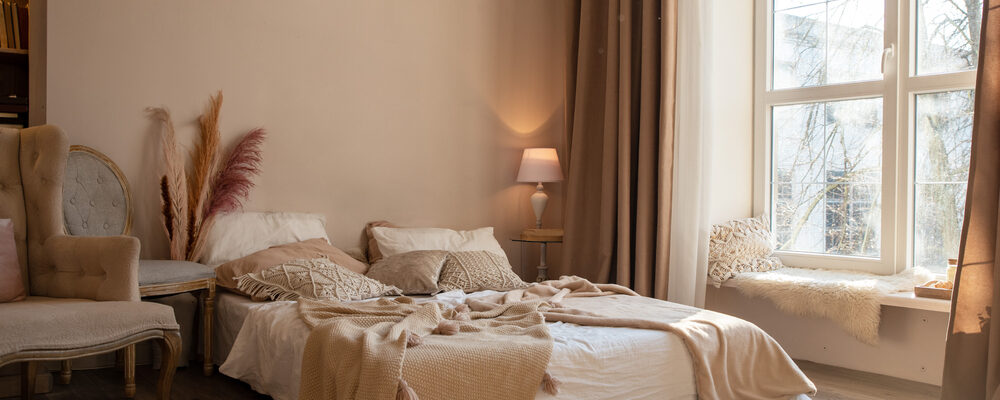
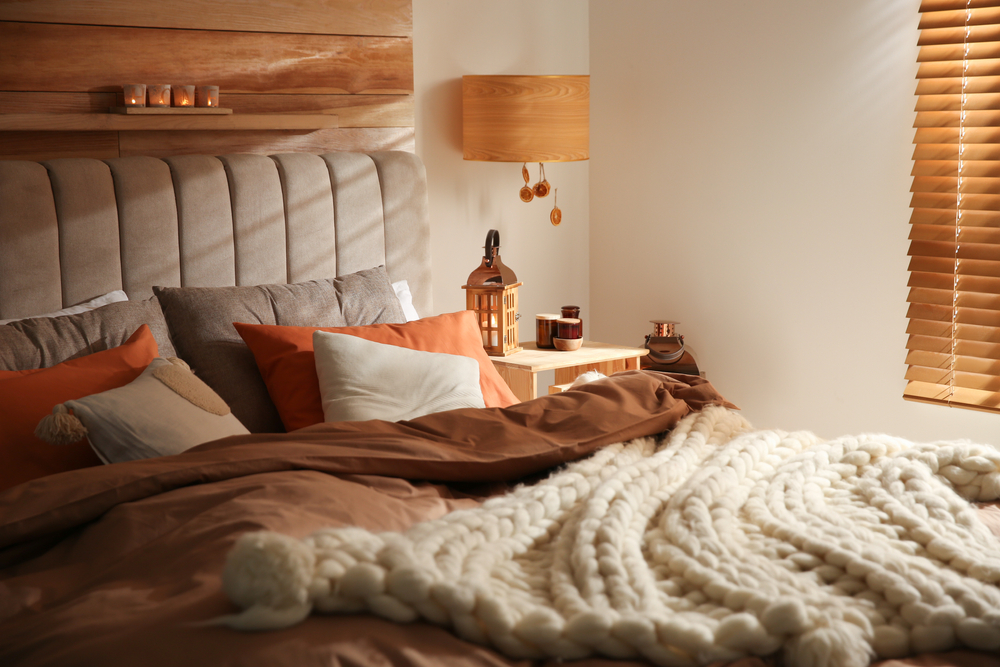
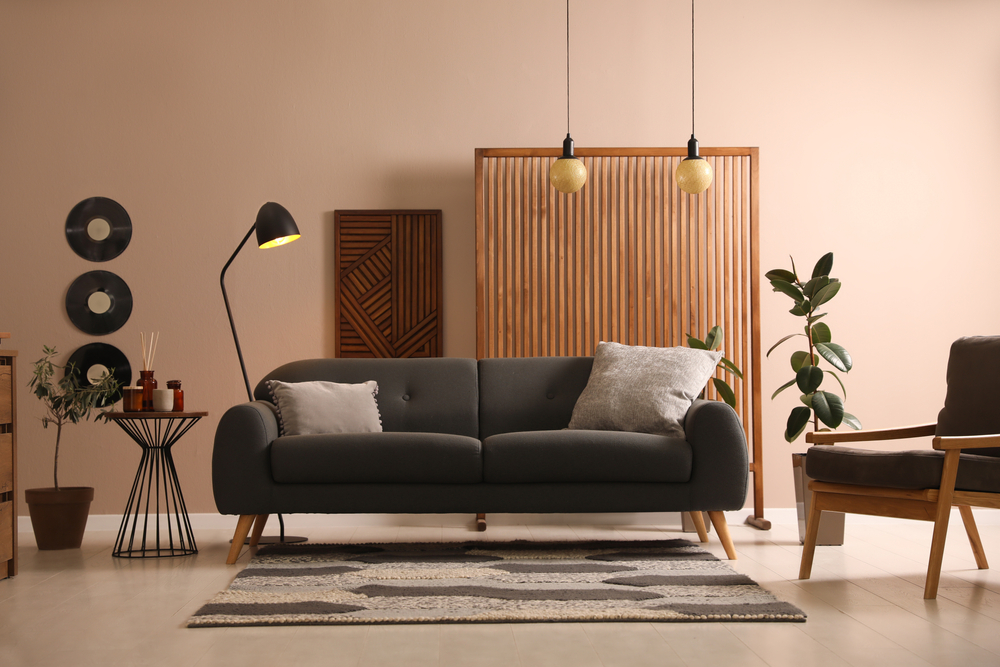
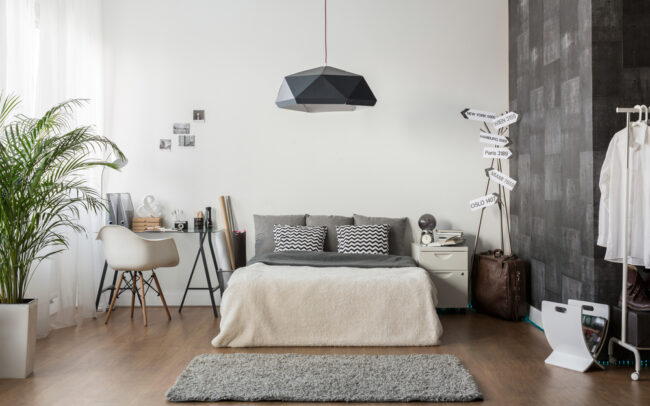
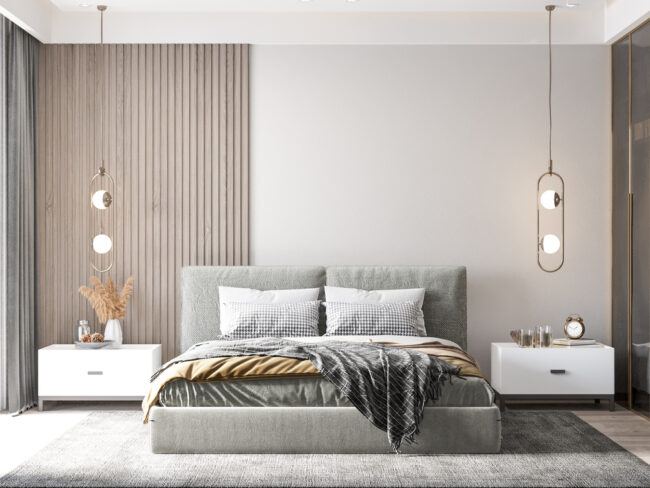
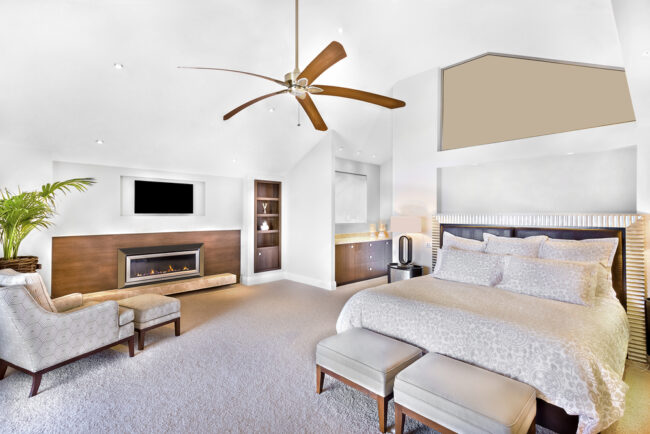
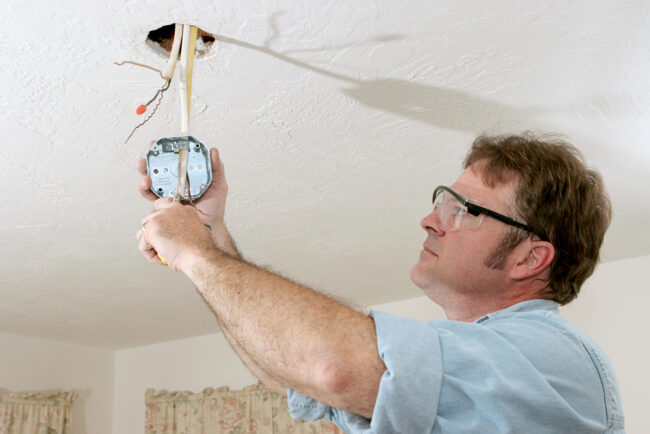
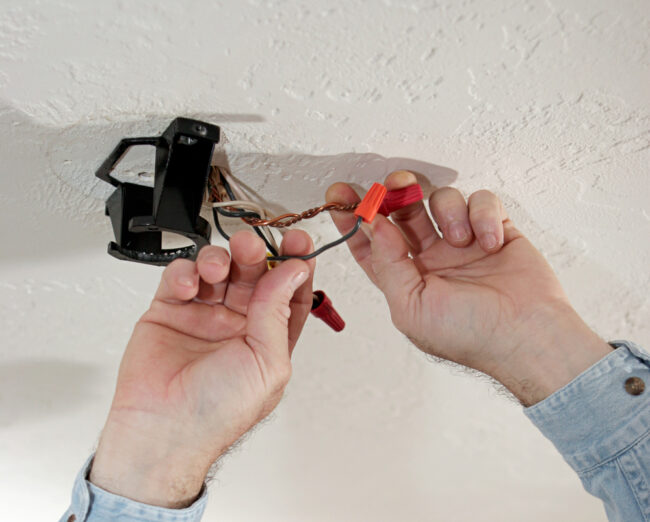
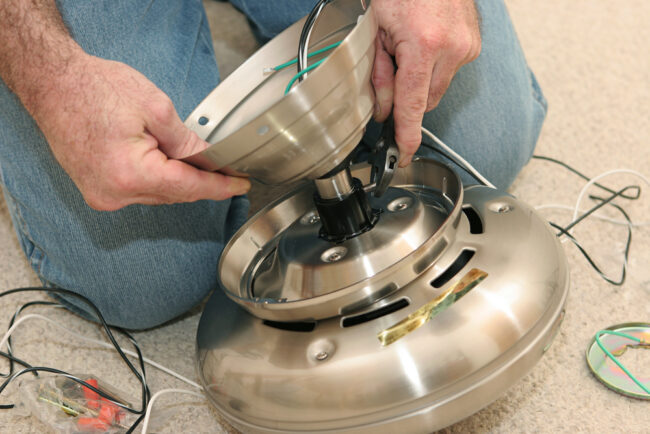
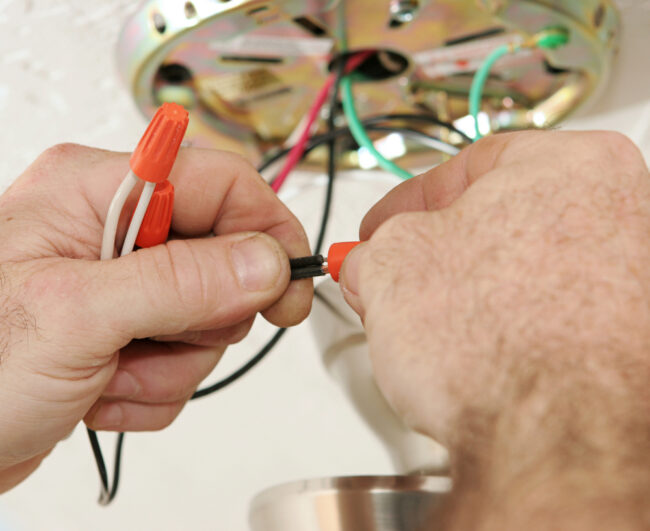
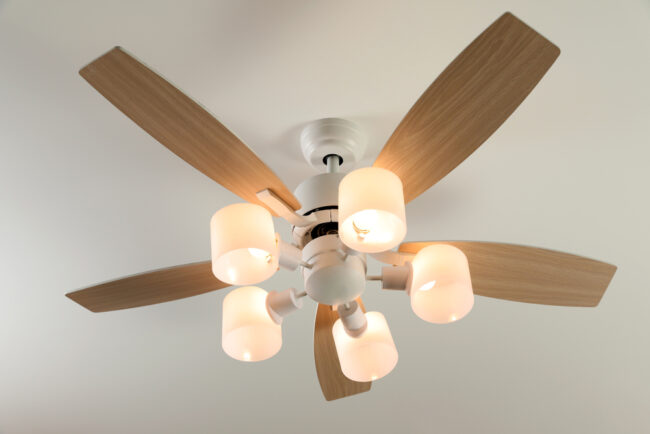
6. Lighting

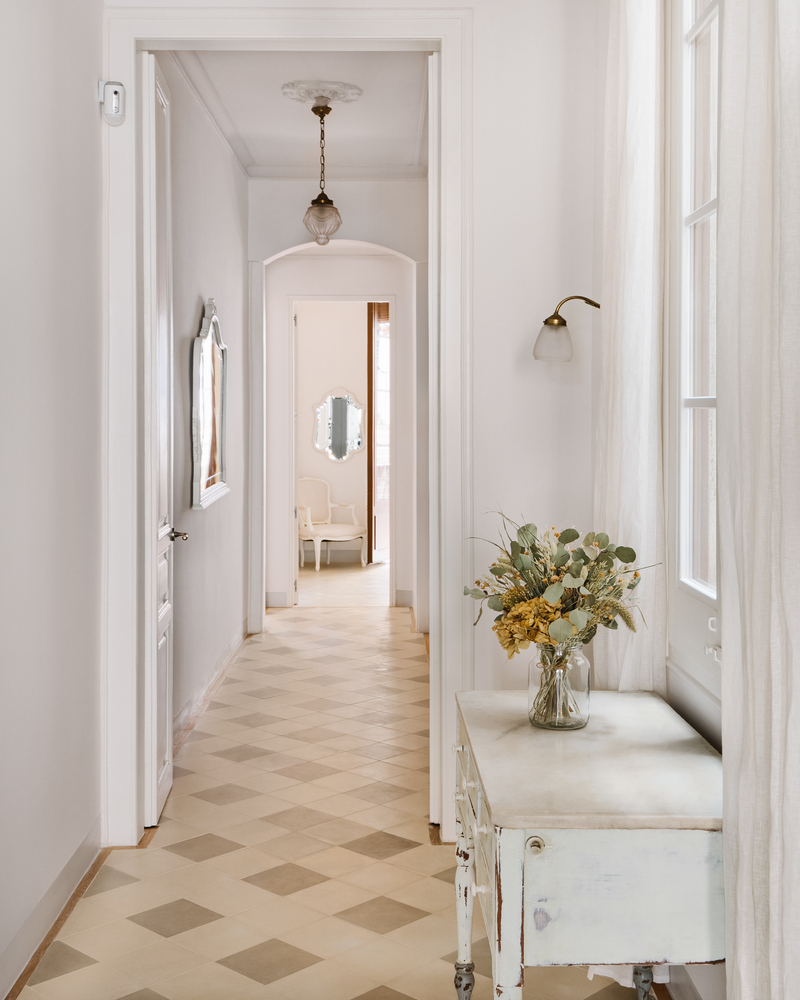
Play with the lighting of your hallway to take away the gloom of a confined, windowless space. This designer used a vintage pendant in the main hall with a complimentary sconce to create a cozy nook. These simple touches take the color palette and existing decor to round out “French countryside” vibes.

Why you’ll love it:

  • Updating builder-grade installs immediately elevates the space
  • Replacing existing fixtures doesn’t require professional skill
  • LEDs light baseboards for nighttime vision and a luxury feel

Did you know that LEDs and sconces can come with a plug? No hard-wiring required!

7. Console Table

Console tables solve so many interior design headaches. These narrow tables match any style while providing a catch-all for keys, showing off decor and collectibles, and more. Finally, try adding a lamp for a finished look.

Why you’ll love it:

  • Thin enough to leave walking space
  • Provides storage or decor space
  • Layer with art or mirrors above for an Instagram worthy configuration

Try flipping a thrift find to manage costs– a little TLC can give you a unique piece for a fraction of the price.
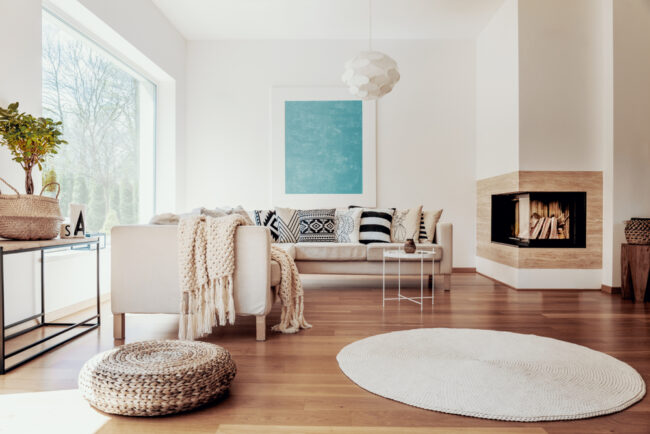
8. Rugs

Rugs are an excellent design option, even if you already have carpeted floors. They add texture, color, and pattern to your space. They can make the hall appear larger and protect the flooring underneath them! Get an extra high pile for a cloudlike experience on bare feet.

Why you’ll love it:

  • Easily fit any hall without taking up needed space
  • Switch out seasonally– no long term commitment
  • Find options on any budget!

Have you been itching to take a risk with color and pattern but can’t commit? Rugs seem to be an exception to the rules, so go for it!

9. Seating

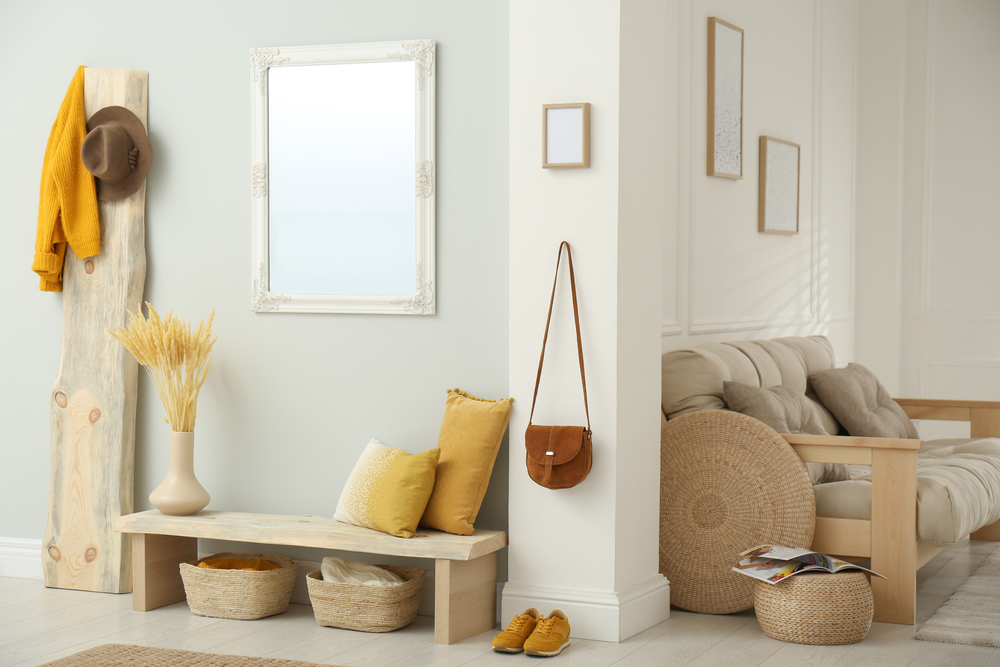
Benches, chairs, or stools– a place to sit makes all the difference. Seating adds excellent functionality to your entry hall and offers a new design element at the same time. You can layer it with decor, position it under shelves or mirrors for layering, or even have it double as storage.

Why you’ll love it:

  • Combines design with function– get space for putting on socks or shoes
  • Layer with pillows or blankets for added texture
  • Use an armchair or stool in corners if there isn’t room in the walkway

Use the material of your seating for an unexpected surprise– metal in a soft space, velvet in a minimalist zone, or wood in an industrial realm.

10. Shelves

Great design is all about layering different elements. Floating shelves provide a place for new decor without taking up valuable walking space. You can play with the shape of your shelves for added interest!

Why you’ll love it:

  • From planks to grids to honeycombs – you can customize your shelves any way you like them
  • Need very few tools to hang them
  • Try corner shelving for tight spaces

Can’t find what you like? Try your hand with a TikTok or Pinterest-inspired DIY project!

———————————-

Having trouble choosing what to highlight in your redesign? The dedicated experts at Illuminations can help you pick the perfect, show-stopping light fixtures for your design. Contact us today to get started on your grandmillennial refresh!

Filed Under: 2023, Styles & Trends

12 Simple Bathroom Updates You Can Do Yourself

12 Simple Bathroom Updates You Can Do Yourself

by admin · Apr 23, 2024

Bathrooms are spaces that often go overlooked, but when they’re spruced up, they add some serious value to your home! Remodeling can take loads of time and effort (not to mention money), but giving your bathroom a facelift doesn’t have to. These simple tips can give you the bathroom of your dreams.

1. Organize

The last thing you want to deal with at the beginning and end of your day is CLUTTER. Give yourself the gift of a good system! Containers may seem unnecessary, but when you’re rushing out the door, it saves you a headache to just have an easy home for all your toiletries.

2. Add Greenery

Plants bring life, peace, and tranquility into a space. This bathroom would be the perfect escape from the stress of everyday life. The warm tones mixed with the green tell you to relax and take a break. Who are you to tell them no?

3. Change the Hardware

Arguably one of the easiest ways to take your bathroom from the early 2000s to today without spending a fortune is changing the hardware on your cabinets. Finish options are endless! The bathroom above uses gold accents to create a cohesive look with a modern feel.

4. Spruce Up the Walls

If you’re looking for a simple way to make a big impact in your bathroom and have a free weekend coming up, a fresh coat of paint and some elbow grease will make your bathroom feel like a brand new space with just a few hours of work! 

Want to take it to the next level? Bold wallpapers are in, and they really let you show off your personality! This bathroom incorporates the best of both worlds with a simple, painted board and batten wall on the bottom and wallpaper on top! It’s not as hard as it looks – check out this quick tutorial!

Renter-friendly option: Removable peel and stick wallpaper will give you the same look without having to commit long-term. Love the board and batten? There’s a renter-friendly tutorial for that too!

5. Update Mirrors

Bathroom mirrors are often neglected, but they totally change the feel of the room – don’t leave them out! These wood-framed mirrors bring warmth to this bathroom’s design and help to balance out all of the cool tones and polished finishes. 

Renter-friendly option: If replacing your mirror is out of the budget or you’re renting, adding a wood frame to an existing mirror is an easy one-weekend DIY project – just make sure you can easily remove it if you’re renting!

6. Paint Your Cabinets

Painting your bathroom cabinets may take a little effort, but it’s a great way to unify your space or to add a fun pop of color your bathroom. With just a small can of paint and some time, you can take your bathroom from basic to beautiful, even with a low budget. This bathroom’s painted cabinets help to ground the space, and provide much-needed contrast that takes the design from bland to balanced.

7. Replace Old Light Fixtures

Replacing a ceiling or wall light in your bathroom with a modern fixture that’s more your style will give the entire room an instant style boost! You don’t have to play it safe here – find a fixture you love and jump in! We love the way this bathroom shows some serious creativity with these pendant lights that highlight this AMAZING wood accent wall. 

Many homeowners are wary of swapping out light fixtures, but it’s usually a pretty simple DIY. We recommend starting with your vanity light first if you’re on a budget – great front-facing light by the mirror will make the biggest impact on your morning routine!

8. Layer Your Light

Every room in your house should have several light sources to make it feel more comfortable and eliminate harsh shadows and dark corners. In a living room, that’s as easy as tossing in a few lamps, but layering light in a bathroom can be a little trickier.

This bathroom uses a combination of pendant lights and recessed lights to make the whole space feel bright and airy. If your bathroom lighting isn’t working for you, installing an extra wall or ceiling light is the best way to go from dark and dingy to light and bright. 

If your bathroom’s already finished and rewiring isn’t in the cards – don’t worry! Fortunately, there are a lot of easy do-it-yourself options out there. 

LED light strips like the ones in this bathroom are inexpensive and as easy to install as a sticker! They’re usually used behind the mirror or under cabinets, but they can go anywhere you want some extra light. 

You can also replace a light switch or outlet cover with one that has a built-in light – no more blind fumbling for a switch in the middle of the night.

Renter-friendly option: Get a motion-sensing plug-in outlet light or a rechargeable countertop light! These are both non-permanent ways to add a layer of light and keep yourself from bumping into the counter in the dark.

9. Update Faucets

Another way to update the look of your bathroom and conserve water is by switching out your faucets. Look for a faucet with a WaterSense label to reduce your sink’s water flow by 30 percent or more. Less water flow means a lower water bill. With a lower water bill, you’ll have some extra change in your pocket to take your family out for dinner (or yourself–you deserve it!).

10. Dim the Lights

The lights in this bathroom make it a retreat from chaos. When you want a calming bath, dim the lights for optimal relaxation. Dimmable lights give you the flexibility to turn your bathroom into a spa.

Bonus points: Since dimmable lights are more energy-efficient, installing a dimmer switch will leave you with extra money to do more with your bathroom!

Renter-friendly option: Use other lower-light options like strip lights, countertop lights, or LED candles like in the bathroom above.

11. Add a Backsplash

The metallic accents and painted vanity in this bathroom are to die for, but what really makes this space magic is that classic backsplash. Not only does it breathe new life into this space, but it also protects the wall from moisture and staining, so you won’t have to worry about mold or mildew. With a little DIY magic, this bathroom feels complete!

Renter-friendly option: Use a peel and stick backsplash instead! It’ll look like tile without actually being permanent.

12. Update Your Tile Floor

While tile may be a bigger time or money investment, this bathroom clearly shows that it pays off. If you’re wanting to update the floor, choosing a unique tile like this is the way to go. Pro tip: while real tile will give you the best result, you can actually use a stencil to paint your floor. It will give it the same look for a fraction of the cost!

Renter-friendly option: Use removable flooring (peel and stick) to look like custom tile, or cut a vinyl piece to fit the size of any existing tile.

————–

Don’t let your bathroom fall between the cracks any longer! When you’re ready to take it to the next level, give our experts at Illuminations a call. We’d love to help you get started and give you more tips like these.

Filed Under: 2023, Bathroom Lights, Styles & Trends

How to Choose the Right Bathroom Vanity Lighting

How to Choose the Right Bathroom Vanity Lighting

by admin · Apr 16, 2024

When done right, your bathroom lighting should be able to take you from a bright morning routine to an evening spa break to a midnight trip to the restroom without feeling too over or underpowered in any scenario.

Most builder-grade vanity lights just don’t cut it. They’re often too high, too bright or dim, and don’t really add much to the design of your bathroom. So if you’re ready to try something new, we’ve compiled a list of the most common vanity light fixtures to help you figure out precisely what you (and your bathroom routine) need to create the bathroom oasis you deserve. 

Here is a short list of light fixtures and bulbs to consider so that you’ll be prepared to balance the functionality and style according to your budget and available space.

Types of Vanity Light Fixtures

Your bathroom vanity includes the mirror, counter, sink, and surrounding lighting. Vanity lighting is often the only source of light in the bathroom – and it largely determines your experience there. So it’s important to get it right!

There are several types of vanity light fixtures, each with its own set of benefits. Which one you choose is up to you – but make sure you consider both style and function to make sure you’re happy with the result.

Vanity Light Bar 

Light bars are the most common fixture for bathroom vanities because they’re easy to install and give off a lot of light. Light bars consist of a long base (the bar) with light emanating from its entire length. They’re usually mounted just above the mirror from a single, central wiring box. 

Most people picture a base with multiple bulbs sticking out into the room, like you’d see in a “builder’s grade” new home or surrounding the mirror in a makeup artist’s studio. Other light bars consist of a single, long light source, such as a sleek LED bar or a fluorescent tube. 

The advantage to installing light bars is that they create even lighting with fewer shadows. (Anyone who’s ever done makeup or shaved using a bathroom mirror knows how important that is!)

Pro tip: The most crucial part of successfully using a light bar is getting the proper proportions. Ensure the bar is at least 75% the mirror’s width and never longer than the counter below. Keeping the bar at least 6-6.5 ft high will give even light without shining directly into your eyes. 

Mirror-framing Sconces 

Sconces are light fixtures that attach to the wall rather than the ceiling. They’re often found above the center of the mirror, although it’s worth considering placing your sconces on either side of the mirror– you’ll get the best light for your morning routine and playfully break from tradition! 

The number of bulbs and types of shades will impact your placement. Some shades only allow for downward light, so those work best up high. Glass shades are a little more forgiving – they’ll shine light on your face when installed above or to the side of the mirror. 

Not only are sconces an excellent fit for lighting your vanity, but they also make a statement. You’ll show that you put real thought into your bathroom design by using a non-traditional fixture.

Pro tip: We recommend mounting sconces with the center of the fixtures about 60″ high and about 28″ apart. Try installing one on either side of your mirror to get even, shadow-free light on your face as you’re getting ready.

Unexpected Pendants

If you’re looking for a way to make your bathroom look unique, try out pendant lighting. These fixtures hang directly from the ceiling, with the bottom of the shade right above eye level. Not only are pendants a bold statement, but they’re also a versatile option if you’re short on space.

In a bathroom, sconce and pendant placement guidelines are very similar. A single pendant directly over the mirror is an excellent option for small bathrooms. They also work well as a pair, framing the mirror on either side. 

Because pendants have an extra “wow” factor, they’re also sometimes used in larger groups to create a design element. For example, this designer hung multiple pendants along the mirror – and we think it turned out great!

Pro Tip: We recommend spacing your pendants about 30 inches apart to avoid harsh lighting. Also, keep in mind the pendant’s ability to shine directly onto the mirror– a thin or transparent shade will reflect a lot of light. It’s a good trick to make your space feel brighter but may cast unexpected shadows.

Modernize with LEDs

For a modern (and energy-efficient) touch, consider opting for LED lights. They last for years, cost little to run, and come in a wide variety of color options.  LED light bulbs can be installed in almost any fixture in place of a traditional bulb.

Some light fixtures come with LED lights already integrated, which means you’ll never have to change a bulb for the life of the fixture. While these mirrors come in a variety of styles, they’re most often found in sleek, modern bathrooms with a minimalist feel. 

LED strip lights may be an unexpected choice for the bathroom. They’re easy to install (some are even peel-and-stick!) and will make your bathroom feel high-end with just a little bit of creativity. As vanity lighting, try installing them behind a mirror to give a soft, luxurious glow. 

Pro tip: Because they are so small, LED strip lights can be tucked in unexpected places, like along the underside of a mirror to light the counter, or along the bottom of a floating vanity to light the space underneath. Adding light to dimly-lit edges and corners of your bathroom will make it feel bigger!

When to Hire a Pro

If you own a newer home and have tools handy, you can probably handle most light fixture upgrades yourself. But not all fixture update projects are created equal. For example, you may have an older home that requires electrical updates, don’t own tools, need new circuits for new fixture locations, or simply don’t feel comfortable with an electrical project. 

Electricians will ensure your new fixture is installed quickly and safely. Not sure how to hire a qualified electrician? No problem! Your local lighting showroom can often connect you to a great pick– and offer a wider selection of fixtures while you’re there!

Ready to update your bathroom vanity? The experts at Illuminations can help you find the right fixture for your room, budget, and style. Contact us today!

Filed Under: 2022, Bathroom, Bathroom Lights

2023 Interior Design Trend: Creating a Cozy House that Feels Like Home

2023 Interior Design Trend: Creating a Cozy House that Feels Like Home

by admin · Apr 9, 2024

It’s 2023 and this is your wake-up call! Your home needs you – it’s ready for a refresh! This year, we’re all looking for a respite from the stress that always seems to work its way in. Designing a comfortable home will make you feel the extra happiness and productivity you’ve been in desperate need of. These 3 expert tips will make your home a haven you’ll be itching to get back to at the end of the day!

1. Choose a Soft Color Palette

It’s no secret that colors have a huge effect on your mood and the feel of a room. These rooms knock the color palette out of the park without sacrificing personal style or comfort. Achieving a soft color palette doesn’t have to be difficult – go with neutrals, a pop of color, or choose a monochromatic color scheme and you’re set!

Neutrals

A neutral color palette seems like an obvious choice when you’re going for comfort, but it can be tough to pull off – without color, other elements like texture or shapes will have to do the heavy lifting.

The heavyweight champions here are definitely the plants! Adding some green to an otherwise neutral-heavy space brings some life and vibrance without destroying the tranquility you desperately need. Finishing this look with a variety of textures and shapes from the hard wood edges to the pair of round tables to the woven area rug makes this space feel comfortable, creative, and cozy.

This neutral bedroom incorporates beige and white with black accents to ground the space. The night stands with pendants hanging above elevate the space, giving you lighting and a gorgeous focal point! We love how this space feels lived-in without looking cluttery. With neutral tones, the soft textures of the rug and blankets are what make this room feel comfortable and cozy.

Picking a neutral color palette for this sitting area really make the shapes shine. We love how arches are carried throughout the design from the furniture to the architecture. This chair looks like a cloud and with the gorgeous light above it, anyone sitting here would feel like they’re in the heavens!

Pop of Color

A cozy home doesn’t have to be colorless! If neutrals don’t speak to you, try mixing them with a pop of color. It’ll give your room some excitement, but not so much that it’ll feel busy or chaotic.

This living room took a bold color and ran with it. The navy blue is a stunning contrast to this cozy tan leather couch. If we could copy and paste this look into our homes, we would! The neutrals pop against the accent wall and we couldn’t be more obsessed.

These red velvet pillows and drapes contrast with the neutral room and bring in some cozy texture. The bright colors spice up what might otherwise feel like a bland living room.

Monochromatic 

Choosing a monochromatic color scheme is a 2023 trend we love. It’s bold, but still soft. In a true monochromatic space, there isn’t extra visual stimuli for your brain to process. This gives your brain a sense of peace and calm you may not feel in a room with more going on in terms of color. These rooms use a simple color palette and the effect is cozy with a touch of elegance. 

Green is one of the most soothing colors. It can bring a sense of peace and harmony to your home. This couch and wall combo is no exception! Choosing to pair them with beautiful browns makes this sitting room look like it was plucked straight from nature, then given a facelift.

This kitchen uses the monochromatic color scheme to make it look bigger than it is. We especially love that extra wood cabinet with accent lighting both for functionality to store more and for decorative purposes. The calming blues make this a space you’d want to do some stress-baking in!

2. Add Soft Textures

Texture is a vital tool in an expert’s tool belt, especially when comfort is your end-goal. A space can be gorgeous, but if it feels like a place your grandma will yell at you for touching anything in, it won’t really feel comfortable. Texture is what takes a space from formal and austere to a beautiful, cozy space you can actually live in.

There’s no question this bedroom is gorgeous, but it also feels like a space you could spend time in without completely messing it up. The intentionally unkempt linens on this corner of the bed add simulated texture that makes it feel like home. We also love the green velvet accent pillow and floor pillows for an extra cozy touch! A lamp and pendant allows you to have dimmer or brighter lighting to accommodate your changing needs.

There is no world where a chunky-knit blanket and lots of pillows won’t scream comfort. The touches of fur on the rug and the side bench give it an extra dose of coziness. Anyone would love to curl up and hibernate here all winter! Light a few candles in the lanterns and switch on the pendant for the perfect reading spot at night.

This feminine bedroom is a corner of paradise! The colors are soft and gorgeous, but the textures are what really make this space magical. The velvet headboard brings delicate softness to the space. The textured pouf and cane-detailed night stand here are working overtime – and they should get paid for it! They bring elements of texture and give some seating and storage space. The blanket and soft rug are the finishing touches that would have anyone making excuses to retreat here for peace and quiet.

3. Soften Your Lighting

Harsh lighting is the opposite of comfortable! It’ll leave you with a headache and can actually make it harder for you to sleep at night. To bring in some much-needed comfort, you’ll need to soften up your lighting. In a room with soft lighting, the transition from light to dark is gradual and easy on the eyes. Avoid harsh shadows and balance your lights out using these three tips and your eyes and mood will thank you!

Dimmable Lighting

Switching to dimmable lights is a relatively simple way to soften your lights and make your lighting customizable. This cozy room is the perfect place to recharge your batteries. Dim the lights 2 hours before bed to help yourself sleep better, then brighten them in the morning to jump start your mood and your day!

Layer Your Lights

Layering your lighting is a fool-proof way to give you adjustable light. Every room in your house should have at least a few light sources to make it feel more comfortable and eliminate any dark corners. Adding a few lamps across a room and some pendants will give you flexibility to have more or less light depending on your need and mood.

Accent Lighting

Accent lights are the finishing touches that make a room feel complete. They’re the piping on top of the icing on the cake! Adding them makes a room instantly feel warmer and more comfortable. Plus, they soften up your lighting by eliminating harsh shadows in areas that might otherwise go overlooked. Put sconces on an empty wall, strip lighting under cabinets like in this kitchen, or pendants above conversation areas. A room with warm, balanced lighting is a guaranteed ticket to having the relaxing ambiance you need for comfort.

—

Listen, it’s 2023 and it’s time you started living your life in comfort! Choosing to design a cozy home is about more than just aesthetics. It’s about overall wellness! You deserve to live in a home you love, so it’s time to get started. With a little inspiration, the expert tips above, and help from Illuminations you’ll be set! Give us a call and we’ll help you soften your lighting and give your home the extra relaxing boost it needs.

Filed Under: 2023, Styles & Trends

Home Lighting and Interior Design 101: Top Interior Design Tips From The Lighting Experts

Home Lighting and Interior Design 101: Top Interior Design Tips From The Lighting Experts

by admin · Apr 2, 2024

Have you ever walked through your home and wondered, “why did my stuff look cuter online/in-store?” If you have, there’s a decent chance the problem is your home lighting. Product images and store displays always have excellent lighting, showing you the best possible version of their decor, paint samples, art, and furniture. 

But if you buy that gorgeous piece or perfect paint color and put it under poor lighting, you’re bound to feel like you got duped.

Luckily, the rules to great lighting aren’t very complicated! You can start updating your home lighting for relatively low cost, low skill, and low tools. 

Consider this post a free course on home lighting essentials, including practical interior design tips from lighting experts. Answer quiz questions along the way to see if you’ve got it, then apply what you learn to make your interior design shine!

The Basics

Let’s start with a few basic terms and ideas– including five layers of great lighting and why the bulbs you use significantly impact how your home reads.

Layers of Light

You can break up your home lighting into five different categories. Once you understand how the categories work, you can mix and match them to fit your needs. Here are the five layers you should consider in each of your rooms:

  1. General/Ambient: the primary light source for the entire room.
  2. Task:  more focused light over a workspace, like a kitchen island or desk.
  3. Accent: think mood lighting; creates an atmosphere rather than light up the whole room.
  4. Decorative: it’s more about what the fixture adds to the overall design than the light it gives.
  5. Natural: working with windows (and firelight) to maximize color and space.

We’ll break down tips for working with each of these layers later on. For now, keep in mind that a well-lit room typically has five to seven light sources spread across these categories.

Question 1: Which type of lighting is most responsible for setting the mood in your space?

Warmth of Bulbs

There is so much information available on bulb temperature. The truth is you can get started with just a few pieces of information. First, bulb temperature refers to the color and brightness of the light. So let’s break it down.

Cool light will wake you up, help you focus, and is best for showing the true colors of paint, makeup, and clothing. These are the bulbs in the bottom row of the image above. Cool bulbs are great for offices, kitchens, and vanities.

Warm light has the opposite effect– it relaxes and casts a yellow or orange glow on your walls and furniture. Warm light is perfect for bedrooms, living rooms, and dining areas.

Both ends of the spectrum are important for different areas. And sometimes you might need to combine them in the same room so you can control the activity you’re doing. 

Now, let’s get into some specifics about how to work with each of our five light categories.

Question 2: Which light temperature is best for relaxing, cool or warm?

General or Ambient Light

As stated earlier, general or ambient lighting is your primary source of light for your space. It’s often centered in the ceiling so it can cast a bright, even light across the room. Your light fixture will greatly impact how the light casts. For example, flush mount domes offer little resistance to light, while metal shades will concentrate light downwards.

Since general lighting gives the most light, it will set the tone for your space. Here are a few top tips for nailing the general lighting in your home:

  • Use cool ambient lighting for kitchens, offices, and bathrooms.
  • Use warm light for living rooms, dining, and bedrooms. 
  • Swap out your builder-grade flush mount for an immediate (not to mention cheap and easy) upgrade. 

Question 3: Where should you position your general light source?

Task Lighting

Task lighting concentrates light (and your focus) on important tasks, like homework, dicing up vegetables, and filling out expense reports. They are also more obvious choices in your design since they often hang down or sit close to the action. 

Top tips:

  • Hanging pendants often look best in odd numbers, so stick to one, three, or five pendants where possible.
  • Strip lights or spotlights tap into task lighting fixtures to highlight art or displays to create design focus. 
  • Don’t forget LED strips as a versatile option! Place them around mirrors and under cabinets for steady, bright light.

Question 4: How do you know what areas need task lighting?

Accent Lighting

Accent lighting covers mood lighting and rounds out the lightscape. From reading lamps to LED strips behind TVs, they land closer to decorative lighting than really focusing on function. 

But don’t underestimate what they deliver! Accent lighting easily becomes general lighting during movies, date nights, and intimate gatherings with friends and family. 

Top tips:

  • Warm light is usually best for accent lighting. Scatter a few accent light sources around gathering places to have enough light to fill the room without the general light source.
  • Sconces are a great way to switch up typical lamps. And some come with plug-in cords– no hard wiring needed!
  • Color-changing bulbs and LEDs are a great option for accent lights. Then they are versatile for task lighting or mood lighting as the situation requires!

Question 5: True or false? If I want to add accent lights to my home, I have to hire an electrician.

Decorative Lighting

The final category is sometimes lumped in with accent lighting since they both have more to do with aesthetics than functionality. But we pulled this out to give special attention. 

Decorative lighting is about adding a super cool fixture, with the provided light taking a backseat. For example, using a chandelier for general lighting offers general light for the room, but its top priority is providing a visual “wow.”

  • Try mixing up the expected, like using pendants or sconces where you’d normally use a lamp. 
  • Get creative and turn a statue or other thrift finds into a one-of-a-kind light source.
  • Work with a local light showroom for designer-level pieces for a fraction of the price– plus top tips on installation and more!

Question 6: What is the purpose of decorative lighting?

Natural Light

Natural light is the final component of your lightscape. While manipulating natural light isn’t as easy as shopping for a great light fixture, it’s still critical to the overall feel of your home. 

For example, when shopping for paint, check the swatches day and night to see if there’s a dramatic change in appearance. This will also inform your decision on what kind of bulbs you use. And if your room’s color changes a lot from day to night, you can use cooler “daylight bulbs” to keep your color from changing as much. 

Top tips:

  • To get an airy feeling, use light curtains and hang them as close to the ceiling as you can, regardless of where your window stops. 
  • Which way do your windows face? You’ll get very different glows north versus south, as north-facing windows tend to get cooler light, with south-facing windows giving warmer light. Work with the natural light temperature when picking paint colors and decor!
  • Remember, dark colors absorb light, and lighter colors reflect it. So if you want a dark, moody space, dark paint will help to suck in extra light while still getting to keep the windows open. 

Question 7: True or false? Paint colors always look the same, no matter the time or the way windows face.

Summary

With a basic understanding of these simple lighting and interior design principles, you’re ready to convert your home from predictable and dull to vibrant and glowing! Remember:

  • You need all five layers of light to pull off a great room design.
    • General: main light source.
    • Task: focused light on important activities.
    • Accent: set the mood.
    • Decorative: dress it up, make it unexpected.
    • Natural: work the windows.
  • Bulb temperature affects concentration and color interpretation. 
    • Cool light for true colors and enhanced focus. 
    • Warm light for cozy relaxation and a golden touch to color. 
  • Updating your lighting doesn’t have to be complicated. Work with local professionals to get a leg up with great selections, expert advice, and affordable prices.

Need Help?

Proper lighting is essential to a fully functioning home– but it can be challenging to nail balanced brightness, great fixtures, and a budget! Contact the experts at Illuminations for advice on your project!

—

Quiz Answers:

Question 1: Which type of lighting is most responsible for setting the mood in your space?

General (ambient) lighting is a room’s main light source, so it’s the primary contributor to the mood.

Question 2: Which light temperature is best for relaxing, cool or warm?

Warm light naturally relaxes your brain and helps you to fall asleep. Cool light wakes up your brain for detailed work.

Question 3: Where should you position your general light source?

General lighting should come from as high and centered as possible for even light distribution.

Question 4: How do you know what areas need task lighting?

If you have an area where you perform detailed work, you should check to see if you need task lighting! Ambient lighting can provide enough light, but focused work often requires focused lighting.

Question 5: True or false? If I want to add accent lights to my home, I have to hire an electrician. 

False! There are many options for battery-operated and plug-in accent lighting.

Question 6: What is the purpose of decorative lighting?

Decorative lighting works with your decor as art, giving a unique lift to your design. It’s one more detail that helps you show off your style!

Question 7: True or false? Changing your lighting will change your paint colors.

True! All colors change with the quality of the light shining on them. Window position, time of day, and bulb temperature will all change how your paint reads.

Filed Under: 2023, Accent Lighting, Bathroom Lights, Bedroom Lighting, Buying Guides, General Lighting Tips, Kitchen Lighting, Light Bulbs, Lighting Types, Styles and Trends

How Light Bulbs Made the Industrial Revolution Possible

How Light Bulbs Made the Industrial Revolution Possible

by admin · Mar 26, 2024

The Industrial Revolution was marked by invention, early machinery, and mass production. Likewise, modern methods of supplying fuel, preserving food, producing clothes, and providing health care began with the Industrial Revolution. And a crucial common factor across the modernization of these industries? 

Light bulbs.

Let’s set the stage. As the global population increased in the 1800s, a vicious cycle emerged. With more food, medicine, and shelter available, more children survived to adulthood. More adults meant more families with children, creating greater demand again. So over and over, more people were born and lived longer than before and increased demands on the global economy.

As early supply chains attempted to provide basics to the growing population, its success led to more people surviving.

The Industrial Revolution characterizes an era of inventors, undoubtedly fueled to relieve suffering and improve old methods. In short, it was an attempt to tame this cycle by providing more goods faster, easier, and in better conditions.

But the trouble was, demands for goods often rose faster than was safe to produce them. As a result, many industries struggled to find ways to increase production, but the light of a candle could only go so far into the night, and it came with dangerous risks and consequences.

Coal Miners: The Backbone of the Industrial Revolution

Let’s start with some of the most heavily relied-upon characters of the Industrial Revolution– coal miners. As demands for residential heat grew, so did the need for fuel for factories and trains.

Coal miners dug deep underground to supply the world with the required fuel. It was dangerous work, not only because of the use of explosives underground but because it was so dark. Lack of proper light made accidents common and kept production slow.

Candlelight was the only source of artificial light then. This posed a problem because mines often release flammable gases. The slightest fire exposure in the tunnels regularly resulted in explosions with hundreds dead. Inventors tried– but were unsuccessful– to create proper fire shields. As the need for coal grew, so did the number of fire-related incidents and deaths in the coal mines.

Reducing Fire Risk in Textile Factories

Another significant mark of the Industrial Revolution was the beginning of mass-produced clothing. Before factories existed, most clothing was tailor-made for each family member. Wealthy families hired sewists, and low-income families made their own clothing.

Textile factories promised to speed clothing production and free up time for other work. But unfortunately, textile factory workers faced a similar problem to that of the coal miners. 

Before making clothing, cotton had to be spun into thread, then woven into fabric. This fabric would then be cut into patterns and sewn into finished clothing. The system of processing cotton led to very dusty rooms filled with tiny floating pieces of raw cotton. Even the smallest flame could catch the floating cotton, creating a runaway fire in moments. These fires took down entire factories in moments, often with few survivors.

Unlike the miners, textile workers could use the light of day through windows. But there was little sunlight in rainy regions or during the winters. So textile production had to slow or risk the use of candlelight according to the weather or season.

Here again, the invention of the electric light bulb allowed for safer work and better conditions for these workers. Electric light reduced the strain on workers and evened out available work hours. The growing population could now count on having enough clothing.

Impact on Food Preservation

The United States population exploded between the 1800s and 1900s as territory expanded. Consequently, the demand for food increased with these settlements and cities.

People’s access to food in the early 1900s was determined mainly by what they could grow themselves. You would eat some of the fresh food you could grow during the summer and store the rest to survive the cold winters. As a result, starvation was a constant threat, and malnutrition was common.

During the Industrial Revolution, many factories opened and started to mass-produce canned food. While canning factories did not risk the same dangerous fire as miners and textile workers, they still had limited light.

Enabling Quality Healthcare

Finally, light bulbs improved the quality of healthcare in hospitals around the globe. The 1800s showed a marked increase in understanding human anatomy and how to save a person’s life after a severe injury.

However, medical attention requires detailed work, and poor sanitation and techniques cost thousands if not hundreds of thousands of lives. Even the simple fact that candles and firelight distort color made it difficult for early medical professionals to accurately gauge a patient’s health status. 

Beyond surgeries, hospital care, or home visits, the development of new medicines was also limited before the Industrial Revolution. For example, penicillin was developed in the 1920s – 1940s and is widely regarded as the first true antibiotic. The drug was developed through the work of many scientists observing bacteria cultures in universities, and it saved countless lives during World War II alone.

Although light bulbs alone did not allow for the creation of penicillin, the availability of consistent light (partnered with microscopes and other technology) is clearly linked with a massive spike in new medication since the early 1900s. 

Lightbulbs: The Unsung Hero of an Industrialized World

We owe our modern, comfortable world to many inventions of the late 1800s and early 1900s. Still, there is no doubt that none of them would have been as successful without the invention of the electric light bulb. And so, the ordinary light bulb is the unsung hero of the modernization of the world.

So, the invention of the electric light bulb created the possibility of an industrialized, modern world– a world where people had enough heat, food, and medicine. The light bulb allowed for safer working conditions and paved the way for other inventions that advanced humanity as a whole.

Electric light provided bright, steady light for miners without a significant risk of explosion. As a result, artificial light significantly reduced the number of deaths. As a bonus, it also allowed them to work faster. Thus, miners could better fuel the world, unleashing the Industrial Revolution.

Food production through factories was unleashed with electric lights. The world now had an efficient and cheap process to provide food that could last months or years on the shelf.

As one could imagine, electric light significantly improved healthcare quality. Surgeries were performed with much better lighting, and follow-up care received better attention. Doctors and nurses could discover infections faster and perform precision work with accuracy.

Aside from hospital care, proper lighting enabled the creation of new medicines and techniques. Electric lighting was not the only factor to decrease medical-related deaths. Still, the widespread availability of steady light enabled doctors and scientists to make significant strides in proper care.

—————

At Illuminations, we are proudly following in the footsteps of these early lighting engineers. We are just as passionate about lighting the world as they were as we supply homes and businesses with the latest designs and functionality. Talk with an expert at Illuminations today to get custom advice on your lighting needs.

Filed Under: 2022

How to Safely Install a Ceiling Fan

How to Safely Install a Ceiling Fan

by admin · Mar 26, 2024

Installing a new ceiling fan is a cheap way to save on energy costs all year without compromising on comfort. In the summer, ceiling fans cool down the house by creating a breeze. In the winter, they help circulate the heated air to warm the whole room evenly. 

Putting in a ceiling fan is a win-win for your comfort levels and your budget – and it’s a pretty simple DIY project for homeowners. Plan on giving yourself a few hours (depending on the type of fan and your experience level with lighting DIYs), and grab a friend that can help you hold things in place while you work.

If you’re buying a ceiling fan new, it should come with thorough installation instructions. We always recommend following those instructions exactly to be sure that your fan is installed safely and properly. If you’re installing a secondhand fan, you may be able to find the installation guide online by searching with the model number on the fan. Either way, we’ll walk you through the basic steps here so that you can prepare. 

1. Preparation

Before you break out your tool belt, make sure you have a good plan in place. There’s nothing worse than being in the middle of a project and realizing you don’t have everything you need to complete the task.

Tool Checklist

Before you take on a ceiling fan installation project, make sure you have all the tools you need so you don’t have to rush off to your local hardware store for a last-minute purchase. To install a ceiling fan you’ll need to have a:

  • Voltage Tester
  • Ladder
  • Measuring Tape
  • Screwdriver
  • Ceiling Fan-Rated Junction Box
  • Fan Brace
  • Wire-Cutter/Stripper
  • Light Bulbs
  • Globes/Shades if they aren’t included
  • An extra-long downrod if you’re installing on a sloped ceiling
  • Ceiling Fan and Kit

Choosing the Right Fan Size

Measure the room you’re working in before you start. Not all fans are created equal, so pick one that will fit. Use the following guidelines to help. 

  • For rooms smaller than 75 square feet (like bathrooms), pick a fan with blade spans of less than 36 inches.
  • Blade spans between 36 and 42 inches are ideal for rooms up to 144 square feet. 
  • A 44-inch span is perfect for rooms up to 225 square feet, like a dining room.
  • For rooms that are 225 square feet or larger (a large living room, for example), you’ll need a fan with a 50 to 54-inch blade span.
  • The more space between the ceiling and the fan, the better! The ideal ceiling fan height is 8-9 feet above the ground. 
  • If your ceiling is less than 8 feet, you’ll most likely need to install a flush-mount fan (no downrod).
  • High pitched ceilings typically require you to buy an extra-long downrod (so that the blades won’t hit the sloped ceiling), so check your ceiling height and angle before choosing your downrod.

Pro Tip: Once your fan is installed, the tips of the blades should be at least 30 inches from the walls, and the bottom edges of the blades should be at least 7 feet above the floor. 

Other Important Tips

  • Ceiling fans are heavy! They need to be anchored properly to an electric ceiling box designed to hold the weight of the fan. Inspect the electrical box to ensure it’s fan-rated. There should be an inscription on the box to indicate this. If it’s not, you’ll also need to purchase a fan box before you get started.
  • Check to make sure the light switch you’re using is wired appropriately for the fan. If it isn’t, you may need to call a professional to get the job done.
  • Check the ceiling joists for any wiring or plumbing pipes that may be in the way.
  • If you’re adding a new fan where one didn’t exist, check local building codes to determine if you need a permit.
  • Always check your installation guide for any additional requirements that are specific to your fan. For some expert help choosing the perfect fan for your space, give us a visit or a call and we’d be happy to help.

2. Safety

Now that you’re ready to begin, head out to your circuit breaker and turn the power off for the room where you’ll be installing your fan. Also, make sure all of the wall switches in the room are safely in the “off” position. Do not rely on a wall switch alone to protect you from electrical shock! Always use a voltage tester to be sure the power is off before handling wires.

Pro Tip: Place some electrical tape over the switches you’ve turned off on the circuit breaker. This will prevent anyone from switching it back on while you’re working.

3. Remove Your Old Fixture

Let’s get started! First, you’ll need to take down the existing fixture. Most fixtures have easy-to-find attachment points, like screws or twist-off caps. Remove accessories like light bulbs, shades to get down to the base of your fixture, then unscrew the base from the ceiling.

If you’re removing an existing ceiling fan, remove the light bulbs and globes first. Then, take down the light kit (if needed – some fans have them, some don’t). Unscrew and remove the fan blades next. At this point, you may need to enlist a helper as the full weight of the fan base and motor can be heavy. Pull off the canopy (metal cover at the base of the fan). The last step is to remove the mounting bracket with a screwdriver!

Once you have the base of your fixture dropped away from the ceiling, unscrew the wire nuts connecting it to the electrical box. Be sure to test the wires with your voltage tester first!

4. Install a Fan Box

Before you start, check your existing electrical box. If it isn’t rated to support the weight of your fan, you’ll need to install a new one. To see if your existing box is rated to hold a fan, just take a look at the label! If you can’t find a label, err on the side of caution and get a new one. 

You’ll have to do a little bit of homework here to figure out what will work best for your project. Fan boxes are easiest to install if you have open access, like in the attic or an unfinished ceiling. If you won’t have easy access you may need to widen your drywall hole a little, but you can usually find a brace that will slip through the existing hole. 

Take a look at your rafters to determine the best way to install your fan box. Fan boxes can be attached directly to the rafter with a side bracket. If your new fan won’t be right next to a rafter, look for a brace that will span the space between two rafters. These braces can be a little trickier to install through a small hole in the ceiling, but they’ll give you a lot more breathing room when it comes to getting your fan box in the right place. 

5. Install the Mounting Bracket

To secure the mounting bracket to the fan box, start by threading the wires through the mounting bracket. If the fan has a slide-on bracket, leave the bolts on the junction box, slide the bracket over the mounting hardware, and tighten the screws. For fans without a slide-on bracket, place the bracket over the mounting bolts that poke through the bracket. Then, secure it using the provided nuts. If your fan is a flush mount, pull the wiring through the canopy (the part that covers the wiring/mount bracket) and skip to step 7.

6. Install the Downrod

To set the downrod, you’ll want to find a flat work surface. Slip the canopy onto the downrod and pull the primary wires through the hollow downrod. Then, connect the downrod to the fan base. With the downrod and base assembled, attach the other end of the downrod to the mounting bracket. 

7. Wire the Fan

Next, it’s time to wire! Hang the downrod – or canopy, if you’re installing a flush mount fan – on the hook on the mounting bracket. If there isn’t a good place to hang it, phone a friend to hold the fan up for you to free up your hands while you connect the wires. 

Before you start, check to make sure all your wiring (and the wire nuts) will fit in the ceiling. Use your wire cutters to trim down any wires that won’t. This will also keep them from vibrating against the canopy when the fan is on. Use wire strippers to expose the copper of the wires on the new ends. 

Connect the corresponding wires using the provided wire nuts. Your installation guide will have a diagram to follow, but, generally speaking, the fan’s green wire connects to the ground wire, the fan’s black motor wire connects to the black supply wire, and the fan’s white wire connects to the white (or neutral) supply wire. 

Double-check your work against the diagram, then gently push the wires into the junction box. Lift the fan into position, then clip it to the mounting bracket and secure the screws.

Pro Tip: Some fans come with additional wires for extra features, like having a separate switch for the light and fan. If your switches or wires don’t match the diagram, you might need to check in with an electrician or a lighting specialist at our showroom to help you get things set up correctly.

8. Blades and Bulbs

Now it’s time to install the fan blades. Every fan is a little bit different – but most fans will have an arm or bracket that you’ll need to attach to the blade and then to the base using a screwdriver. Some fans have quick-install blades that speed up the process using keyhole slots that slip over the fan’s mounting screws and lock into place with a little tug. 

Some fans have reversible blades – so make sure you’re checking each time that you have the correct side pointed down!

By now, you should be seeing the light at the end of the tunnel – so let’s install the bulbs! For fans with a light kit, refer to your guide to ensure everything goes in place correctly. Generally, you’ll just need to install the shades, globes, or light cover. If your fan did not come with bulbs, make sure the bulbs you install have the correct base type and wattage 

If your fan came with a remote, don’t forget to install the remote control holder!

9. Lights… Fan… Action!

Last, but not least, it’s time to test out your new ceiling fan! Go back to your circuit breaker and turn the power back on. Try switching your fan and lights on and off using the light switch or remote control. Test all of the speed settings to make sure your fan is secured properly and doesn’t wobble or rattle.

Most of the time, installing a ceiling fan is a pretty straightforward DIY project. Occasionally, an odd issue can crop up due to things like old wiring. If you run into any trouble, be sure to give us a call right away, or call an electrician that can help you troubleshoot the issue.

—

Congratulations DIY master! Now that you’ve successfully installed your new ceiling fan, get ready for a fresh breeze to blow your way–and some savings too. With all that extra cash blowing around, come visit us and we’ll help get you started on your next project. 

—————————-

DISCLAIMER: Be sure to follow all the manufacturer’s installation instructions and take all recommended safety precautions. Check before installing to see if you need a permit and be sure all building and electrical codes are observed. If you have any questions or are unsure about installing the fan yourself, contact a licensed electrician or Illuminations for more help.

Filed Under: 2023, Ceiling Fans, Ceiling Lights, How to, Informational, Wellness & Safety

« Previous Page
Next Page »

Copyright © 2025